Once you have setup a migration project (see chapter 04) and corresponding email messages (see chapter 05), you can initiate the migration of its devices by sending invitations. This will happen according to your configurations (see chapter 03.3), that in some cases cannot be changed after sending the first invitations.
09.1. Important notes
As soon as the first invitation message is sent towards a device, the parameters of the ‘Transformation Tool’ where you can change your users’ email address format or domain between your UEM source server and your UEM target server cannot be changed anymore (see chapter 06) and also the ‘Mobile Config’ file (relevant for iOS Wi-Fi devices only) cannot be updated anymore. So before sending your first invitation, double-check that these parameters are correct.
But there are other parameters that can be changed after the first email is sent:
- The name of the migration project (by clicking on the small pencil next to the name)
- The categories of the migration project (by clicking on the small pencil next to the name)
- The password associated with the dedicated Service Account for the EBF Onboarder on the source UEM system (by clicking on the small pencil in the ‘Source’ box)
- The password associated with the dedicated Service Account for the EBF Onboarder on the target UEM system (by clicking on the small pencil in the ‘Target’ box)
- The content of all messages which you have set up by accessing the Communication Tool
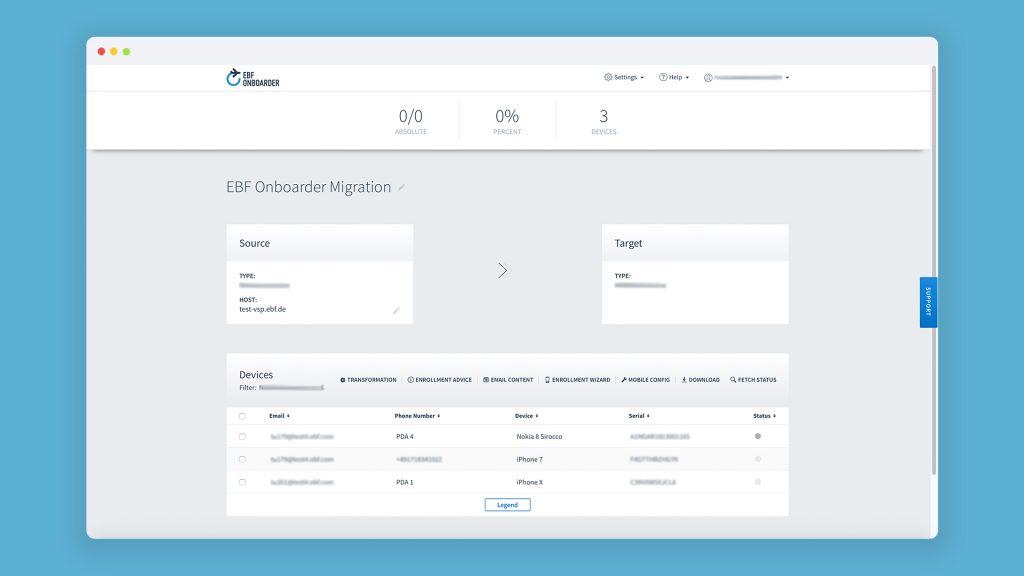
You can access those areas from the migration project dashboard:

NOTE:
- The first invitation sent to a device will count as one license consumed. New invitations which are sent to the same device don’t consume a license. So, you can send several invitations to the device by email or notification without effect on the licenses of the migration project.
- The timer which is relevant for the automatic reminders will start on the day the first invitation is sent (first one of the whole migration project). So, if you send the first invitation email on March 1, March 2 counts as ‘day 1’. A reminder which is scheduled to be sent 5 days after the invitation was sent, will be sent on March 6.
09.2. Sending invitations
Once you have double-checked that all configurations are correct, you can send invitations to your users.
NOTE: If you were preparing your migration project ahead of time and haven’t send the invitations immediately, the device status/existence on your source system might not be the same as on the day of the project creation. To avoid sending invitations to devices that have been removed from the source system and to make sure to send invitations to devices that have been added to the selected group in the source system, please use the ‘Reload’ feature before sending invitations to users/devices (see chapter 04.6).
ATTENTION: The EBF Onboarder uses features of the source system to send messages and notifications to the users and/or devices.
Follow these steps to send invitations:
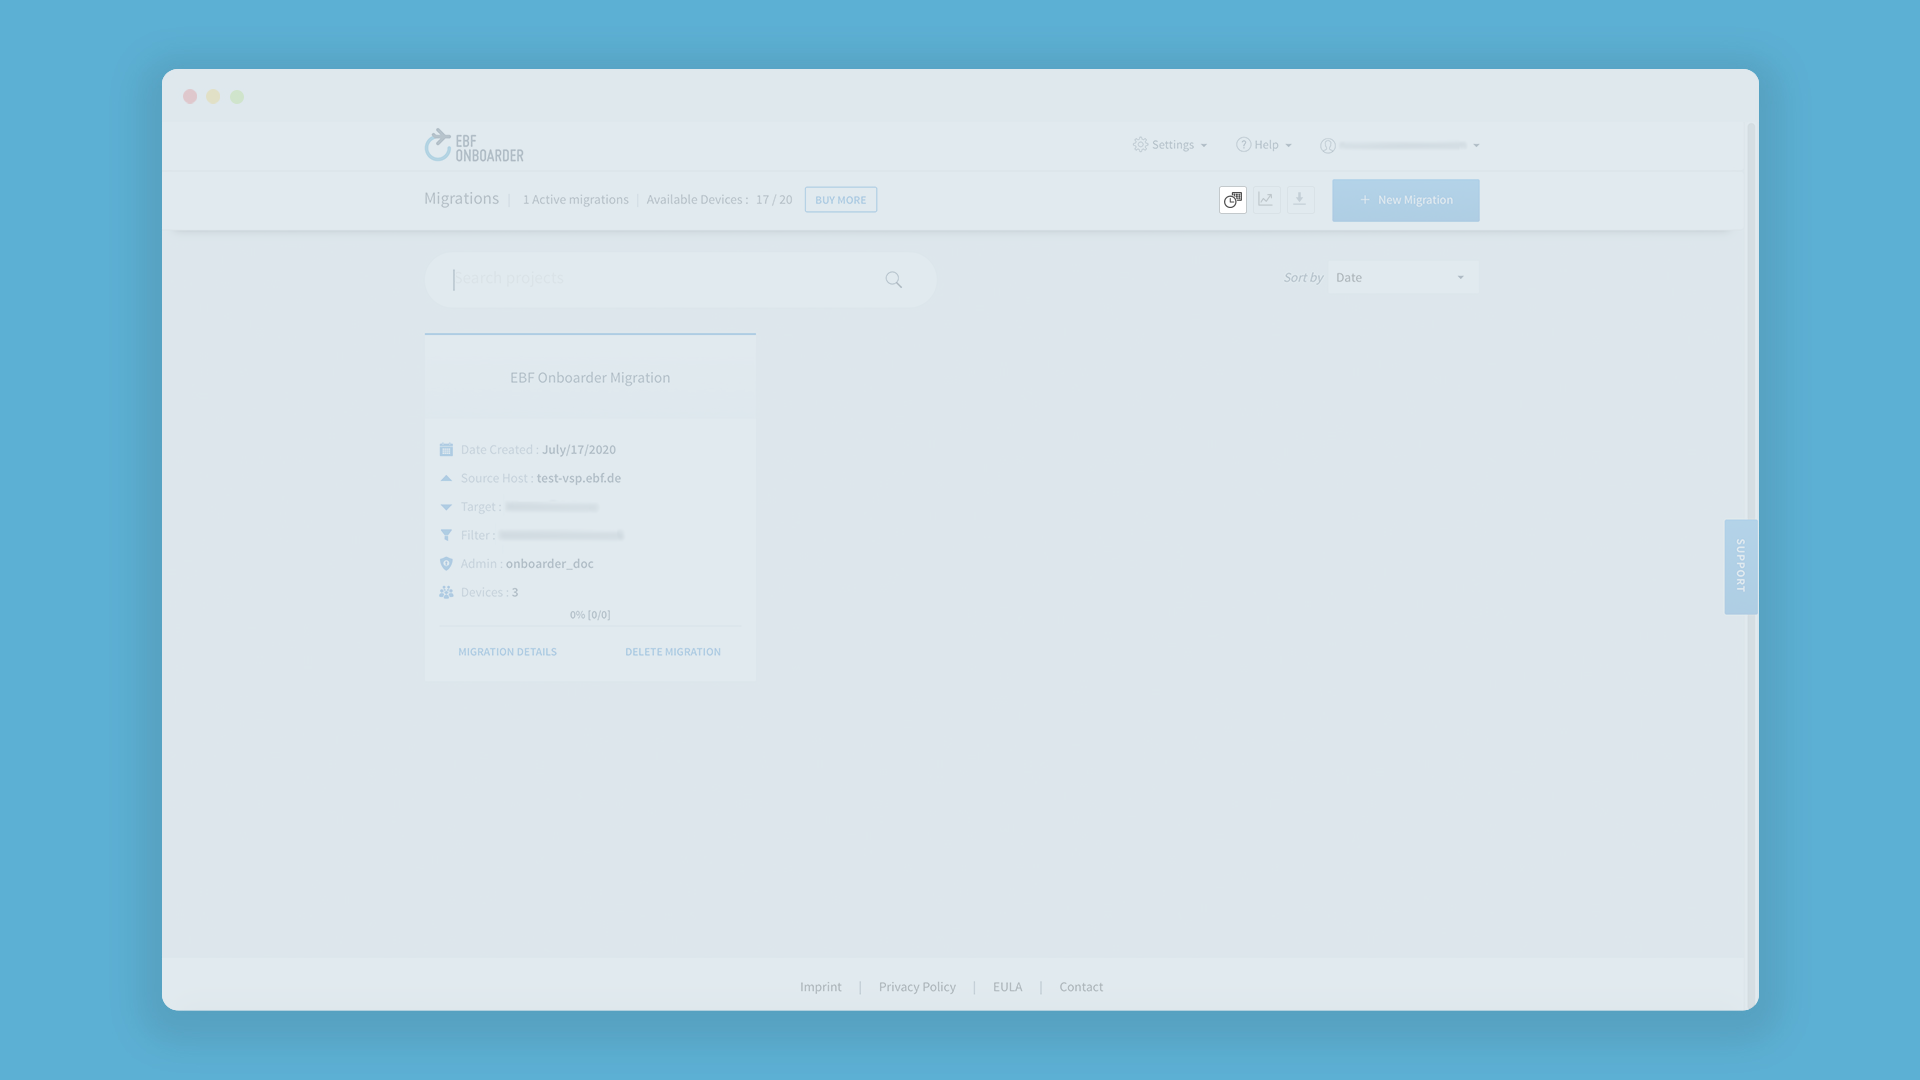
- Go to the EBF Onboarder dashboard and click on ‘Migration Details’ for the migration project you want to launch:

- Select either all devices or some devices. For ‘all devices’, activate the checkbox in the first row. For ‘single devices’, activate the checkbox in the corresponding row:

NOTE: You can also enable/activate the migration link by selecting a single device(s), performing a right-click on the device list and selecting ‘mark as notified’. Please read chapters 8.2.4 and 8.2.5 to learn how users can start the migration on a device in that case. ‘Mark as notified’ can also be used if you want to enable a migration for one or more users/devices, but do not want to send an information to the user.
- Click on ‘Send Invitations’ to send the invitation to the selected devices.
- A popup will display the settings configured in the Communication Tool. You will see if the Invitation message, the Reminders and the Welcome message will be sent by email, push notification and/or SMS. Check if the settings are correct.

NOTE: If you want to send messages by SMS and there are devices without a phone number, the devices will be marked red. You can continue and the devices without phone numbers will not receive an SMS which you will see in in the Audit Logs.
- Press ‘Cancel’ if you want to check the settings again. Or press ‘Send’ to send out the messages to the users and devices.
- The users can then start the migration process by following the instructions in the email or by clicking the migration link in the push notification or SMS.
- In the overview, the status of the device will change from a grey circle to a yellow circle as the user will be notified and you can see the timestamp of the sending date here. You can read more about it in chapter 09.2.1.
NOTE: You can still select further devices which you have not selected previously and send them an invitation or activate the migration at any time.
09.2.1. Launch by email
By default, only ‘Email’ is selected as a message type, and the invitation will be sent to the user’s email address associated with the device.
ATTENTION: You need to make sure that the email includes a ‘Start Migration’ button or a link that will enable the device to start the migration (see chapter 05.1.1).
In some cases a migration link is not wanted, so we do no longer enforce the migration link in the Invitation message.
Selected or manual migration start
You can select single devices or all devices for which you want to start the migration.
Once you click on ‘Send’, the EBF Onboarder starts to send invitations to all selected devices according to your settings. You will see a confirmation in green boxes and a list of all selected devices after clicking on the button.
NOTE: If you have selected only a few devices, the emails can be sent to them immediately. If you have selected several hundred devices or more, this process can take a while. Be patient and aware that it can take up to 15 minutes before the first invitation is sent. The status of the device will change to a dark grey circle as the sending is queued:
Scheduling a migration
You can schedule the sending of information messages and invitations. They will be sent to all users of the migration project.
NOTE:
- Push notifications and SMS are supported as well.
- Users/devices who were invited already, will receive reminder emails.
- If you choose a point in time in the past, the sending will take place at the next full hour.
- If all devices in the project were invited already, you cannot schedule the sending of invitation emails.
Follow these steps to schedule the sending of invitation emails:
- Go to the EBF Onboarder dashboard and click on the scheduler icon at the top right:
- Click on ‘New Schedule’.

- Select and provide the following data for the information messages and invitations:
- Project: Select the project from the list of the none-completed projects for which you want to schedule the sending of invitation emails.
- Start date: Select the start date.
- Start time: Select a start time (only full hours can be selected and please note that the time you need to select is German time as the local server time is used for schedules).
- Email: Enter the email address or email addresses (separated by ‘;’) which should receive a notification email once the schedule was executed.
- active: Check this box to activate the schedule, otherwise the schedule will remain a draft.

- Click on ‘Save and Close’.
- The schedule list will now contain the new schedule. The list will contain planned schedules which can be edited and also completed schedules with their executed date/time.On the EBF Onboarder dashboard you will also see,
- if a schedule is setup, but not yet executed (gray checkmark),
- if a schedule was executed (green checkmark)
- if there is no scheduler configured for this project (no scheduler icon).
You can edit or remove a schedule by opening the scheduler again.

09.2.2. Launch by notification
You can also send push messages to your users/devices. The message needs to include this parameter: ‘{shortUrl}’. Please read chapter 5 for more information.
You can select single devices or all devices for which you want to start the migration. Once you click on ‘Send’, the EBF Onboarder starts to send notifications to all selected devices according to your settings. You will see a confirmation in green boxes and a list of all selected devices after clicking on the button.
09.2.3. Launch with a web clip for iOS devices
In some cases it might not be possible to use an email to initiate the migration. In this case in addition to APNS push notification and SMS, for iOS devices a web clip can be created.
Automatic web clips
The web clip is automatically generated by the EBF Onboarder for Ivanti (MobileIron) source servers (EPMM and Neurons (Cloud and Core)). The administrator can find the web clip and enable it on the devices which he wants to migrate with a web clip. The first invitation sending will generate the web clip automatically during the sending process on the Ivanti (MobileIron) servers.
Manual web clips
For other source systems, the web clip creation is currently not done by the EBF Onboarder. Thus, you need to create the web clip manually ahead in the source system for iOS devices and associated users/device serial numbers.
ATTENTION: The migration link has to be activated in order to allow the web clip to function. This is not the case until you send a first invitation (notification or email) to all relevant devices. Please see step 5 to learn how to activate the migration link.
Please follow these steps to be able to use web clips to start the EBF Onboarder migration:
- Create a new project at the EBF Onboarder platform (see chapter 04).
- Build a link in the following format:
https://ONBOARDERSERVER-URL/action/projectID{DeviceSerialNumber}.
You will find theONBOARDERSERVER-URLand theprojectIDin the browser bar of your EBF Onboarder migration project. TheDeviceSerialNumberwill be the serial number variable of the device. - Create a web clip in your source system and add a URL with the above mentioned format for each device that needs one.
- Deploy the web clip in your source system to the selected devices within the migration project.
- Activate the web clip in one of the following ways:
- Send an invitation email without a link to each device as described in chapter 08.2 to allow the web clip to function. To delete the link, you first have to modify the content of the invitation with the help of the Email Content Tool (see chapter 05.1.1) and add an invisible {Url}.This is important as the EBF Onboarder will add a migration link to the invitation, if no button or no link is included in the email. To avoid this, you have to add an invisible link to the email content and save the email afterwards:
- Click on {} to add
{url}at the end of your invitation message. - Switch to the HTML syntax by clicking on <> and add
<a href=”{url}”></a>instead of{url}in order to make the URL invisible in the message sent.
- Click on {} to add
- You can also temporarily deactivate ‘Sending Message’ in the source system console and send a push notification to the devices which should use the web clip. In this way, their links will become active by the push notification. Reactivate ‘Send Messages’ in your source system console afterwards.
- Send an invitation email without a link to each device as described in chapter 08.2 to allow the web clip to function. To delete the link, you first have to modify the content of the invitation with the help of the Email Content Tool (see chapter 05.1.1) and add an invisible {Url}.This is important as the EBF Onboarder will add a migration link to the invitation, if no button or no link is included in the email. To avoid this, you have to add an invisible link to the email content and save the email afterwards:
- The user can then click on the web clip.
09.2.4. Launch with the URL with /GO
In some cases it might not be possible to use an email or web clip to initiate the migration.
EXAMPLES:
- iOS: For iOS devices, the migration must be started from the Safari browser. This is not possible if a third-party email client is in use which prevents users from opening or copying and pasting the link from the invitation email to Safari.
- Android: For Android devices, the migration must be started from the Personal Profile.
It is not possible to use the link from the migration email if the email with the link is only available in the Work Profile.
In this case you can provide your users with a link which helps them to start the migration.
ATTENTION:
The migration project must exist already, and the user must at least have been invited to migrate once.
Please follow these steps to enable your users to start the migration:
- Provide your users with one of the following links – depending on your target system:
Target UEM system Website URL BlackBerry {urlGo} or https://blackberry-onboarder.ebf.de/go Ivanti EPMM/Neurons (MobileIron Core/Cloud) {urlGo} or https://ivanti-onboarder.ebf.de/go Jamf Pro/School {urlGo} or https://jamf-onboarder.ebf.de/go
{urlGo} or https://jamfpro-onboarder.ebf.de/goMaas360 {urlGo} or https://maas360-onboarder.ebf.de/go Microsoft Intune {urlGo} or https://intune-onboarder.ebf.de/go Workspace ONE {urlGo} or https://workspaceone-onboarder.ebf.de/go - The user needs to open the link on the device.
- The user needs to enter his email address and click on ‘Next’:

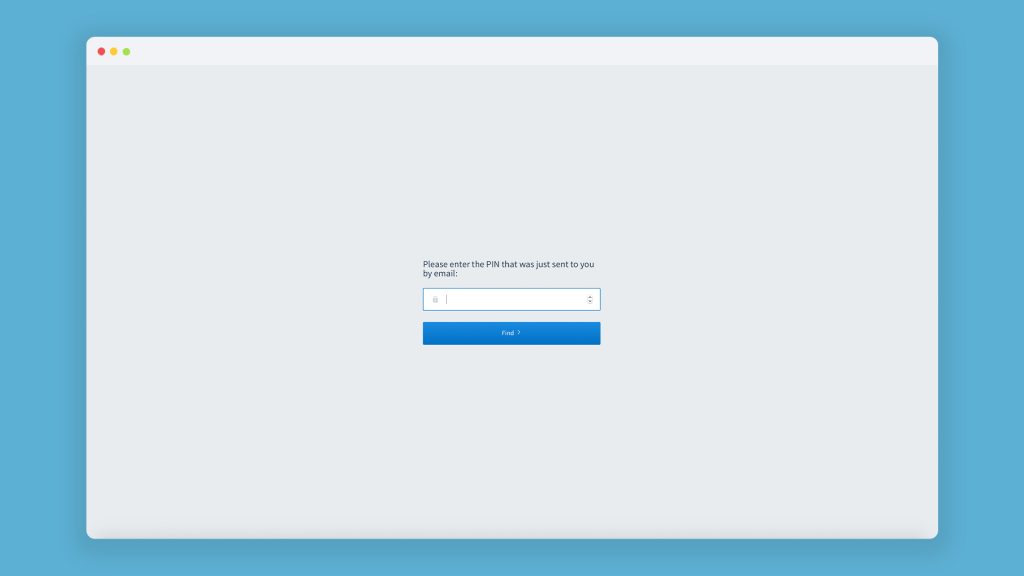
- The user will be asked to enter a PIN number which he will receive by email after finishing step 3. He needs to enter the PIN and click on ‘Find’:
NOTE:
- If only one device of a user is included in the migration project, both PINs provided will start the migration: The PIN in the email with the subject “Onboarder PIN” and the PIN in the migration email. After entering the PIN, the user’s AD/LDAP password is required to start the migration.

- If only one device of a user is included in the migration project, both PINs provided will start the migration: The PIN in the email with the subject “Onboarder PIN” and the PIN in the migration email. After entering the PIN, the user’s AD/LDAP password is required to start the migration.
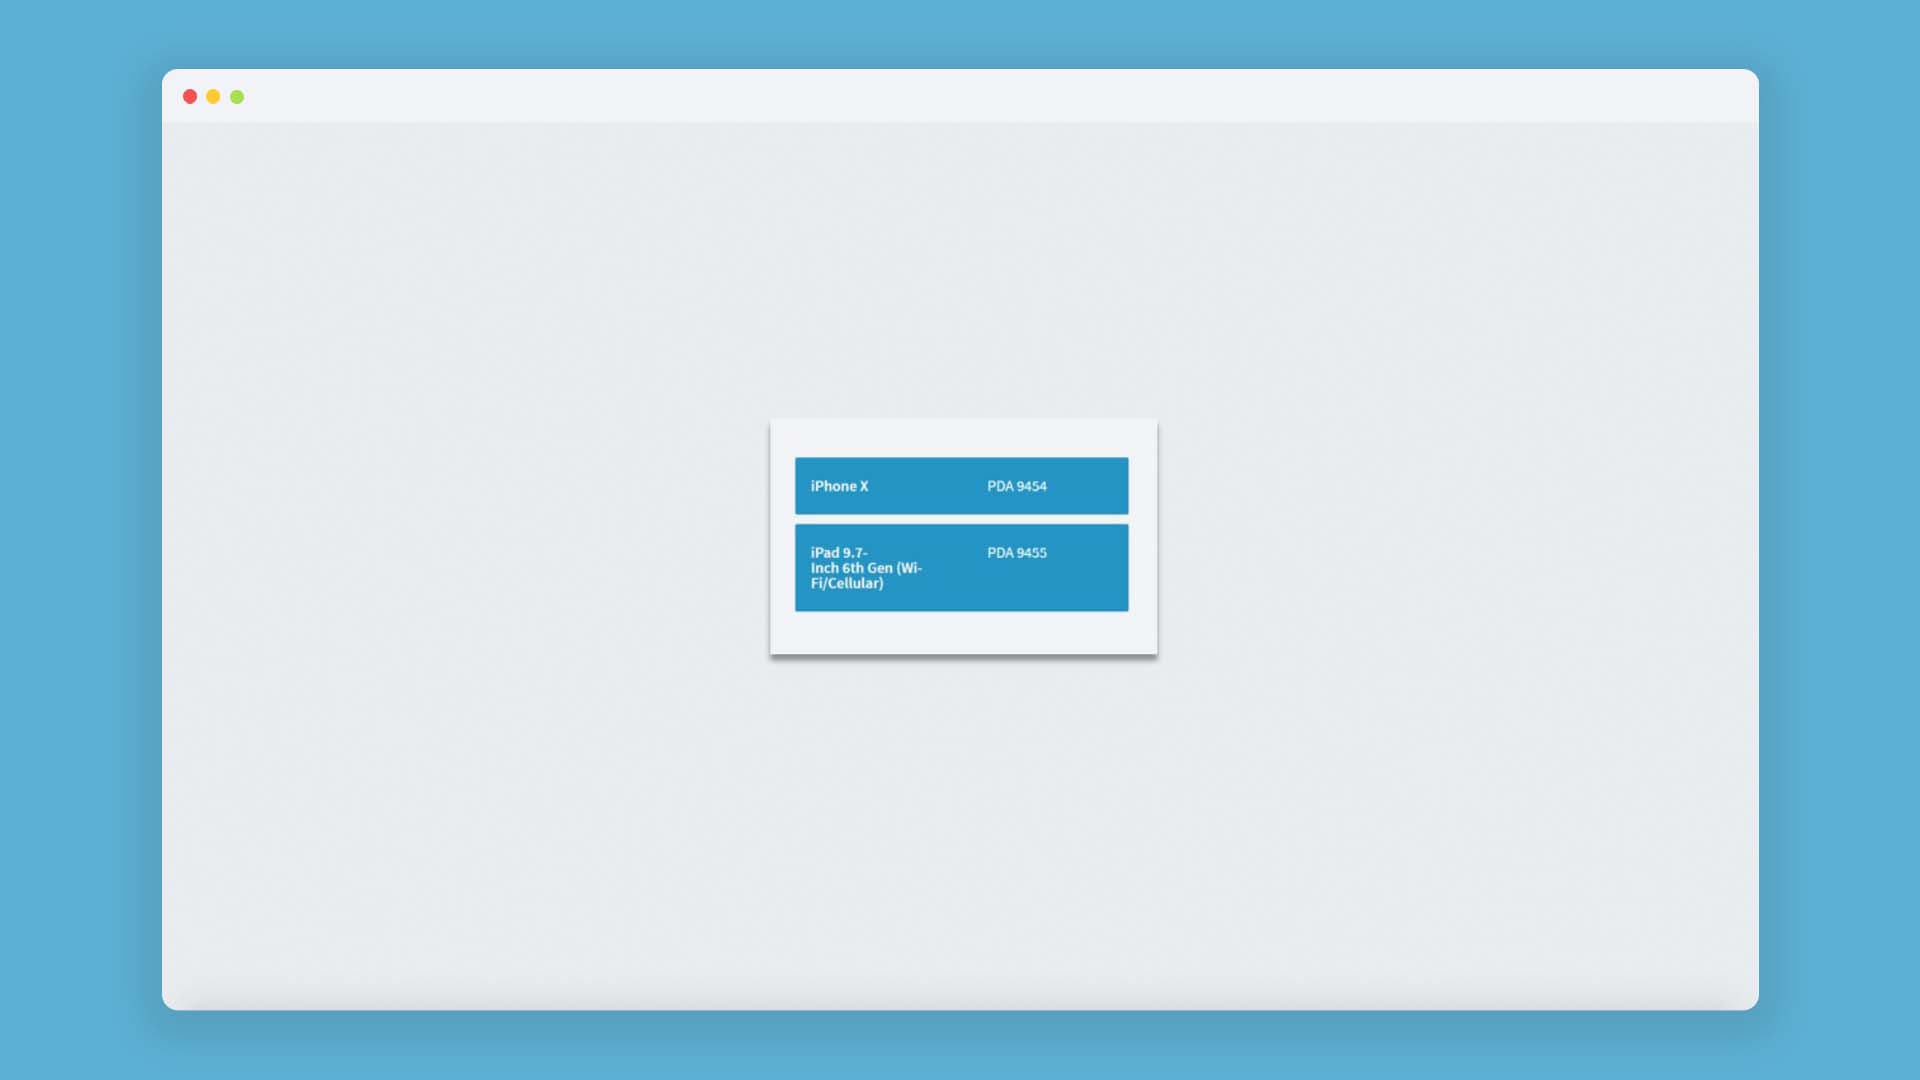
- If two or more devices of a user are included in the migration project, the user must use the PIN of the email with the subject “Onboarder PIN”. Afterwards a list of devices which are included in the migration project will be displayed. The user needs to choose the correct device which is supposed to migrate. After choosing the device, the user’s AD/LDAP password is required to start the migration. The display switches between phone number (if available) and serial number. If the wrong device was selected, the user needs to login again.
- He will be directed to the start page of the migration and can initiate the migration process by clicking on ‘Start Migration’.
09.2.5. Launch with Self Service /ireg
ATTENTION for Microsoft Intune as a source and target system: In some cases, it is not possible to use an email or web clip to initiate the migration of a device. In this case you can provide your users with a static link to start the migration. Please read the separate documentation in addition to this one to learn how to use the Self Service. You can find it here.