01. Introduction
There is a general documentation available for the EBF Onboarder, where you can find information about its prerequisites and the whole migration project. It describes how you can setup a migration project, how you can setup invitation emails and reminders which guide your users through the migration. It also tells you how to initiate the migration process and how to track the migration status.
This documentation complements the general EBF Onboarder documentation and provides more detailed information for the source system Microsoft Intune about:
- the prerequisites for the source system,
- the target system selection during the migration project setup.
The EBF Onboarder supports the following endpoints (National Clouds) offered by Microsoft:
Global Service & GCC [DEFAULT]:
Select this option if you use the standard Microsoft Azure/Intune system with Azure AD endpoints: https://portal.azure.com, https://endpoint.microsoft.com or https://login.microsoftonline.com
US Government L4 (GCC High):
Select this option if you use the Microsoft 365 L4 GCC High environment with the following Azure endpoints to connect to your system: https://portal.azure.us and https://login.microsoftonline.us
US Government L5 (DoD):
Select this option if you use the Microsoft 365 L5 DoD (DoD=Department of Defense) environment with the following Azure endpoints to connect to your system: https://portal.azure.us and https://login.microsoftonline.us
China operated by 21Vianet:
Select this option if you use the Microsoft Cloud for China operated by 21Vianet environment with the following Azure endpoints to connect to your system: https://portal.azure.cn and https://login.chinacloudapi.cn
German Cloud [DEPRECATED]:
The German Cloud reachable at https://portal.microsoftazure.de is out service.
02. Prerequisites for the source system Microsoft Intune
02.1. Microsoft Intune Service Account
We support a Microsoft Azure app to allow the EBF Onboarder to access your source system. With your own app you have full control of the app and the client permissions (see chapter 02.1.1). The setup is the same for each endpoint/region.
NOTE:
Multi Factor Authentication can be used by your users. The EBF Onboarder is able to migrate devices if you use Multi Factor Authentication and the Microsoft Company Portal will accept the user credentials with MFA (security reinforced) during registration.
02.1.1. Configuring your own app
Your own app enables you to reduce the applied roles and provides full control over the app and client permissions.
If there are any changes that need to be made regarding this access, you are much more flexible.
While creating the app in Microsoft Azure, you will get the Directory (tenant) ID, the Application (client) ID and the value of the client secret. You will need these three values to configure your EBF Onboarder projects.
Follow these steps to create the app:
- Create your own app for the EBF Onboarder:
- Login into the Azure Portal (Default: https://portal.azure.com/).
- Go to ‘App registrations’.
- Register a new app by clicking on ‘+ New registration’.
- Enter a user-facing display name and set up the app for ‘Accounts in this organizational directory only (Single tenant)’ and click on ‘Register’.
You will find your Application (client) ID and Directory (tenant) ID on the next page. Copy them as you will need them during the setup of a migration project with the EBF Onboarder.
- Go to ‘API permissions’ and
- delete the existing permission ‘User.Read’ and confirm,
- click on ‘+ Add a permission‘ and select ‚Microsoft Graph’,
- select ‘Application permissions’,
- add the following permissions for the Service Account:
- User.ReadWrite.All
- Directory.ReadWrite.All
- Device.ReadWrite.All
- DeviceManagementConfiguration.ReadWrite.All
- DeviceManagementManagedDevices.PrivilegedOperations.All
- DeviceManagementManagedDevices.ReadWrite.All
- Group.ReadWrite.All
- and ‘Grant admin consent for (your domain)’:

NOTE:
- Perform User-impacting remote actions‘: The permission DeviceManagementManagedDevices.PrivilegedOperations.All is required to unenroll or wipe a device.
- If you use ‘Modern Authentication for Exchange Online Mailbox’ for sending emails, you can use the app which is used for EBF Onboarder access also for the Exchange Online access and apply the required permissions to the user.
- Go to ‘Certificates & secrets’ and set up a new client secret.
- When you later setup a migration project with the EBF Onboarder, you will be asked to define the source system, the National Cloud and to insert your tenant ID (see chapter 03). The form will switch to ask you for the client_id and client_secret (Value) which you have received after creating your own app in the Azure Portal:
02.1.2. Using the EBF Onboarder shared app (not supported)
We are no longer supporting the shared app. Please use a client app – 02.1.1.
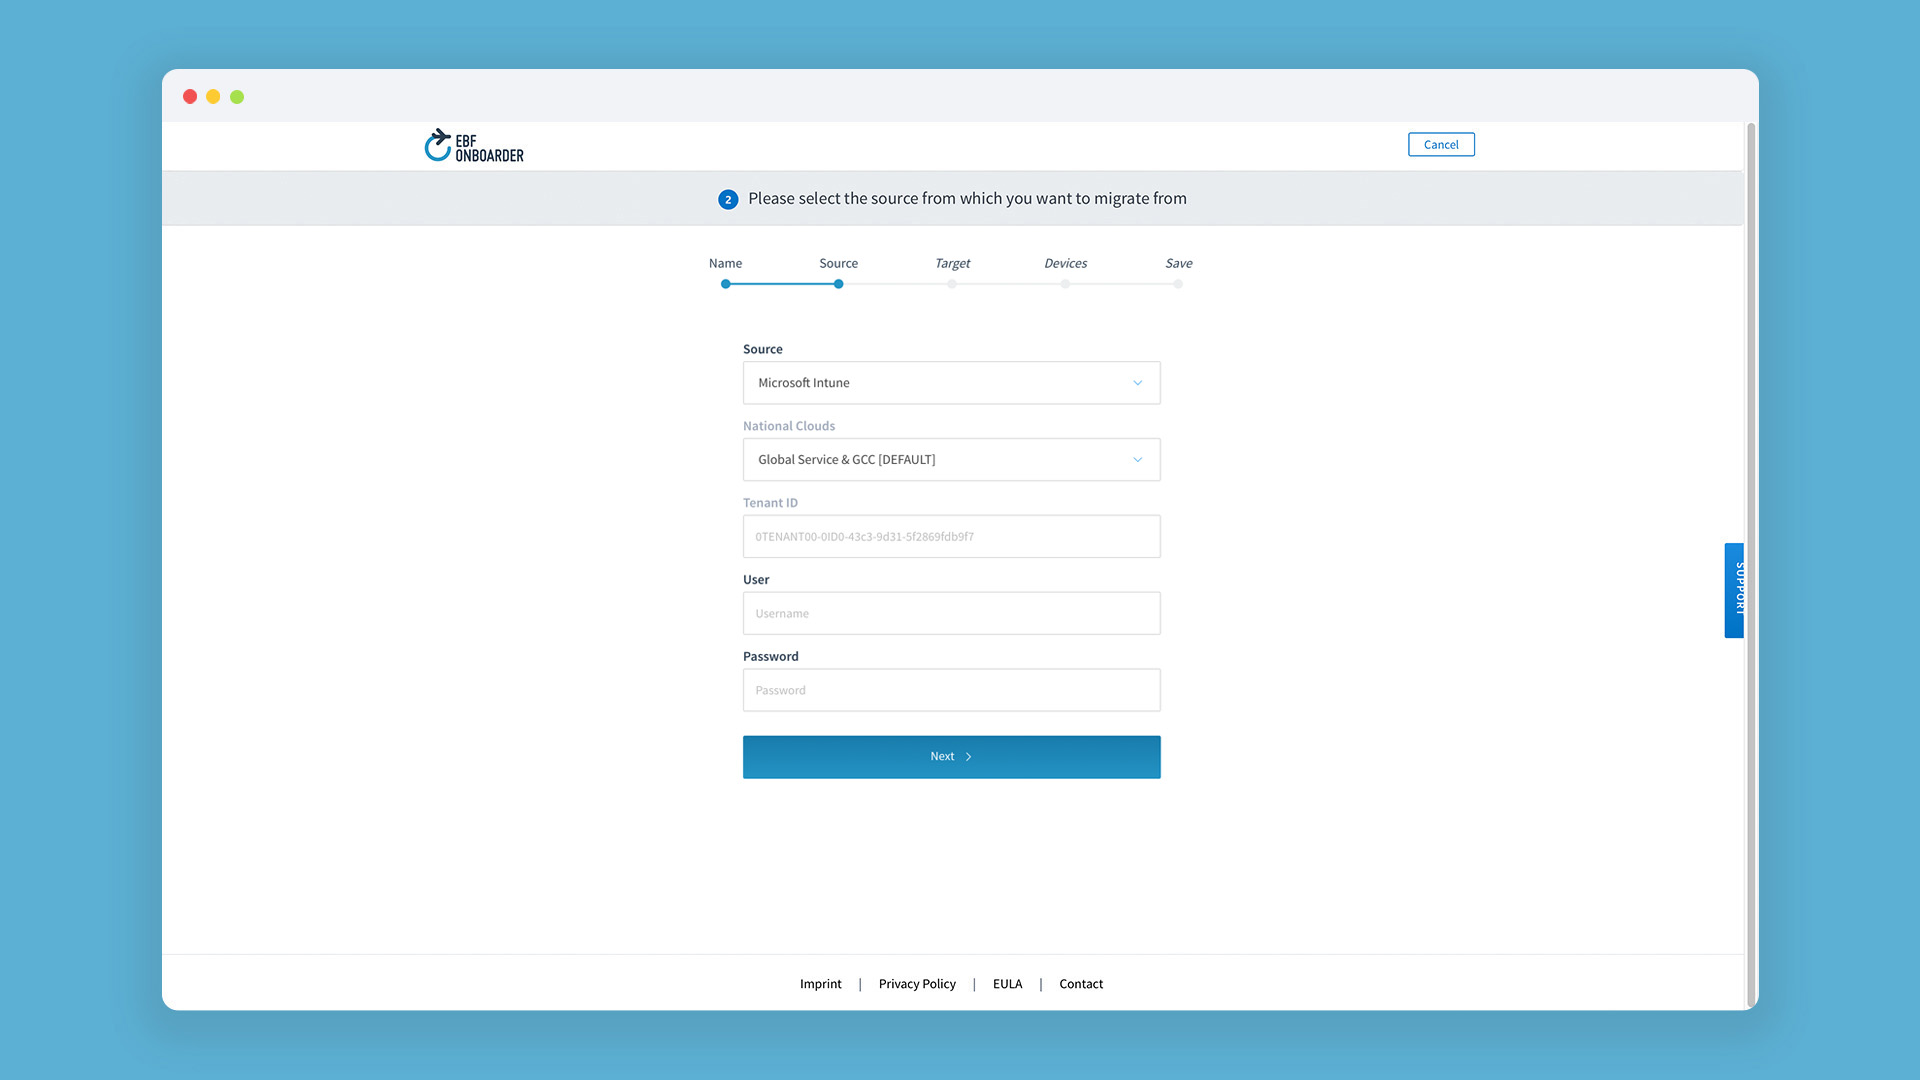
03. Source system selection for the source system Microsoft Intune
When you setup a migration project with the EBF Onboarder, you will be asked to define the source system (please read the general documentation to learn more about this).
Select Microsoft Intune as source system, select your National Cloud (Global Service & GCC is the default Microsoft Intune environment.)
- Enter tenant ID, client_id and client_secret. Please make sure that you have followed all instructions of chapter 02.1.1.
04. Device selection for the source system Microsoft Intune
When you setup a migration project with the EBF Onboarder (please read the general documentation to learn more about this), you will be asked to select the devices of your users you want to migrate.
NOTE: For Microsoft Intune endpoints, the default setting is to add “users” to a group with membership type “assigned” in Azure Active Directory (AAD), not „devices“. We can only read groups with the assignment type ‘Assigned’
04.1. Stolen Device Protection
Please check the chapter 13.1.1 regarding the Stolen Device Protection to be aware of this topic which can block devices from being migrated.
05. Migration Launch Self Service (/ireg)
In some cases it is not possible to use an email or web clip to initiate the migration of a device. In this case you can provide your users with a static link to start the migration.
05.1. Prerequisites
The EBF Onboarder Self Service will use your Default Azure Identity Provider authenticating the user by their Azure AD email address and Azure AD password.
ATTENTION: The migration must exist already and the user must have been invited to migrate the device at least once.
05.2. Workflow
Please follow these steps to enable your users to start the migration using /ireg:
- Create a Redirect URI for the app created in chapter 02.1.2:
- Login into the Azure Portal.
- Go to ‘App registrations’, open your app and ‘Authentication’.
- Within ‘Platform configurations’ click on ‘+ Add a platform’.
- Click on ‘Web’ and enter the following for Redirect URIs: https://intune-onboarder.ebf.com/ireg
- Click on ‘Configure’.
- Provide your users with the following link: https://intune-onboarder.ebf.com/ireg
NOTE: This link needs to be opened on the device that should be migrated. The link must be opened in a browser that is not removed while the device is removed/retired from the source MDM system.
- The user needs to enter his email address and click on ‘Find’.
- The user needs to enter the Azure Active Directory Password and click on ‘Find’.
- If a user has more than one device registered on the source MDM system, a list of devices which are assigned to him is displayed. The correct device needs to be selecteed for the migration.
- The browser redirectes to the start page of the migration and the migration can be initiated by clicking on ‘Start Migration’.
- The user can follow the normal migration/enrollment process on the device.