01. Introduction
There is a general documentation available for the EBF Onboarder, where you can find information about its prerequisites and the whole migration project. It describes how you can setup a migration project, how you can setup invitation emails and reminders which guide your users through the migration. It also tells you how to initiate the migration process and how to track the migration status.
This documentation complements the general EBF Onboarder documentation and provides more detailed information for MaaS360 as a source system and also as a target system.
02. Prerequisites for MaaS360
The EBF Onboarder requires some information to access the MaaS360 system when it is either used as source or as a target system. You should collect all relevant data before setting up the EBF Onboarder for MaaS360.
The following table describes the required information:
| EBF Onboarder Parameter | Value | Description by IBM |
| Target/Source | MaaS360 | Type of MDM server |
| Host | Can be found in the URL you should see in your browser while logged into MaaS360 (no https:// is required)
Example: services.m3.maas360.com or m3.maas360.com |
WS_SERVER_BASE: This should point to the base web service URL for your MaaS360 portal |
| Account-ID | Can be found in the account section or in the bottom line of the MaaS360 portal when you are logged in | Account-ID or BILLING_ID |
| Plattform-ID | Should be 3. To be sure, please contact the IBM support |
PLATFORM_ID |
| App-ID | Can be found here: Auto-provisioning web services – IBM Documentation
Example: com.my123.webapi |
APP_ID |
| App-Version | Should be 1.0 | APP_VERSION |
| App-AccessKey | Can be found here: Auto-provisioning web services – IBM Documentation
Example: 82DxczOXXf |
APP_ACCESS_KEY |
| User | Your username for your MaaS360 account that you use for web service access (this user account requires the “Web Services API” as well): Your.Username or name@company.com | USERNAME |
| Password | Your password for your MaaS360 account that you use for web service access | PASSWORD |
NOTE: Please ask the MaaS360 IBM support, if you have issues to find the information. Share your credentials and Account ID with them and ask them for the API key parameters.
BEST PRACTISE: We recommend creating a new user account for the migration project to make sure that the account contains all necessary rights and is used for migration purposes only:
- Apply the default „Administrator“ role to this user.
- Create a new a role that contains the „Web Service API“ permission only and apply this new role to the new user as well.
- Make sure you log into MaaS360 with the new account before using it in the EBF Onboarder as you need to reset the password after the first login and to check if the Web Service API is available within the SETUP menu.
Please read the next chapter for further details about the user creation/configuration.
02.1. Admin account with Web Service API access
In order to access MaaS360 by the EBF Onboarder as a source or target system, you need an admin account with web service API permissions.
You can check if your account has the required rights by hovering over ‘SETUP’.
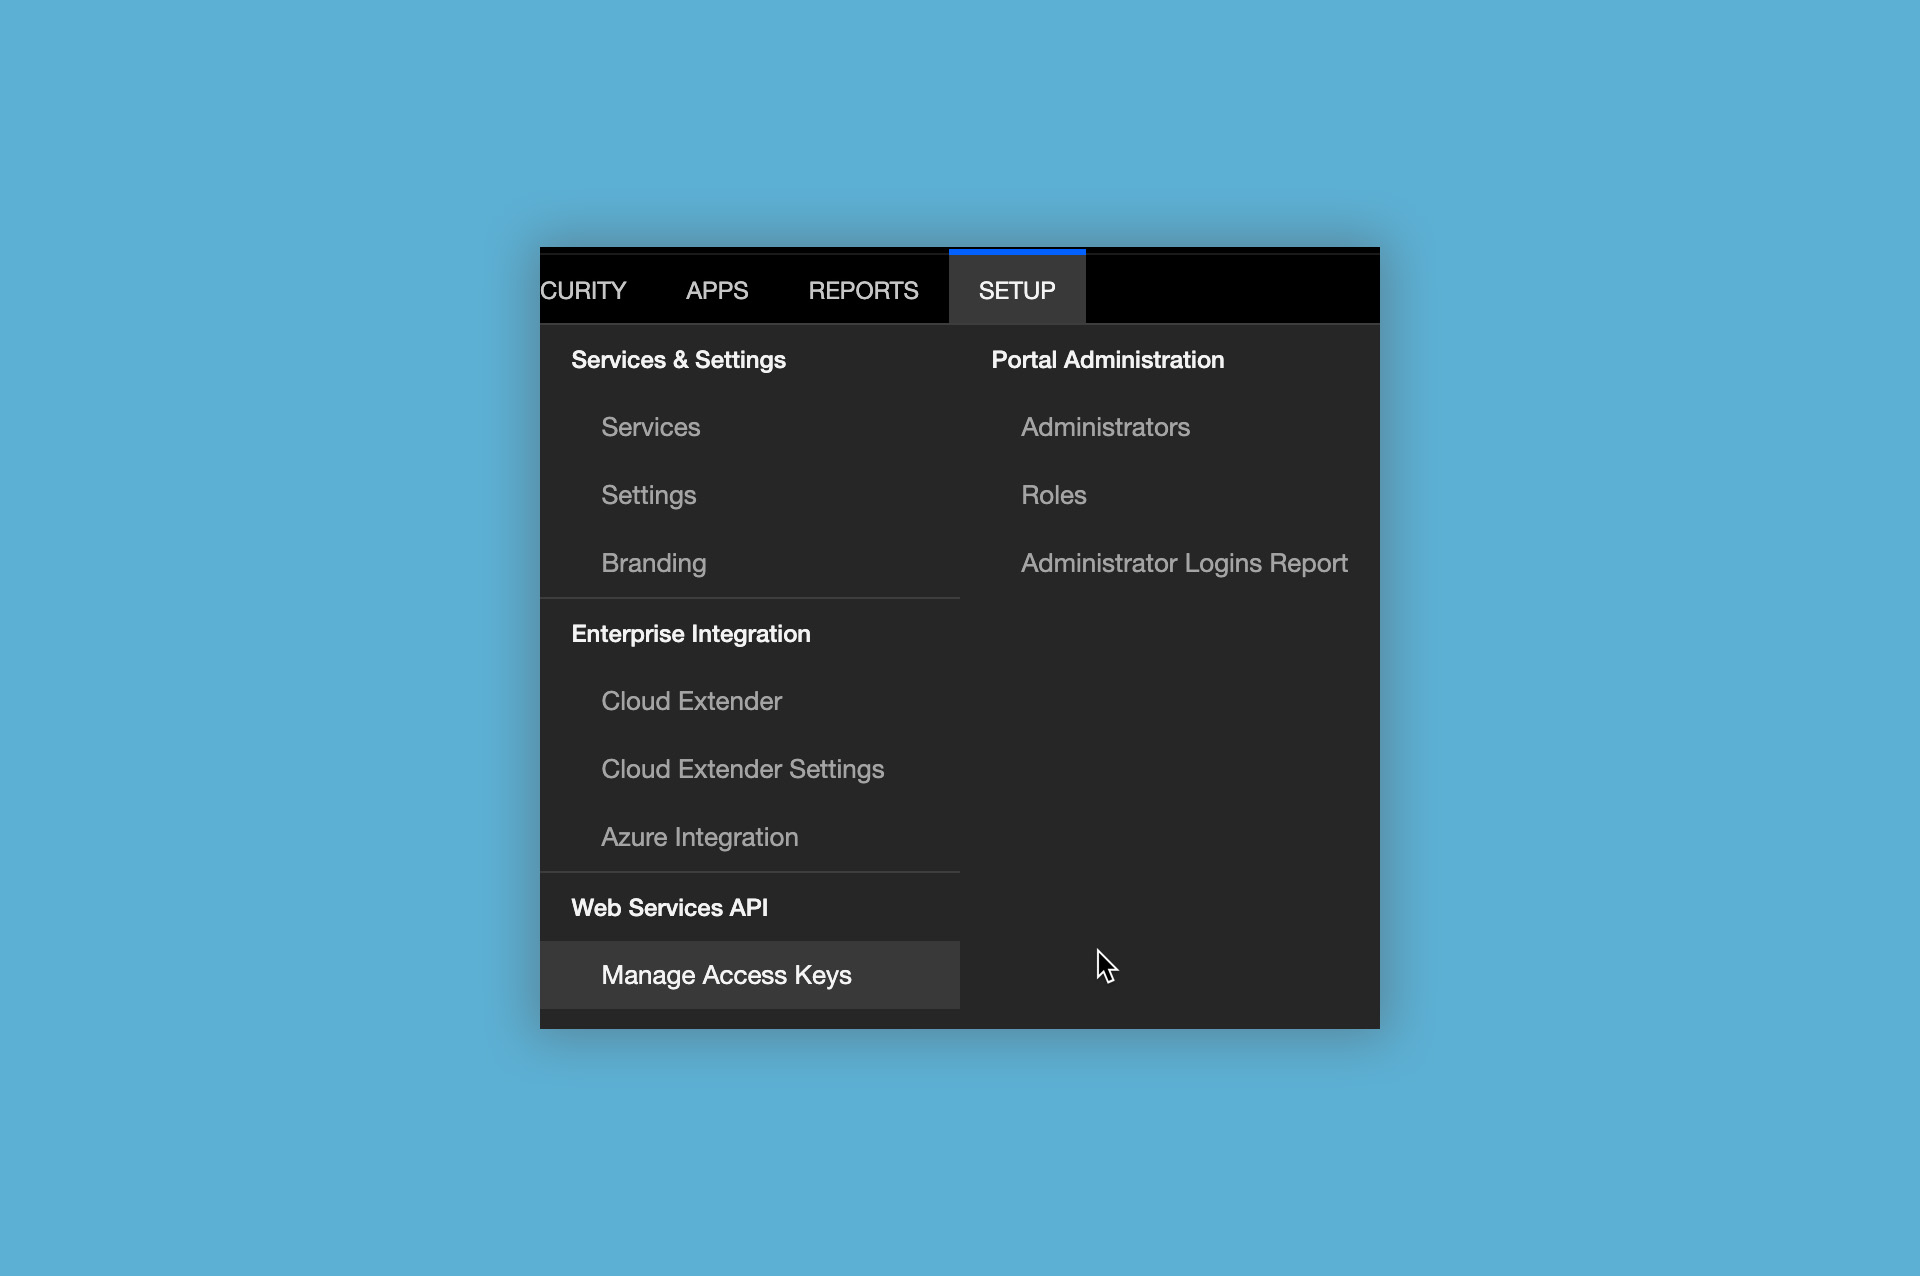
If the menu does not show ‘Web Service API >> Manage Access Keys’, you first need to create a role that has the permission and then you need to apply this role to an admin account.
02.2. Creating a role
To create a new role, you need to do the following:
- Click on ‘SETUP’ >> ‚Portal Administration‘ >> ‚Roles‘.
- Click on ‚Add Role‘ in the ‚Manage Roles‘ area.
- Under ‚Basic Entrollment Settings‘ enter a role name (e.g. Web Service API) and a role description (e.g. Permissions to access the Web Service API).
- For ‚Select Mode of Creation‘ select ‚Create new‘ and click on ‚Next‘.
- Select ‚Web Service – Access Keys‘ from the available Access Rights and click on ‚Save‘. You might need to enter your password for a security check.
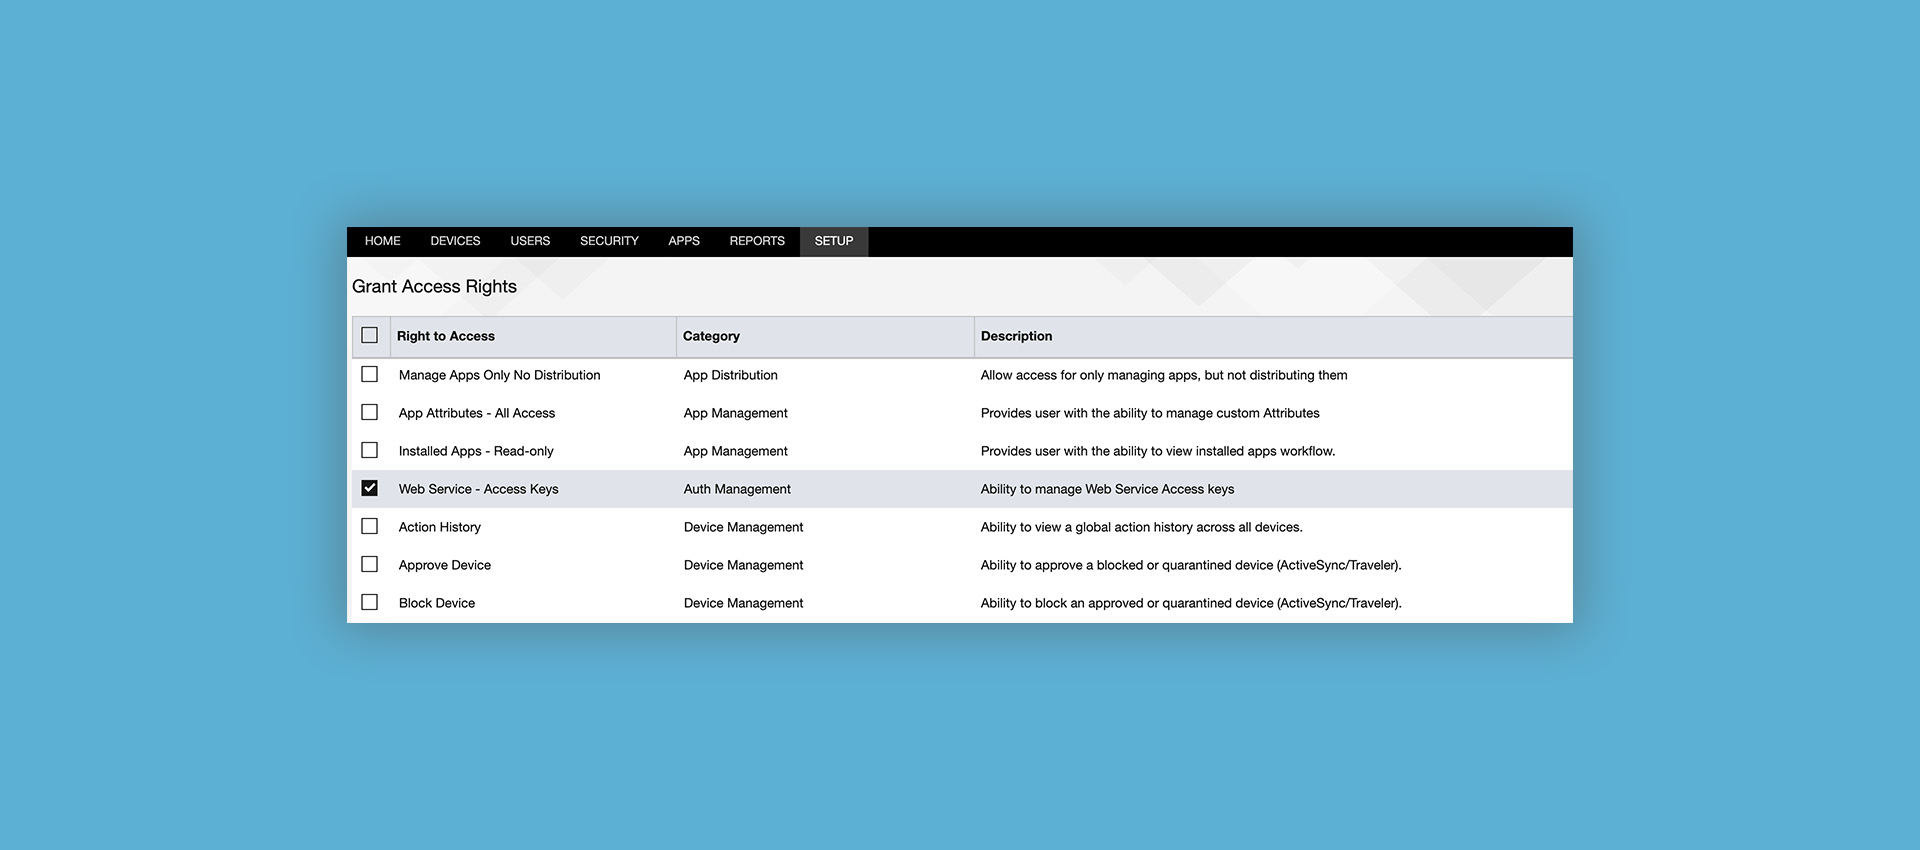
- The new role has been created.
02.3. Assigning the role to an admin account
To setup an admin account with the new ‘Web Services API’ role, you need to do the following:
- Click on ‘SETUP’ >> ‚Portal Administration‘ >> ‘ Administrators’ and click on ‘Edit’ for the admin account.
- Add the Web Service API role and click ‚Continue‘.
The new role is then added to the admin account. The next time that admin logs in, access to the Web Service API keys should be available. - Click on ‘SETUP’ >> ‚Manage Access Keys‘ to create a new key.
- Click on ‚Generate Access Key‘.
- Select ‚MaaS360 Web Services‘ as a key type, enter a name and select ‚Generate‘.
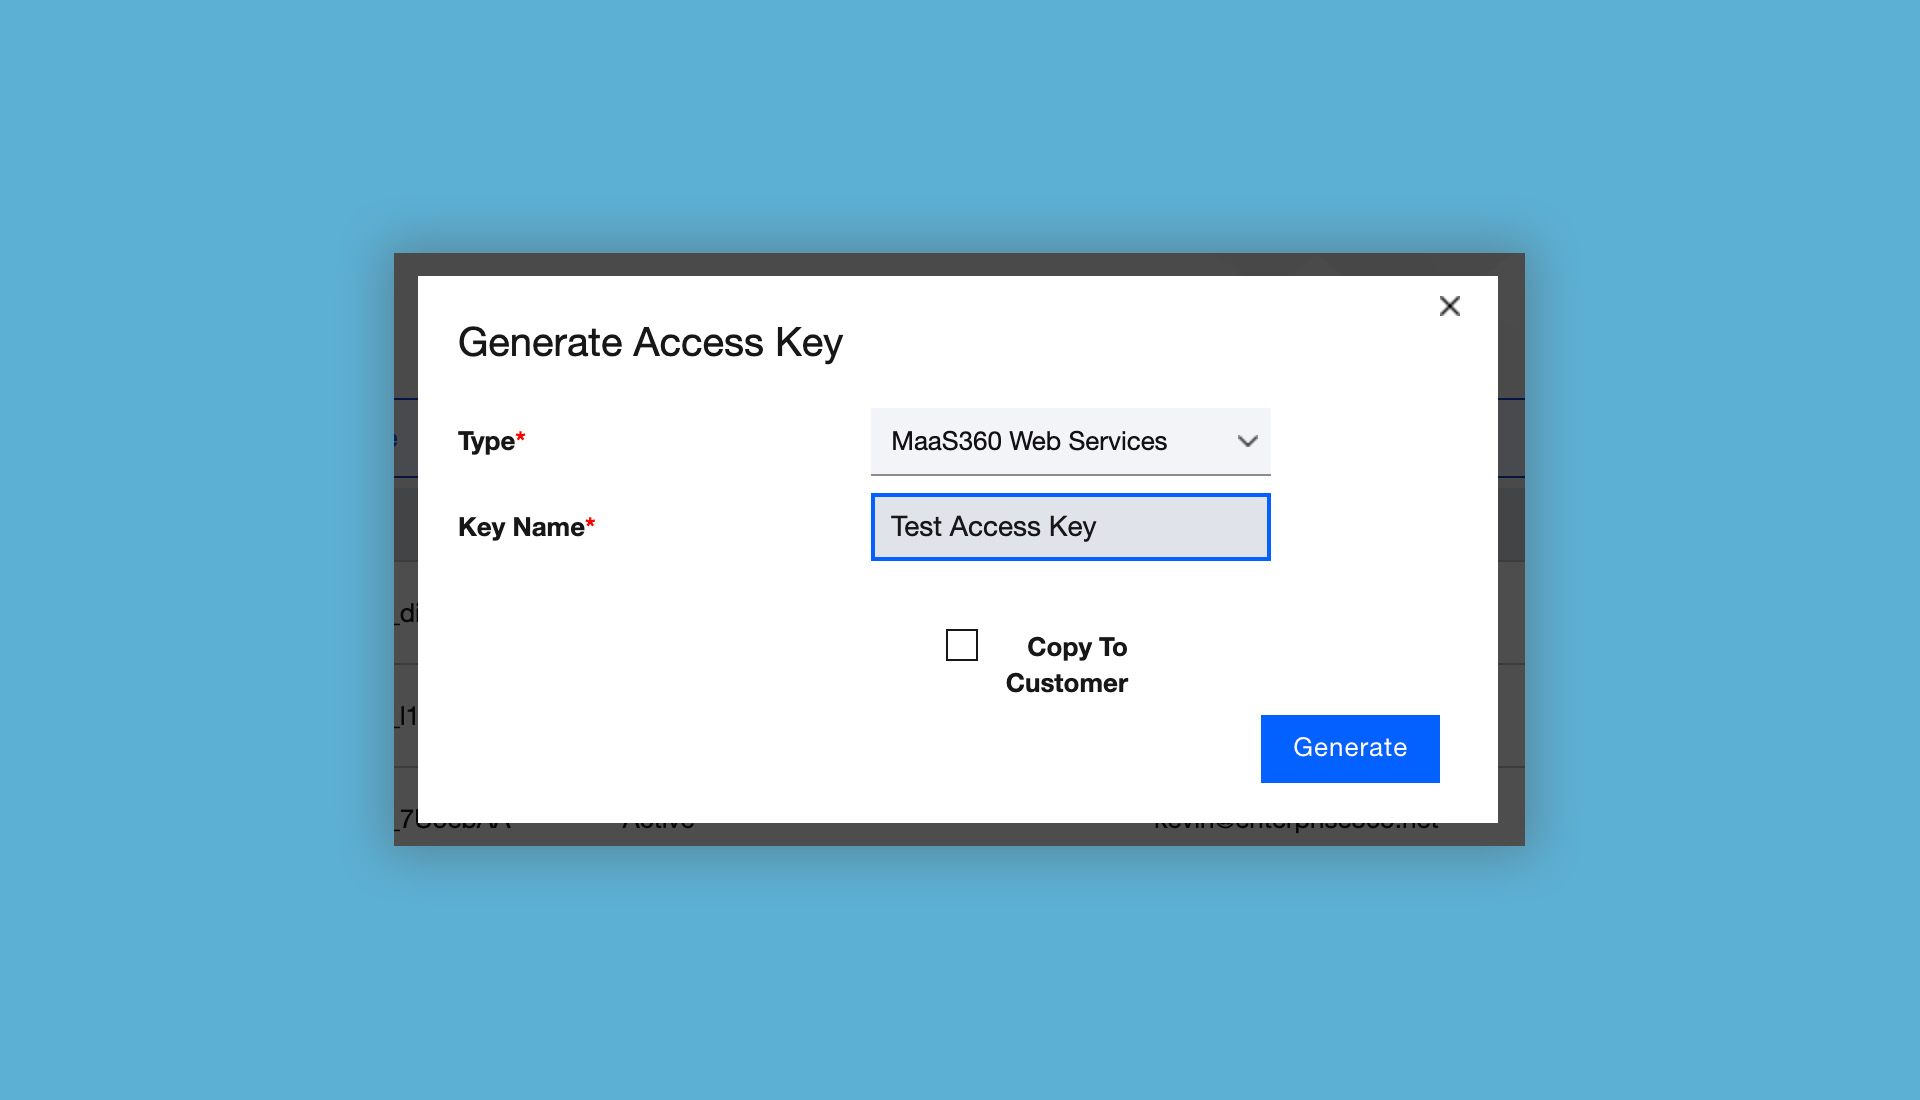
- After entering your admin password, the key information you need will be displayed.
ATTENTION: Make sure you log into MaaS360 with the new account before using it in the EBF Onboarder as you need to reset the password after the first login and to check if the Web Service API is available within the SETUP menu.
03. MaaS360 as a source system
03.1. Specifying devices for the migration
The devices you want to migrate should be added to a “device group” in MaaS360. You will select this group while setting up the migration in the EBF Onboarder portal.
03.2. {serial} placeholder
During the setup of the user communication, you can add the {serial} placeholder. Due to MaaS360 API specifications, the {serial} placeholder will provide a device’s IMEI, not its serial number.
04. MaaS360 as a target system
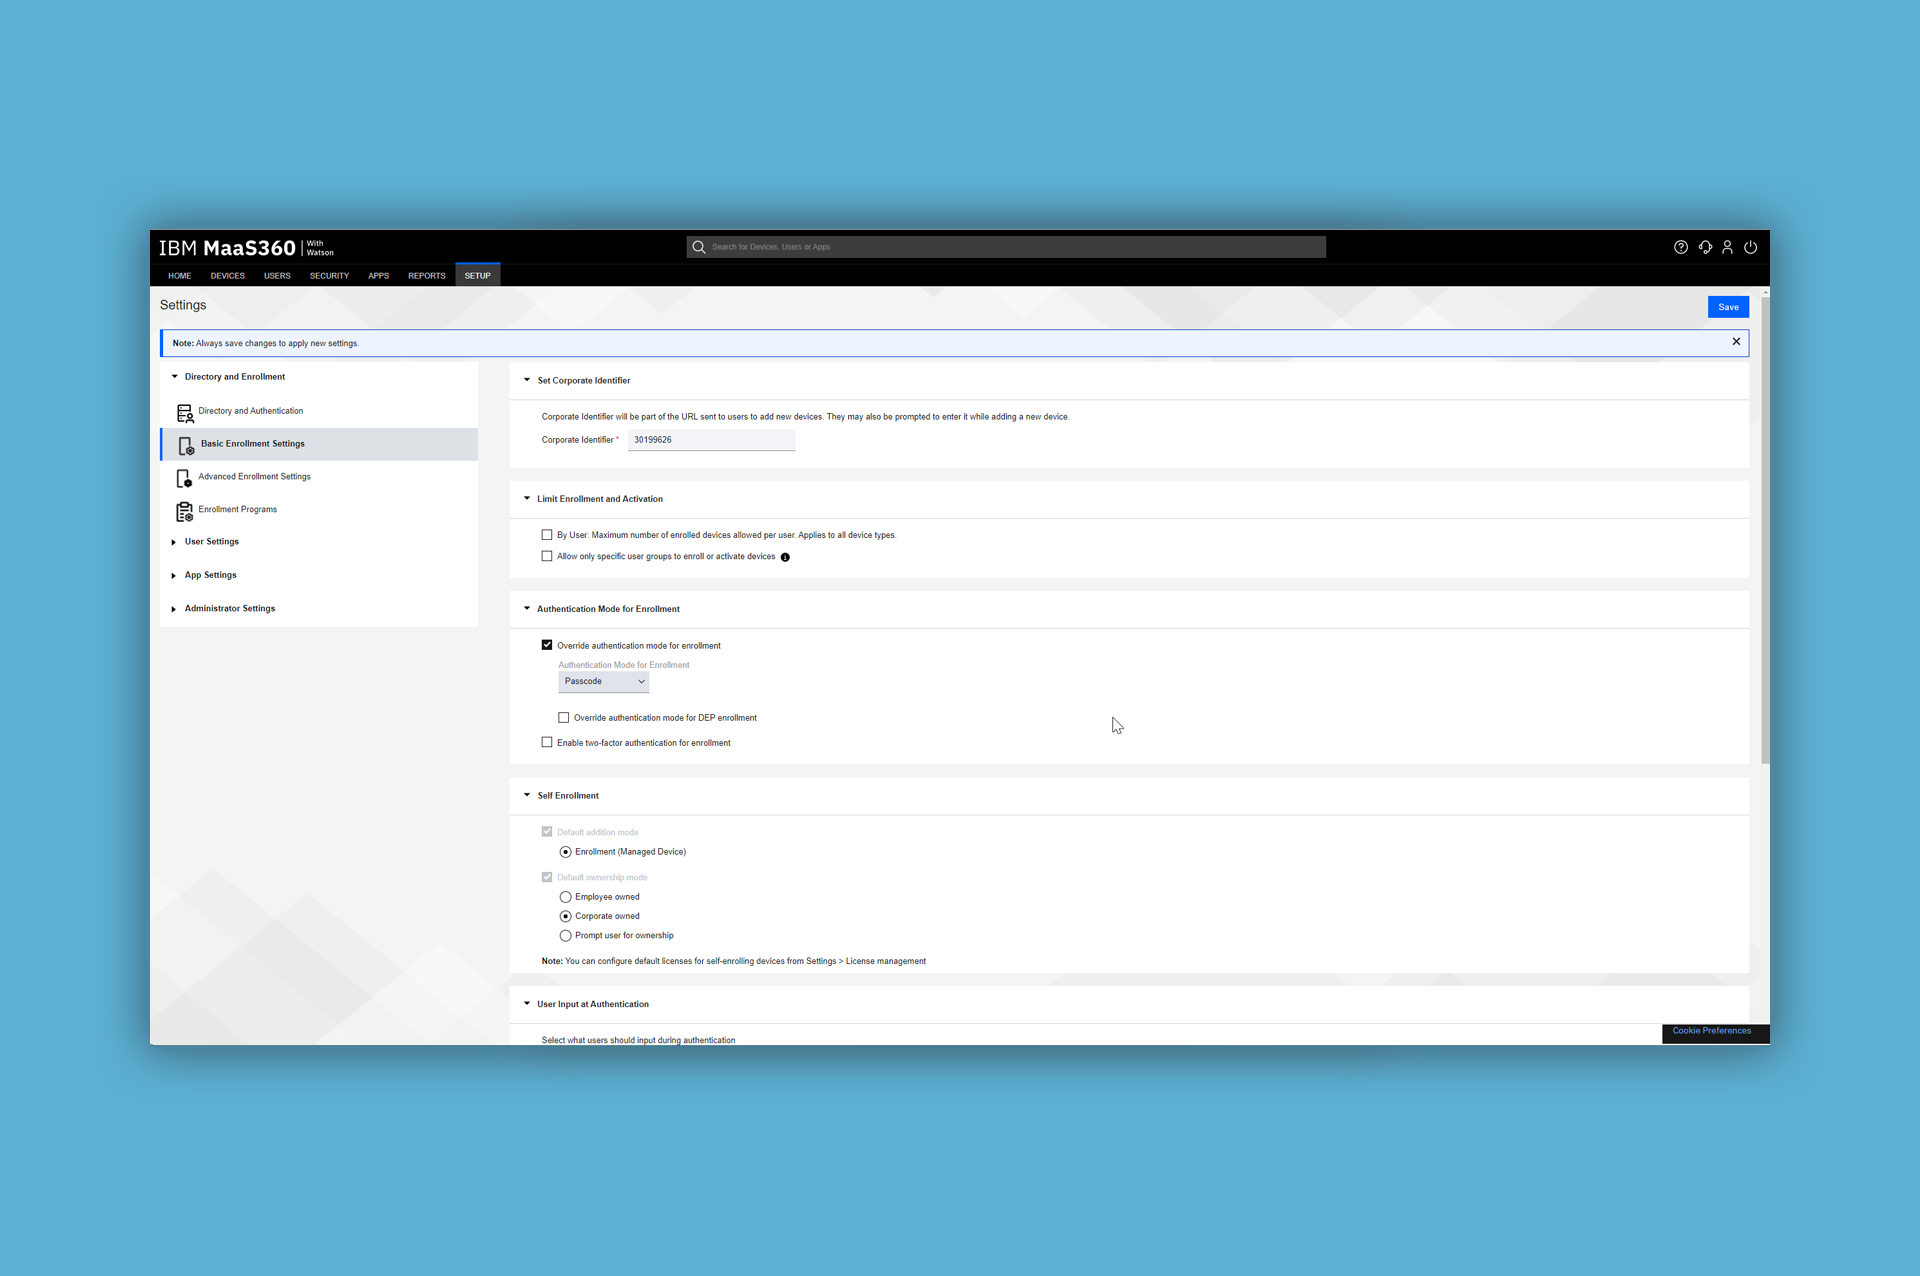
04.1. Enrollment settings
Please follow these steps to register devices and be able to download the MDM Profile:
- Click on ‚SETUP‘ >> ‘Services & Settings’ >> ‘Settings’.
- Expand ‘Directory and Enrollment’ and open ‘Basic Enrollment Settings’.
- Open ‘Authentication Mode for Enrollment’ and make sure, that ‘Override authentication mode for enrollment’ is checked and ‘Authentication Mode for Enrollment’ is set to ‘Passcode’.
- Press ‘Save’.