Communication is essential for the success of a migration project. After saving the migration project, you can prepare and schedule email messages which:
- inform the users about the migration project (Information),
- invite the user to start the migration (Invitation)
- if necessary, remind them of the migration (Reminders),
- confirm that the migration of the device is completed (Welcome).
This is done by using the Communication Tool which is automatically opened after saving the migration project.
For all messages (information, invitation, reminders and welcome) you can select whether you want to inform your users by email, push notification and/or SMS.
There are templates available that help you to create the content, especially helpful is the template for the email content.
All message types are described in detail in the following chapters.
After leaving the Communication Tool you can access it again at any time. Any changes saved will be sent out in future communication.
This is how you can access the Communication Tool:
- Go to the EBF Onboarder dashboard and click on ‘Migration Details’ to access the migration project dashboard:

- Then click on ‘Communication’:
05.1. Information message
The Information message will be sent to users to provide them with information that is relevant to know prior to the migration: e.g. what the user needs to do prior to the migration or the timing of the migration.
The Information message can be sent to the user/device by email, push notification (if the source UEM supports push/APNS) and/or by SMS.
This is how you can setup the Information message using our template:
- Go to the migration project dashboard, open the Communication Tool and click on ‘Information’.

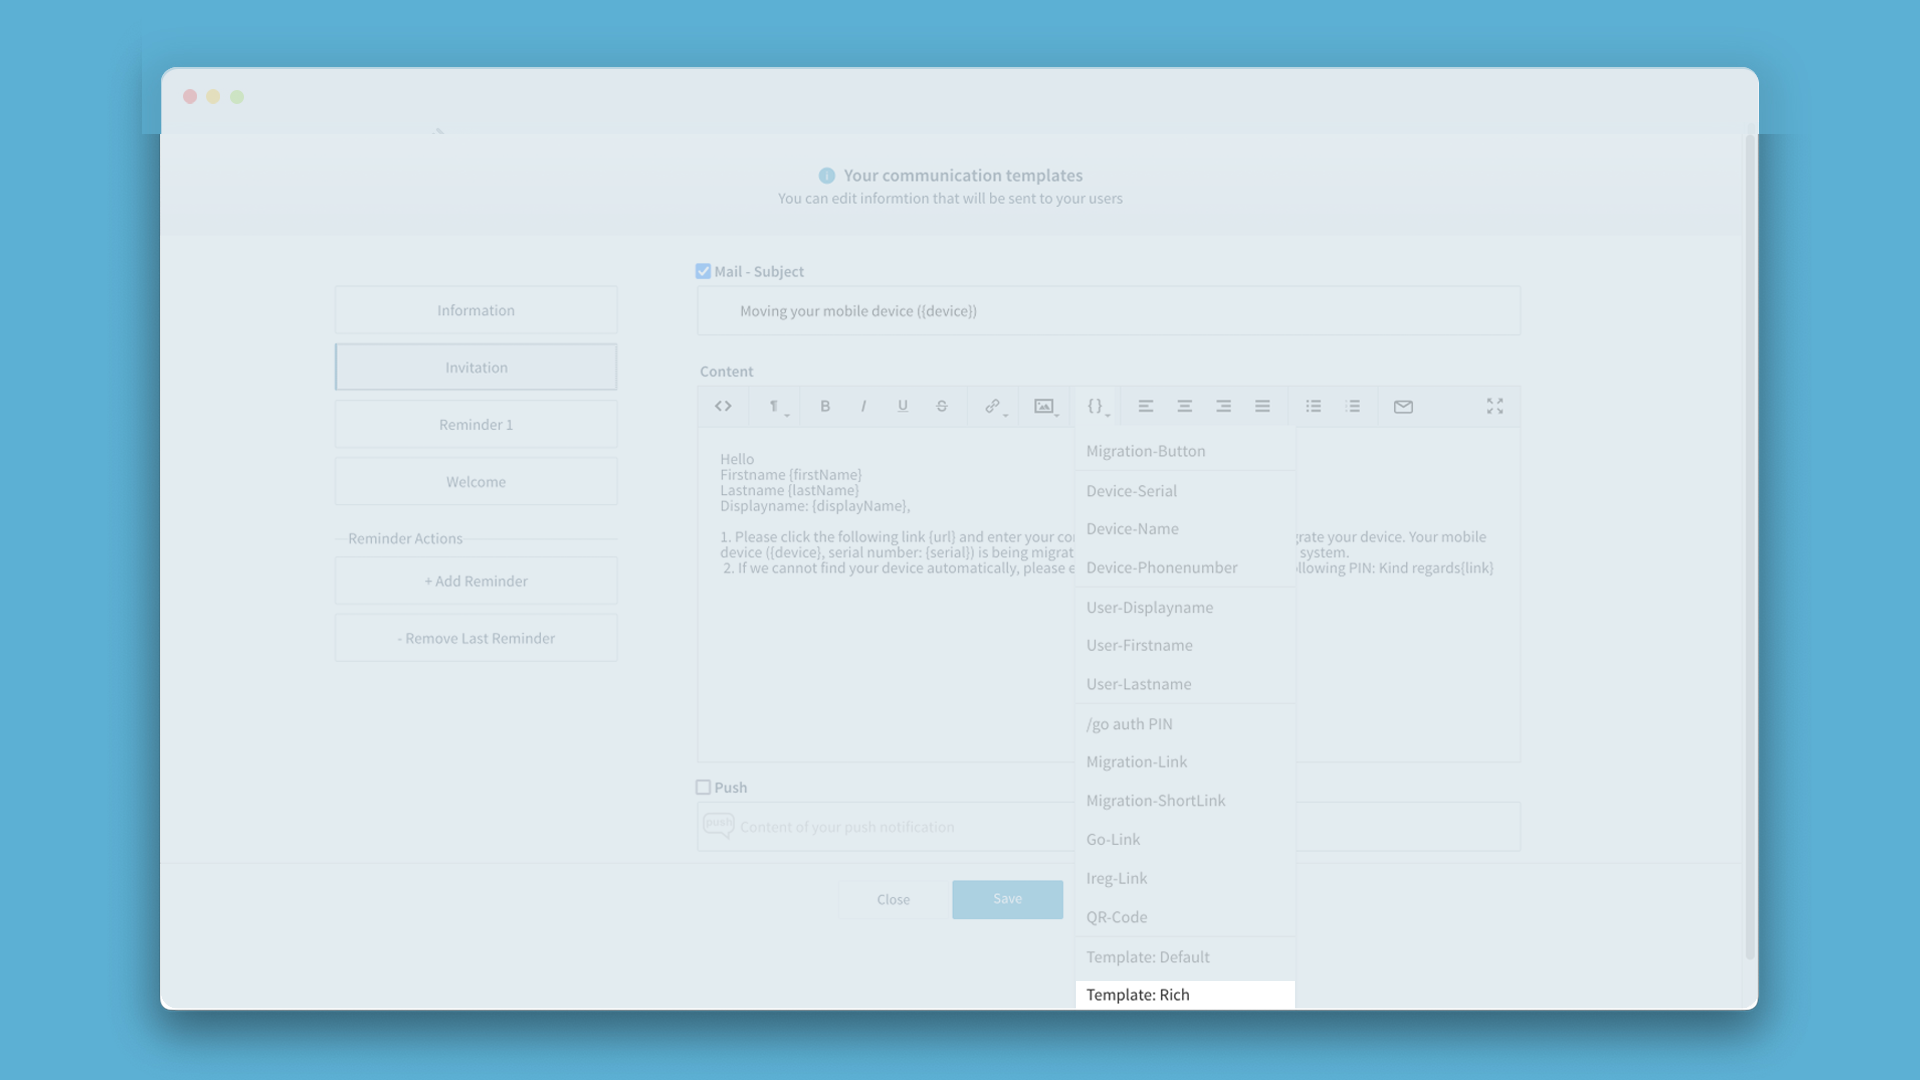
- Click on‘{}’in the menu bar, select ‘Template: Rich’ and adjust the content.
05.2. Invitation
The invitation will be sent to users to invite them to start the migration. It includes a link or a start button to initiate the migration at the mobile device. Each invitation is unique and will associate one user email address with one single mobile device.
The Invitation can be sent to the user/device by email, push notification (if the source UEM supports push/APNS) and/or by SMS (needs to be configured).
ATTENTION:
- As each invitation is unique and associated with a certain device, it is important that the migration is started exactly from the mobile device that is associated with the invitation. For that reason, it is recommended to indicate the device name and the serial number in the subject of the invitation email. In case the user has several devices to migrate, this allows him to select the right invitation email for each mobile device.
- It may happen that a user clicks on the link or start button when he is using a laptop instead of the mobile device where the migration should actually be initiated. In this case, a QR code appears, which can be scanned by the user from the device which is named in the subject of the migration mail. In case the user still starts the migration with the wrong device, the mobile device will be retired from the source UEM server, although the migration process was not started from it. The migration process will stop, and the mobile device won’t be registered on the target UEM server. The migration process has to be restarted from the mobile device to finish the process and register the device properly on the target server.
05.2.1. Default or rich templates
The Communication Tool offers different templates which help to setup an invitation.
NOTE:
- You need to make sure that the message includes a ‘Start Migration’ button or a link that will enable the device to start the migration. If you don’t do that, the EBF Onboarder will automatically add a start button or link to the invitation, but you cannot control the style of it.
- There can be reasons why an invitation email should not contain a migration link. To be able to create an email without a migration link, you need to use the ‘Template: Android Enterprise’. Other templates force you to include the migration link.
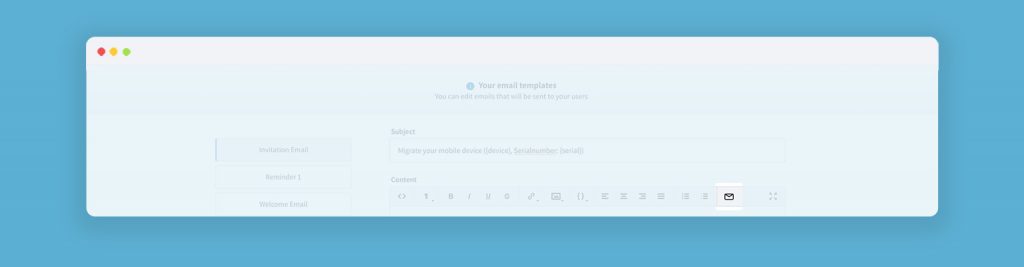
This is how you can setup the Invitation using our templates:
- Go to the migration project dashboard, open the Communication Tool and click on ‘Invitation’.
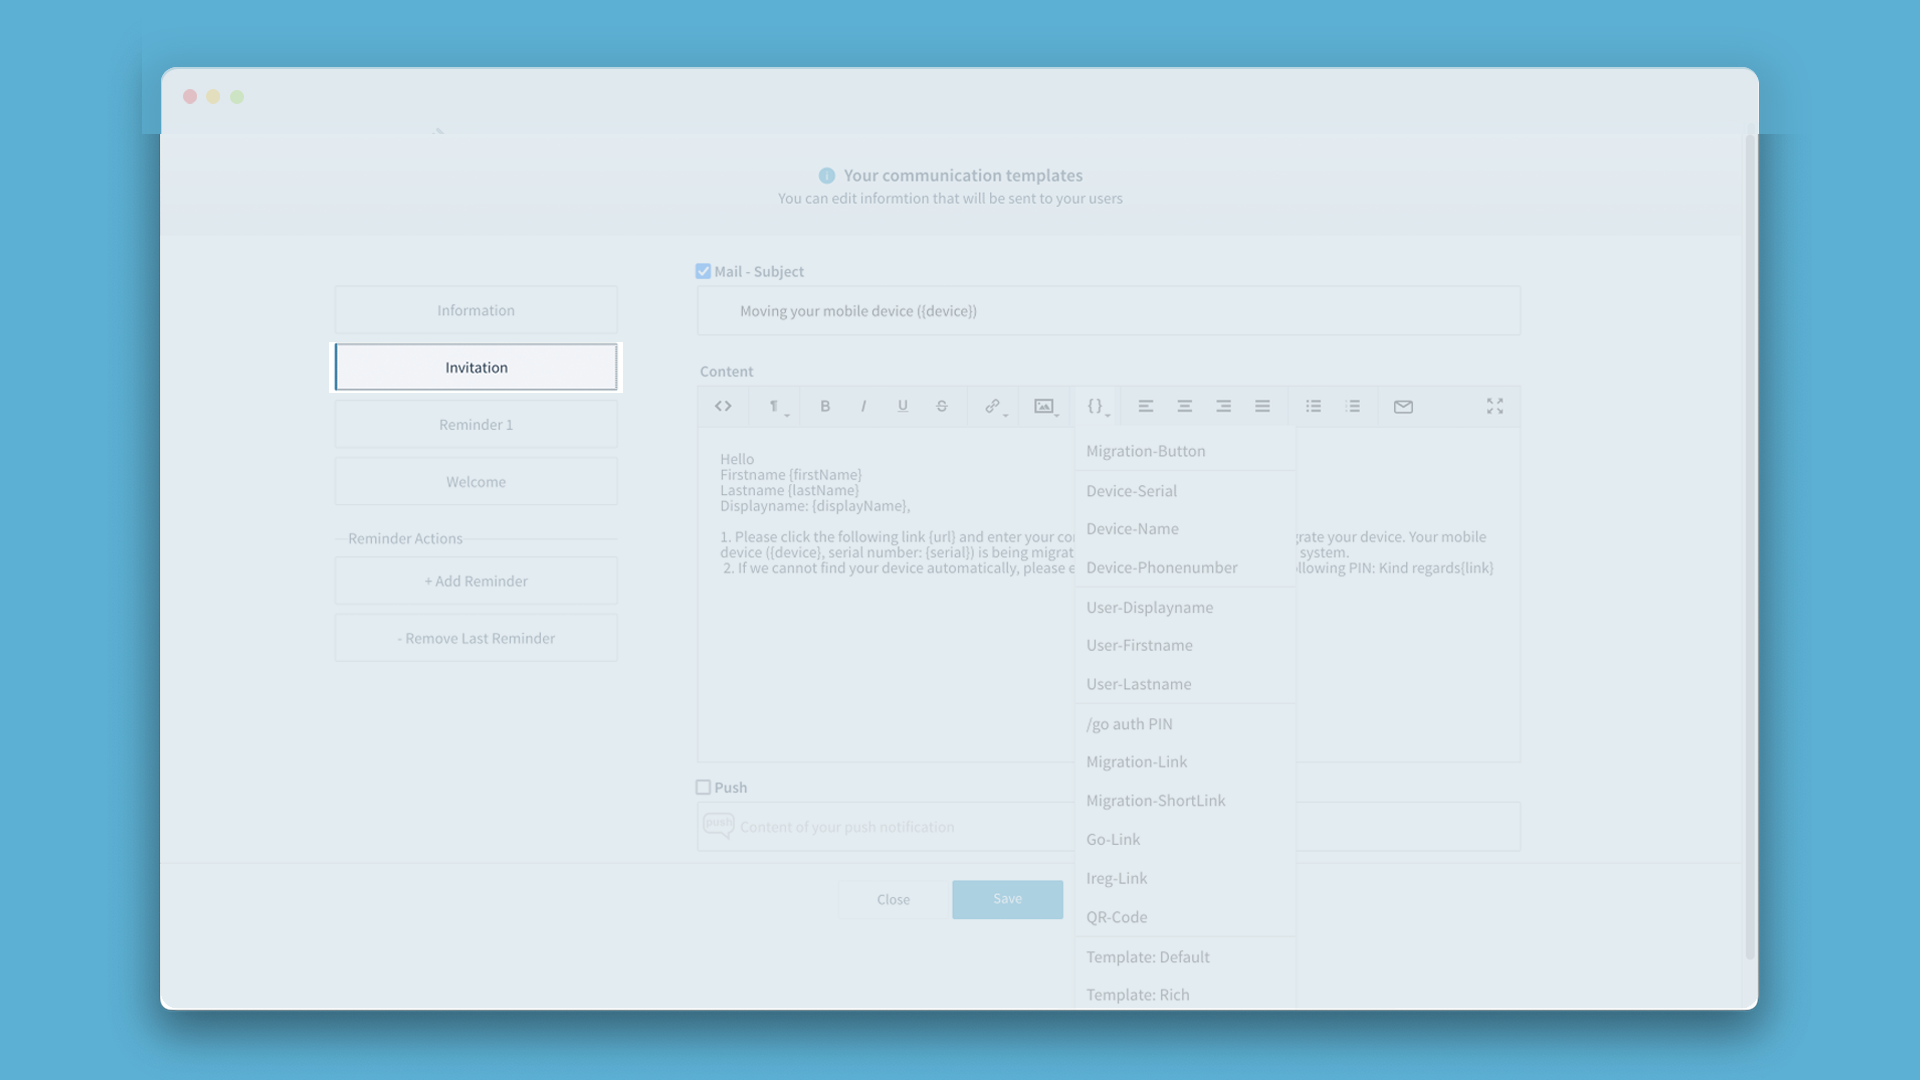
- Click on ‘{}’ in the menu bar, select ‘Template: Rich’ and adjust the content.
This is how you can setup the Invitation using our templates:
- Go to the migration project dashboard, open the Communication Tool and click on ‘Invitation’.
- Edit the subject. It’s recommended to include the device name and the serial number.
- Add the email content by using the basic WYSIWYG editor.
- By clicking on <>, you can edit the HTML source code. You must not add tags to the html source code. You should only add “<body></body>” content.
- By clicking on {}, you can insert variables or a template that can be used as a basis to create your own message. You can change it with the help of the editor.
NOTE: All placeholders are case sensitive!
Variables {HTML}Decription Migration-Button {link}Button to start the migration Device-Serial {serial}Serial number of the device Device-Name {device}Name of the device Device-Phonenumber {phone}Device phone number User-Displayname
{displayName}Username of the device user User-Firstname {firstName}First name of the device user User-Lastname {lastName}Last name of the device user /go auth PIN {pin}PIN of the /go device migration (see chapter 09.2.4) Migration-Link {url}Unique link for the device migration Go-Link {urlGo}Link for the /go device migration (see chapter 09.2.4) Ireg-Link {urlIreg}Link for the /ireg device migration (see chapter 09.2.5) Migration-Shorlink {shortUrl}Short link for the device migration QR-code {qr}QR-code for the device migration.
The user needs a second device to receive the email with the QR code or a printout of the QR code.Template:Default n/a Small text sample for the invitation email Template:Rich n/a Full text sample for the invitation email Template:Android Enterprise n/a Small text sample for the invitation email for Android Enterprise. Android Enterprise migrations should use the link {urlGo} or {urlIreg} or the migration URL can also be provided through a QR code using {qr}.
- Save the changes.
05.3. Reminders
It is recommended to remind users who have not yet started or completed the migration to do this. There are two ways to send reminders to your users:
- Manual reminders (default): You can manually send another invitation to your users. For this, you have to select the users/devices manually and click on ‘Send Invitation’ (see chapter 09). The next reminder will then be sent immediately to the selected users/devices. Make sure it is configured properly.
- Automatic reminders: You can also prepare reminders for your migration project which will be triggered automatically after a certain time. You can schedule several automatic reminders with the Email Content Tool.
Before sending out a reminder, the EBF Onboarder will check if the device is already in the target system (because of a manual migration). If the device is found in the target system, the migration is set to complete and the EBF Onboarder will not send out further reminders.
There are two types of automatic reminders:
- Reminders which are sent to users who haven’t started the migration yet (Status ‘Incomplete’, see chapter 05.3.1).
- Reminders which are sent to devices where the migration process was interrupted and which still need to register at the new UEM system (Status ‘Partially Complete’, see chapter 05.3.2).
ATTENTION: If you have activated automatic reminders, you cannot send an invitation email to specific users manually anymore (see chapter 05.3.3).
NOTE: Reminder mails always have the priority/importance: high.
Templates are available for the ‘Incomplete’ and ‘Partially Complete’ Reminders.
This is how you can setup the Reminders using our templates:
- Go to the migration project dashboard, open the Communication Tool and click on ‘Reminder 1.

- Click on ‘{}’ in the menu bar, select ‘Template: Rich’ and adjust the content.
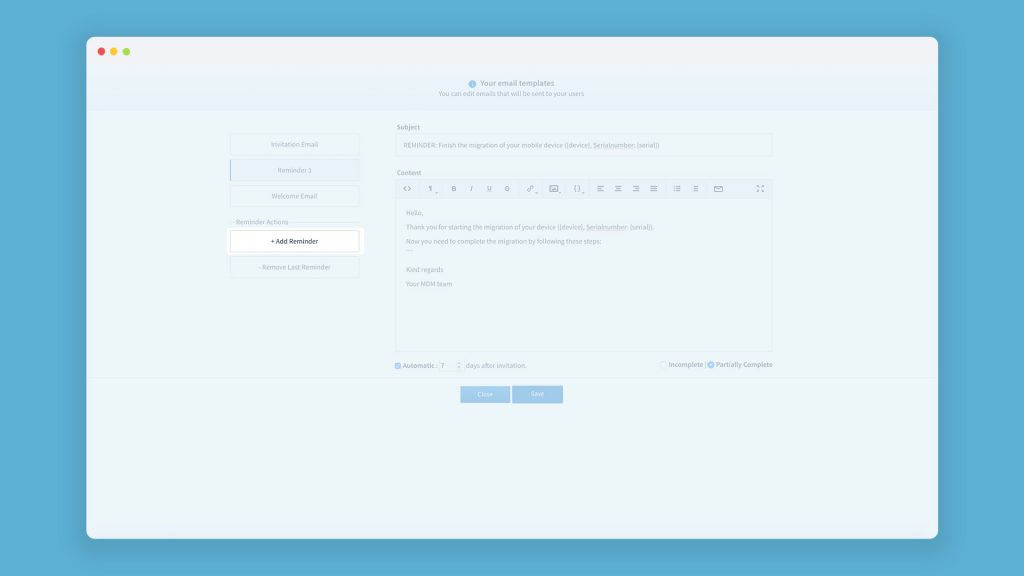
05.3.1. Regular automatic reminders (default)
Follow these steps to create an automatic reminder:
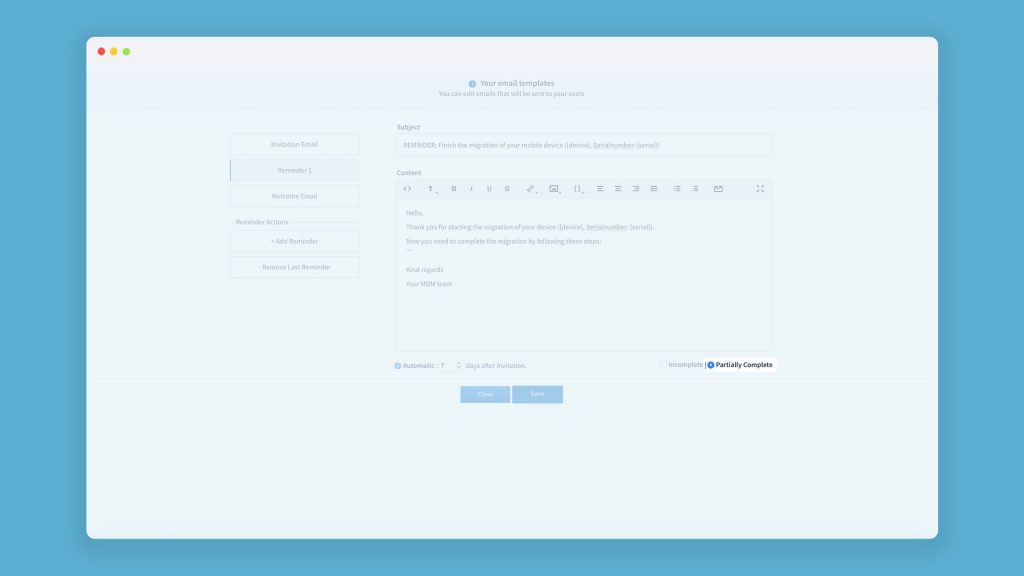
- Go to the migration project dashboard, open the Communication Tool and click on ‘Reminder 1’ to create the first reminder which the user receives if he did not start the migration after a certain time.
- Check the box ‘Automatic’ below the text field and enter when the reminder should be sent to the user.
- Keep the box ‘Incomplete’ checked at the bottom right of the text field.
- Keep or edit the subject.
- Edit the email content and keep it similar to the invitation email. If you edit the HTML source code directly, you must not add tags to the html source code. You should only add the “<body></body>” content.
- Edit the content for the push notification and/or SMS if you want to select this.
- Save your reminder.
If you want to add a second reminder, click on ‘Reminder 2’ and proceed in the same way as for Reminder 1. If you want to add further reminders, click on ‘+Add Reminder’ and proceed in the same way as for Reminder 1 + 2.
NOTE:
- The timer for the automatic reminders will start on the day the first invitation is sent (the first one of the whole migration project). So, if you send the first invitation email on March 1, March 2 counts as ‘day 1’. A reminder which is scheduled to be sent 5 days after the invitation was sent, will be sent on March 6.
- The reminder will be sent exactly ‘n’ days after the invitation was sent. If the invitation was sent at 9 am, the reminder will be sent at the same time ‘n’ days later.
05.3.2. Automatic reminders for interrupted migration processes
Usually reminders are sent to remind users that they should migrate their devices. But it also may happen that a user starts the migration process, but does not finish the migration process and does not register at the target UEM server – e.g. because of a lack of time, a wrong device used, network issues or missing credentials. So, a reminder can also be useful to help users to finish the migration they already started. Often the device was already retired on the source UEM and the migration must be restarted on the device again to finish the registration at the target system. Thus, you should create another reminder for the above-mentioned situations for each regular reminder.
Follow these steps to create another automatic reminder:
- Select ‘Partially Complete’ at the bottom right of the text field:
- Edit the subject and refer to the migration which was interrupted.
- Edit the email content and refer to the migration which was interrupted. If you edit the HTML source code directly, you must not add tags to the html source code. You should only add the “<body></body>” content.
- The settings for ‘Automatic’ do not need to be changed and can be the same as for the regular reminder.
- Save your reminder.
- Proceed in the same way for other reminders which you have set-up with the box ‘Incomplete’ checked.
05.3.3. Consequences of automatic reminders
If you have already activated automatic reminders (‘automatic’ box still selected), you cannot send an invitation email to specific users manually. But there are ways how you can handle this which are described in the following two chapters.
Devices with the status ‘Pending’
If you want to send a reminder manually to selected devices with the status ‘pending’, which means that they have not started the migration yet, you can unselect the check box ‘automatic’. Then you will be able to select users one by one to send your reminder manually. The content of this reminder will be the one of the reminder which was supposed to be sent next.
You can switch back to the automatic mode again by selecting the check box again. The reminder which was originally planned to be sent next will then be sent to the user.
EXAMPLE: If you have created three different messages for reminder 1, 2 and 3, and reminder 1 has already been sent automatically, then reminder 2 would be the next reminder to be sent. If you decide to send a reminder manually instead and uncheck the ‘automatic’ box, the manual reminder will use the content of reminder 2.
Devices with the status ‘Partially Complete’
For devices that are in the middle of the migration process, which means that the migration was interrupted (status ‘Partially Complete’), you cannot send a reminder manually as you won’t be able to select the users in the list anymore – even with the ‘automatic’ box unselected. But you can still add a new automatic reminder for the upcoming days which addresses all the devices that need to be reminded.
Follow these steps to add a new reminder:
- Click on ‚+Add Reminder‘:
- Check the box ‘Automatic’ below the text filed and enter when the reminder should be sent to the user.
ATTENTION: The number needs to be higher than the number of days that have passed since the first invitation was sent.
EXAMPLE: If a migration was started on February 1 and today is February 21, 20 days have passed. If you want to send another reminder to a specific user, you need to update the migration, add a reminder and use 21 days or more as a setting for the sending date. In this case not only the specific user, but all users who have not started the migration yet (status ‘Incomplete’) or all users where the migration process was interrupted (status ‘Partially Complete’) will receive the reminder.
05.4. Welcome message
When the device was successfully migrated from the source to the target UEM and is fully registered at the target system, EBF Onboarder can confirm this by sending a welcome message. This message can also provide further instructions to the user.
This is how you can setup the welcome message using our template:
- Go to the migration project dashboard, open the Communication Tool and click on ‘Welcome’.
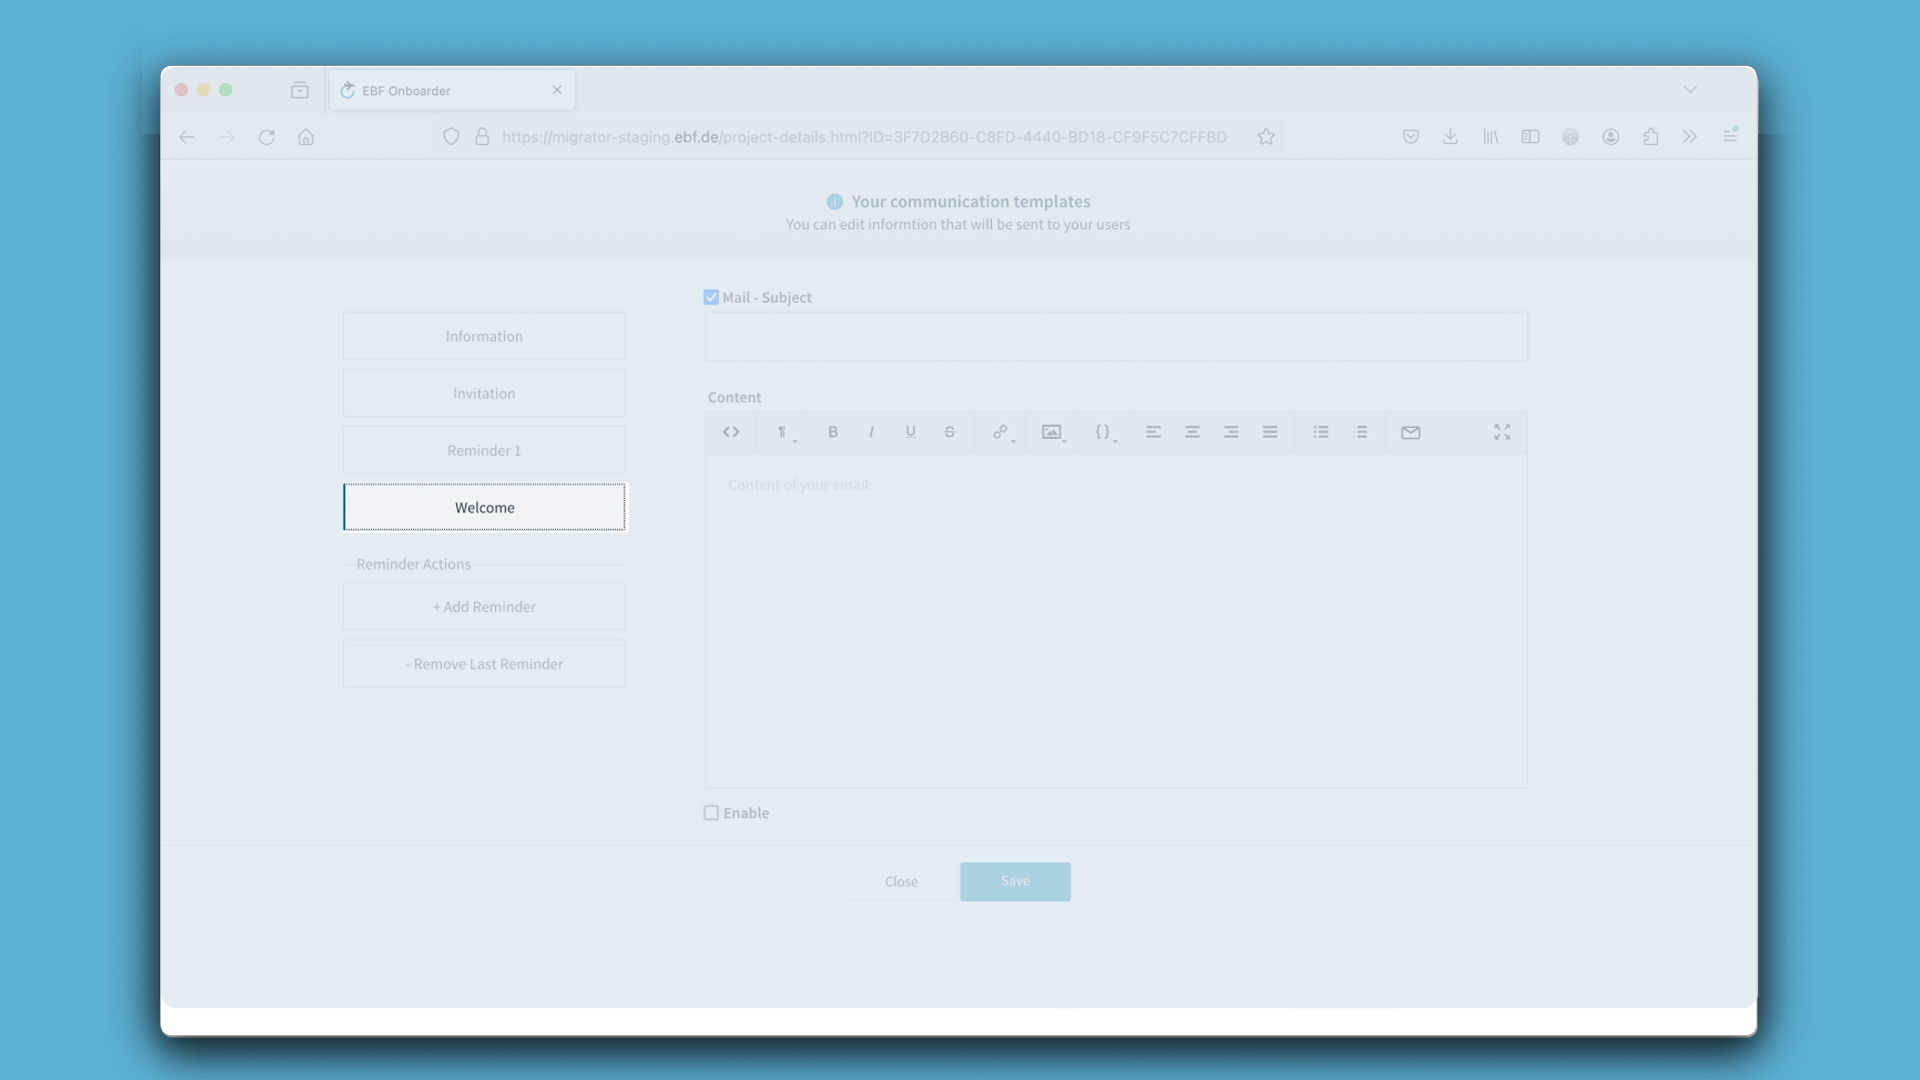
- Click on ‘{}’ in the menu bar, select ‘Template: Rich’ and adjust the content. If you edit the HTML source code directly, you must not add tags to the html source code. You should only add the “<body></body>” content.
- Check the box ‘Enable’ to activate the sending of the welcome message once the device migration is complete. You can deactivate the box, when you want to save the content, but don’t want the welcome message to be sent.
NOTE: The longest timeframe for a device to migrate is 2 weeks. After 2 weeks, EBF Onboarder cannot ensure to send the welcome message when the device is finally registered.
05.5. Test email
After setting up the different emails, it is recommended to test the different messages. The emails will be sent to the admin’s email address.
Follow these steps to send a test email:
- Open the different emails in the Communication Tool.
- Click on the envelope icon:
- A test email will be sent to the admin’s email address.
- Check if the content is correct.
- Change the email content if necessary.
NOTE: A test with the invitation mail will not count for license management.
05.6. Template Sets
In larger migration projects you might need to use different communication messages for your users, e.g for different countries with different languages or for different audiences. You can use Template Sets for these situations.
05.6.1. Using Template Sets
Follow these steps to use a Template Set (you can open the configuration in any project):
- Open the Communication Tool.
- Click on the ‘Load Templates’ icon.
- Click on ‘Template Sets’.

- There is one default template available which is shown in a popup. It contains all Rich Text communication types already available in the EBF Onboarder: Information, Invitation, Reminder and Welcome message. Click on ‘Save’ to select it.
- Click on ‘Yes’ to confirm that the current configuration should be overwritten by the configuration from the Template Set.
- The current setup will be overwritten by the Template Set. In the bottom right you will notice a new information: Applied template: Default.
- From now on, you will find the information about the Template Set in use and further information in the buttom right if your original Template Set was modified after selecting it.

05.6.2. Saving own Template Sets
Follow these steps to save a Template Set:
- Create all message types (Information, Invitation, Reminder and Welcome message) as required. Do not forget to setup the Reminder for incomplete and partially complete migrations including the number of days.
- Click on the ‘Load Templates’ icon, ‘Template Sets’ and ‘Save’.
- The EBF Onboarder will ask you for a name for the template. Provide a proper name to identify this template also after a longer time.
- Click on ‘Yes’ to save the Template Set.
- If you want to use this Template Set in the current project, click on ‘Save’ again.
05.6.3. Managing Template Sets
If you have created different Template Sets, you might have a setup which looks like this:

Follow these steps to manage your Template Sets:
- Open the Communication Tool.
- Click on the ‘Load Templates’ icon.
- Click on ‘Template Sets’.
- Click on the name of the Template Set.
- Choose between the following options:
- Click on the icon with the arrow if you want to update an existing Template Set.
NOTE: If you load a Template Set, change text, save the project and open the project again, the EBF Onboarder will inform you that you are working on a template, that got changes after loading it. In this case, you can use the update feature to update the existing template. This will no effect older projects where this template was used.
- Click on the icon with the trash can if you want to delete a Template Set.
- The default template cannot be edited or deleted. It’s marked with an icon with a lock. You can load it, perform changes and save it with a new name.
- Click on the icon with the arrow if you want to update an existing Template Set.
- After working on the template, always click on ‘Save’ when closing the Communication Tool.
NOTE: If you saved a project with a custom Template Set and applied a category, the next time you create a new project with this category, the same Template Set will be applied automatically.