
Administrators can follow the status of a migration project easily. Depending on the project progress, they can take actions to drive the migration forward.
10.1. EBF Onboarder dashboard
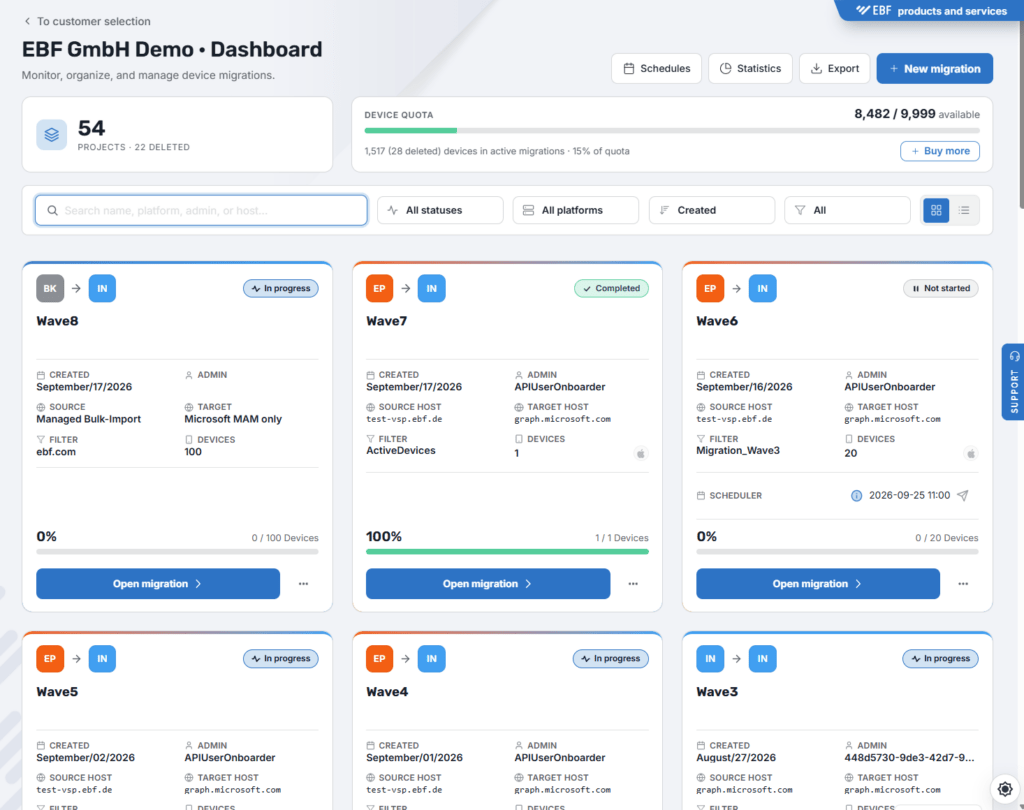
The dashboard of the EBF Onboarder gives you an overview of the progress of all migration projects. You access the dashboard, once you login to the EBF Onboarder platform.
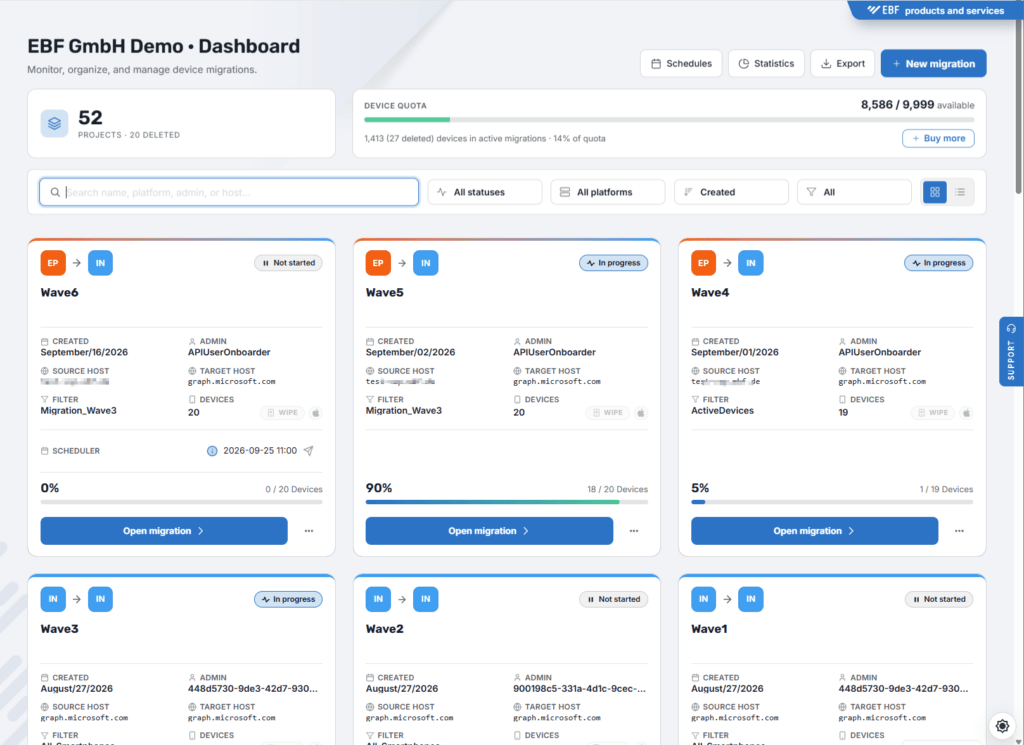
In the header, the number of all active migration projects of your tenant, the quota of the migration and the number of licenses still available is summarized.
You can also purchase further licenses.
A bell icon at the top informs you about errors which might create problems for your migration project. Please check if there is an issue on your side before contacting EBF. The number of records is limited to 100.
A megaphone icon at the top informs you if there are news as an outage or an upcoming update.
Using the tile button you can switch the display of the projects.
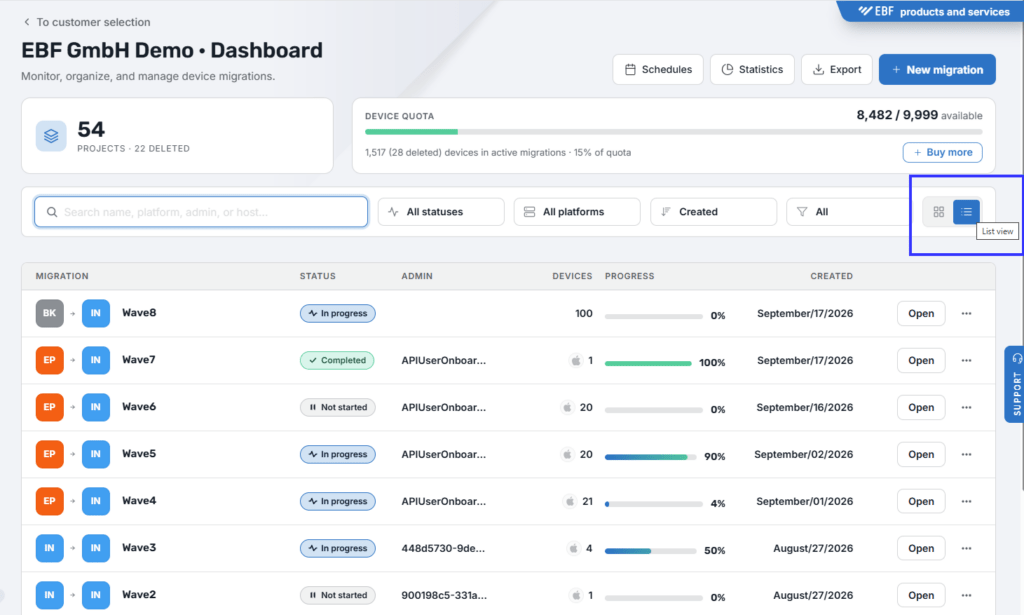
Using the search field, you can search for the projects and the device data within the projects. You can search for email, device name, serial, target user id and project names. The Onboarder will display only the projects where the search was successful. If you open a project afterwards, only the device or devices hitting the search are displayed and the search string is highlighted. You can check the status and preform actions for these devices.

To clear the search hit the x within the search.
Note:
If you go back to the dashboard from the project, the initial search is still active. Press the x reset the search.
The boxes below, summarize the status of each migration project – with the number of devices included and the percentage of devices which are already migrated.
The button ‘Schedules’ (next to the ‘+New Migration’ button) will show you the scheduled tasks. You can create and edit the schedules. Please check chapter 8.2.1.2 for more information.
The button ‘Statistics’ (next to the ‘+New Migration’ button) allows you to see statistics of your migration. The page will provide several statistics including the date and time, and also the instance for support reasons. If you have selected a certain category on the EBF Onboarder dashboard, the statistics will be calculated for that category. To get the statistics for all projects, you need to select ‘All’ in the category drop down before clicking on the statistics button.

The statistics can also be displayed in a bars/funnel:

Explanation of the two bars:
- First bar: Number of migration projects (including the deleted projects)
- Second bar: Number of deleted projects only
- Blue color: Devices migrated and confirmed in the target system
- Green color: Devices migrated, but not confirmed in the target system
- Yellow color: Invited devices
- Grey color: Devices
Explanation of the diagram:
- The top left box shows the currently active migration, the number and percentage of the invited and completed devices. It also shows the numbers of communication messages sent to the users, also the remidners and welcome messages.
- The right box shows the same date, but for all, also the deleted projects.
- The line below shows all available status. If you move the cursor above a status, the same will be highlighted in both boxes above
Explanation of the table:
| All = Migration projects (including the deleted projects) | Deleted = Deleted projects / Active = Active projects | |
| Invited (Yellow) | AllNumber of invited devices in all projects | Deleted / ActiveNumber of invited devices in deleted/active projects |
| Done (Green) | AllNumber of devices migrated, but not confirmed in the target system in all projects | Deleted / ActiveNumber of migrated, but not confirmed in the target system devices in deleted/active projects |
| Confirmed (Blue) | AllNumber of devices migrated and confirmed in the target system in all projects | Deleted / ActiveNumber of devices migrated and confirmed in the target system in deleted/active projects |
| 1 reminder (Light orange) | AllFirst reminders sent to devices in all projects | Deleted / ActiveFirst reminders sent to devices in deleted/active projects |
| 2 reminders (Orange) | AllSecond reminders sent to devices in all projects | Deleted / ActiveSecond reminders sent to devices in deleted/active projects |
| 3 reminders (Dark orange) | AllThird reminders sent to devices in all projects | Deleted / ActiveThird reminders sent to devices in deleted/active projects |
| More reminders (Red) | AllFurther reminders sent to devices in all projects | Deleted / ActiveFurther reminders sent to devices in deleted/active projects |
NOTE: You can use the ‘Export’option at top left to export the tables as a CSV, Excel or PDF file. For the PDF, the Diagrams will be exported as displayed.
10.2. Migration project dashboard
For each migration project, you can get further details about the migration progress through a migration project dashboard:
Go to the EBF Onboarder dashboard and click on ‘Migration Details’:
General information about the status of your migration can be found in the header:
- The number of devices migrated compared to the total number of devices of the migration project
- The project progress in percent
- The total number of devices included in the migration project
- If there is a grey timer icon the Onboarder is waiting for an internal service to update the information(runs every 5 minutes):

- The top right corner of the project plate informs about the status of the project:
- Active
- Not Active
- Inactive
- Completed

Detailed information about each device is shown in a list. You can see the associated user’s email address, phone number (if available), the device name and serial number for each device. And there is a colored bar in the right column which illustrates the migration status. Read more about that in chapter 09.2.1.
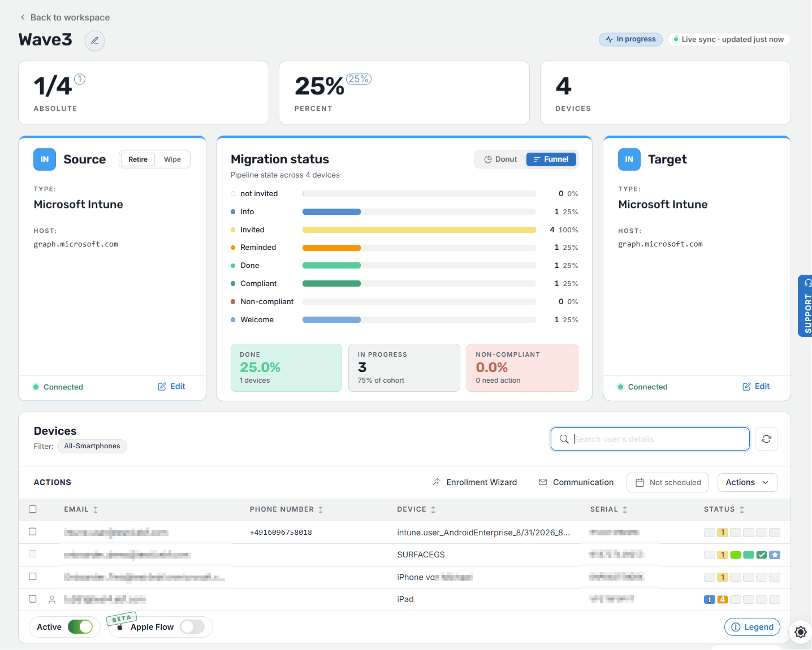
In the Devices section on the right, you can find a search button and a button to refresh the page.
Live Sync:
If you do not have a config window open or a device checked the page will automatically reload after 5 minutes. Note the Live Sync on the top right.
The former function Refresh has been renamed to Reload
10.2.1. Graphic and mouse-over information
Each device’s status is shown as a small colored icon. Click the ‘Legend’ button next to the device list to see the current status definitions:

Hovering over a device’s status icon shows more detail, such as when the last invitation or reminder was sent.
The status definitions are self documenting in the Legend popup, so they stay accurate even as the underlying migration status categories evolve.
There is a colored icon in the right column which illustrates the migration status.
When you hover your mouse over the icon, you will see more information for the corresponding device.
ATTENTION for Microsoft Intune as a target system: Please read the separate document to learn more about this. You can find it here.
| Color | Status | Progress | Pop-up |
|---|---|---|---|
 |
StatusUser Not Informed: This device was not selected for receiving an invitation. |
Progress
Sent
Received
Retiring
App Store
|
Pop-upThe pop-up confirms that no invitation was sent yet. |
 |
StatusInformation Sent: The Information (by mail/push/sms) was sent out by the Onboarder server |
Progress
Sent
Received
Retiring
App Store
|
Pop-upThe pop-up provides the timestamp of the sending date of the last invitation sent. |
 |
StatusInvitation Queued: The invitation is pending to be sent. This can take up to 15 minutes. |
Progress
Sent
Received
Retiring
App Store
|
Pop-upThe pop-up provides the timestamp of the sending date of the last invitation sent. |
 |
StatusPending, User Informed: The device should have received the invitation by email or notification and the user can start the migration at any time from the device. |
Progress
Sent
Received
Retiring
App Store
|
Pop-upThe pop-up provides the timestamp of the sending date of the last invitation or reminder. |
 |
StatusPending, User Informed: The device should have received the invitation by email or notification and the user can start the migration at any time from the device. |
Progress
Sent
Received
Retiring
App Store
|
Pop-upThe pop-up provides the timestamp of the sending date of the last invitation or reminder. |
 |
StatusThe user opened the migration link on the device but did not press the start migration button. |
Progress
Sent
Received
Retiring
App Store
|
Pop-upThe pop-up provides the last notified info. |
 |
StatusThe user opened the migration link, pressed the start migration button, tried to authenticate, but failed. |
Progress
Sent
Received
Retiring
App Store
|
Pop-upThe pop-up provides the last notified info. |
 |
StatusFailed: The user started the migration, but the migration failed. For example, it lost power during the retiring process or was not able to retire from the source MDM. This issue needs to be fixed, and the migration must be restarted on the device (click the migration link again), so that the user can continue the migration. |
Progress
Sent
Received
Retiring
App Store
|
Pop-upThe pop-up provides the timestamp of the failure (German time). |
 |
StatusInterrupted: The user started the migration, but the device migration was interrupted after retiring the device. The user was not sent to the App Store. The issue (e.g. loss of network, loss of access to the browser, migration start from a laptop) must be fixed and the migration must be restarted with the EBF Onboarder, so that the user can continue the migration. |
Progress
Sent
Received
Retiring
App Store
|
Pop-upThe pop-up provides the timestamp of the sending date of the last invitation sent and the retiring date. When automatic reminders are set, this device will receive a reminder with the status ‘partially complete’ (see chapter 05.2.2) which is targeting this situation. |
 |
StatusRetired from Source: The device has been unenrolled from the source system |
Progress
Sent
Received
Retiring
App Store
|
Pop-up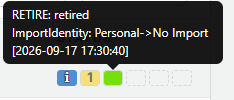 |
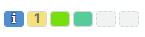 |
StatusSuccess: The user went through the migration process and the device was redirected to the App Store or web enrollment to install or open the registration App of its UEM target system. But the device has not been found in the target yet. |
Progress
Sent
Received
Retiring
App Store
|
Pop-upThe pop-up provides the timestamp of the sending date of the last invitation sent, the date of the redirection to the App Store and the retiring date. |
 |
StatusPartial Success Device found in the target but it is not compliant |
Progress
Sent
Received
Retiring
App Store
|
Pop-up |
 |
StatusMigration completed Device found in the target and is compliant. Migration completed |
Progress
Sent
Received
Retiring
App Store
|
Pop-up |
 |
StatusDesktop migration Migration in progress, device not found in target yet |
Progress
Sent
Received
Retiring
App Store
|
Pop-up |
 |
StatusIf you add a label or group to the users while migrating, the bar shows 5 tiles. |
Progress
Sent
Received
Retiring
App Store
|
Pop-up |
 |
StatusA label/group should be added to the user, but the target systems reported an error. But the user continued the migration. |
Progress
Sent
Received
Retiring
App Store
|
Pop-up |
NOTE: The number which appears in the middle of the status icon explains how often a device received an invitation or reminder. For example, an orange plate with a ‘2’ means that the device was notified twice and did not start the migration yet.
10.3. Reports
The EBF Onboarder provides two types of reports which provide an overview about the migration progress, and which can be analyzed with other tools.
10.3.1. Active migrations
You can download CSV files and a log file with details for all active migration projects.
To do that, go to the EBF Onboarder dashboard and click on ‘Export’:

A popup which allows you to choose from three options will be displayed. These options are described below:

NOTE: The CSV files may use the ‘;’ separator instead of the comma ‘,’. So you must change the formatting when importing the data for your file.
10.3.1.1. Summary as CSV file
You can export a summary by clicking on ‘Summary’ and select the format.
The PDF format provides a file created and graphical structured according to your projects.

The Export summary as CSV file and XLSX file will display every active migration of your dashboard in one row and provide information such as:
- The project id, project creation date/time, the date/time, when the project was suspened(empty if active) and the project title (project_id, project_creation, project_suspened, title).
- The type, host and group/label of the source system (sourceType, sourceHost, sourceSelection)
- The type and host of the target system (targetType, targetHost)
- The total number of devices (userCount)
- The total number of devices which have started to migrate (startedCount)
- The total number of successfully migrated devices (doneCount)
- The total number of devices confirmed at target (confirmedCount)
- When was the project deleted(deleted)
- Link to the project(project_link)
- Name/ID of the target group(targetGroup)
- Percentage of devices left and done the migration and confirmed at target (left, done, confirmed)
10.3.1.2. Details of all projects as CSV and XLSX file
You can export a detailed report by clicking on ‘Export details of all projects’. This file will display all active migration projects with several details including the status of all devices of your whole instance. It will allow you to conduct deeper analysis.
It will take almost 10 seconds before the download starts and the download itself will also require some time, depending on the number of migration projects. You will see an empty page in your browser with a command line while gathering the information. The file can be up to 30 MB.
For deeper analysis the column ‘Accessed’ will provide information about the browser, IP address and date and time (CET) the invitation link was opened.
Check the box for “Only include latest per device” if you want to have only the newest details (one line) for one device.
10.3.1.3. Daily report by email
If you want to receive the report by email daily, please contact support@ebf.com to enable feature in your tenant. Once enabled you can access the report options in the Tenant Settings.
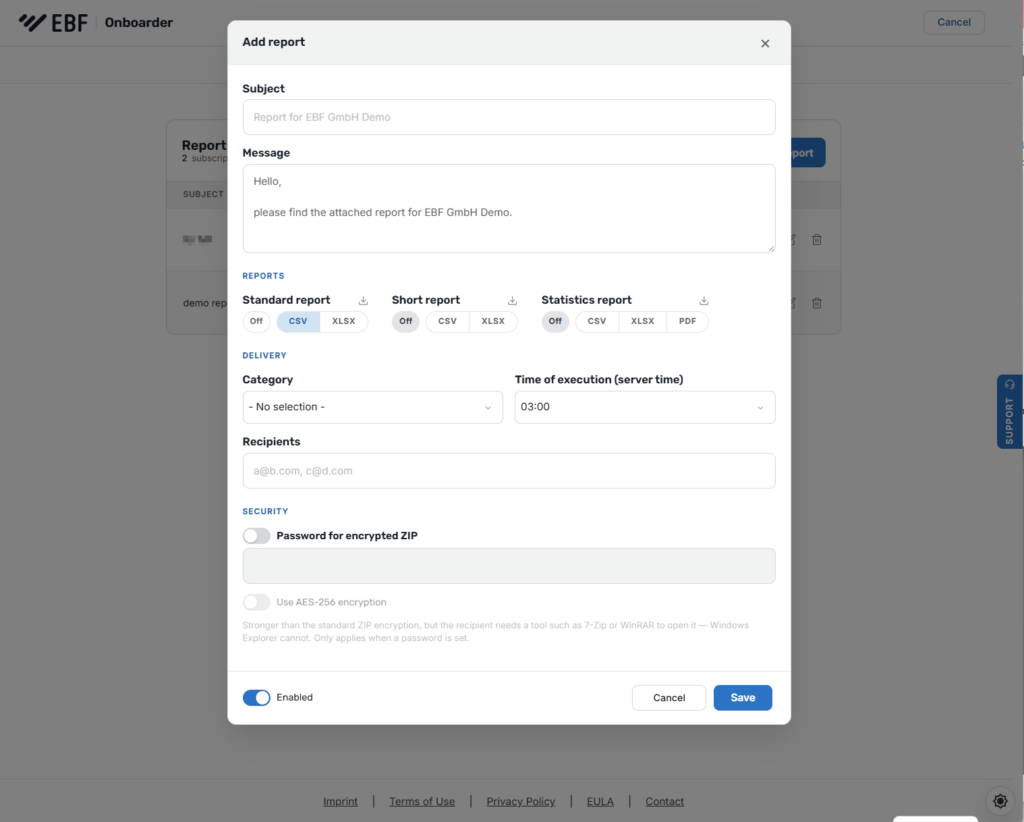
The following settings need to be configured:
- Standard report or Short report:
You can select two different reports and two formats.
The “Standard report” will provide the content of the “export details of all projects” report.
The “Short report” contains the following columns only: Project name, user name, mail address, device name, serial, migration status.You can receive up to two reports a day. After enabling you need to specify the time when the reports should be created and sent. The time set is the local time of the server in Germany. Due to load balancing, the time between the reports will be at least 8 hours. - Select the Category, if required
- Select the time (CET/MEZ) when the report should be generated.
- Recipients: The list of email addresses, separated by a ‘,’.
- Password: As the report is sent through the internet and can reach email attachment limits, the report will be sent in a password protected zip file. The password is not mandatory.
ATTENTION – We encourage setting a password.
If required, you can open AES-256 file, enable this option as well.
Save the settings. You can expect the report to be sent to you within the next hour of the time you have set.
Audit logs
You can export audit logs for all admin actions and system entries by clicking on ‘Audit logs’ (limited to the last 5000 entries). This file will display all actions done by administrators accessing your instance and also some system actions. For example, you can see if a migration is confirmed in Intune if a SMTP sending limitation is detected or if an admin failed to login to the EBF Onboarder.
10.3.2. Single migration project
You can download CSV files with further details for a single migration project.
To do that, go to the migration project dashboard and click on ‘Download’:

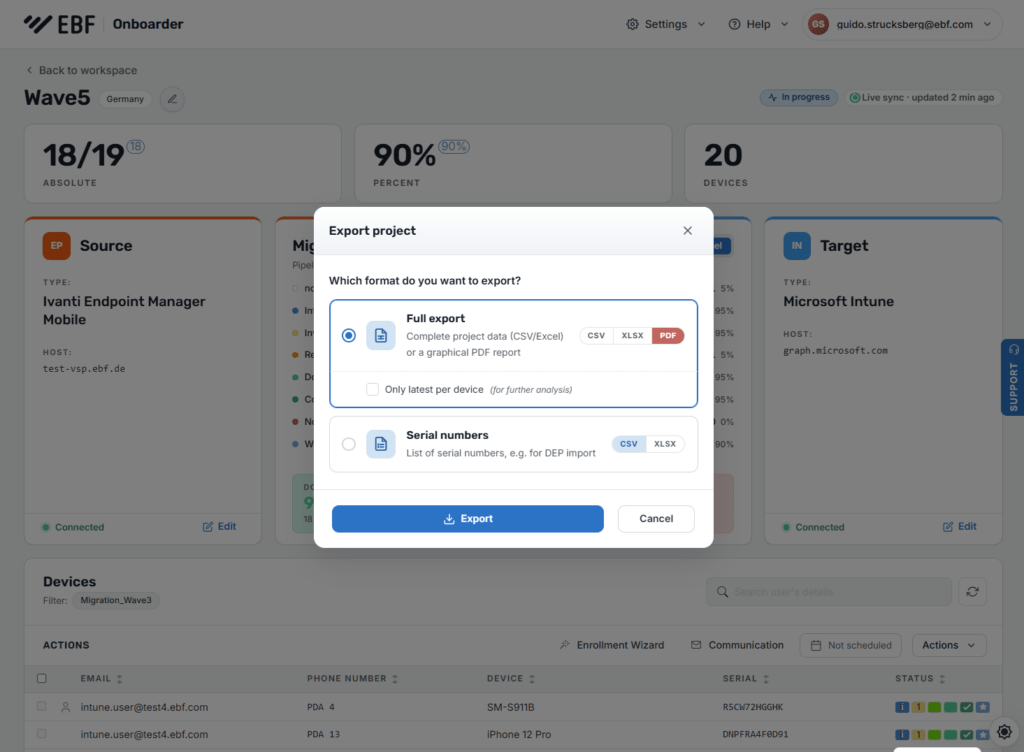
A popup which allows you to choose from two options will be displayed. These options are described below:
10.3.2.1. Project report as CSV file
You can export a summary by clicking on Full report and select the format.
The downloaded file starting with ‘ProjectDetails-<ProjectID>’ will for each device provide information such as:
- An information if the device was notified (notified)
- An information when the migration was created for this device (created)
- An information how many reminders were sent to the device (reminders)
- The user ID (userid)
- The device ID of the source system (deviceId)
- An information if a device was migrated successfully (done)
- The phone number of the device (phoneNo)
- An information if this is a company owned or BYOD device (employeeOwned)
- The email address (eMail)
- The serial number (deviceSerial)
- The device model (deviceIdentifier)
- The device ID of the target system (targetDeviceId)
- The number for the position of the device in the project (selIndex)
- EBF Onboarder internal device user ID (ID)
- The ID of the migration set (projectID)
- Date/time, the project was suspended, empty if active (not suspended)
- The information, if the device was sent to the App Store for getting the registration App for the new UEM target (notifiedApps)
- The time of the checkin at the target system (checkin)
- The start migration link (link)
- A counter for devices that are present in the migration project (one for each device) to display used/free licenses (cnt)
- The steps of the migration process such as ‘REGISTER’ or ‘RETIRE’ (action) and its success (result)
- Time/date when the device performed migration actions (created)
- The performed action (action)
- The ID of the action (actionID)
- Information about the performed steps – like retired, ‘manually set done by (message)
NOTE:
- There will be several rows for one device – one for each step of the migration progress. Check the box “Only include latest per device” to have only the newest line per device, so only one line.
- Instead of an email address there may be a serial number or IMEI in the list. This allows a more precise filtering which is especially useful if a user has several devices.
- The PDF will also provide a graphical info about this migration project.
Another file starting with ‘ProjectMails-<ProjektID>’ will provide you with a list of messages sent to the user per device with date-time for the invitation, all reminders and the welcome message (if the option was selected).
NOTE: The ID of the device in the ‘ProjectDetails-<ProjektID>’ file is the ‘UserID’ in the ‘ProjectMails-<ProjektID>’ file. If the second file is not downloaded, please check the popup blocker of your browser.
List of serial numbers
You can export a list of serial numbers which you can use to manage DEP, for example, by clicking on ‘List on Serial Numbers’.
The downloaded file ‘serialNumbers-<ProjectID>’ will only contain the serial numbers for the devices of this migration project.
10.4. Example: A device migration from start to finish
This section follows a single device through a complete migration, so you can see how each stage is reflected on the project dashboard and in the per device status bar. Hovering over any status icon shows a tooltip with the exact time the step happened.
1. Project created.
Right after saving the migration project, the device is listed but no action has been taken yet.
The status is ‘not invited’ and the migration ring shows 0% done:

The freshly created project: one device, status ‘not invited’, 0% done
2. Information sent.
After selecting the device and using ‘Send Information’, the advance announcement goes out.
The communication ring shows Info at 100%, and the first status cell turns blue:

The Information message has been sent: Info is now 100% and the first status cell is filled.
Hovering over the blue status cell shows exactly when the information mail was sent:
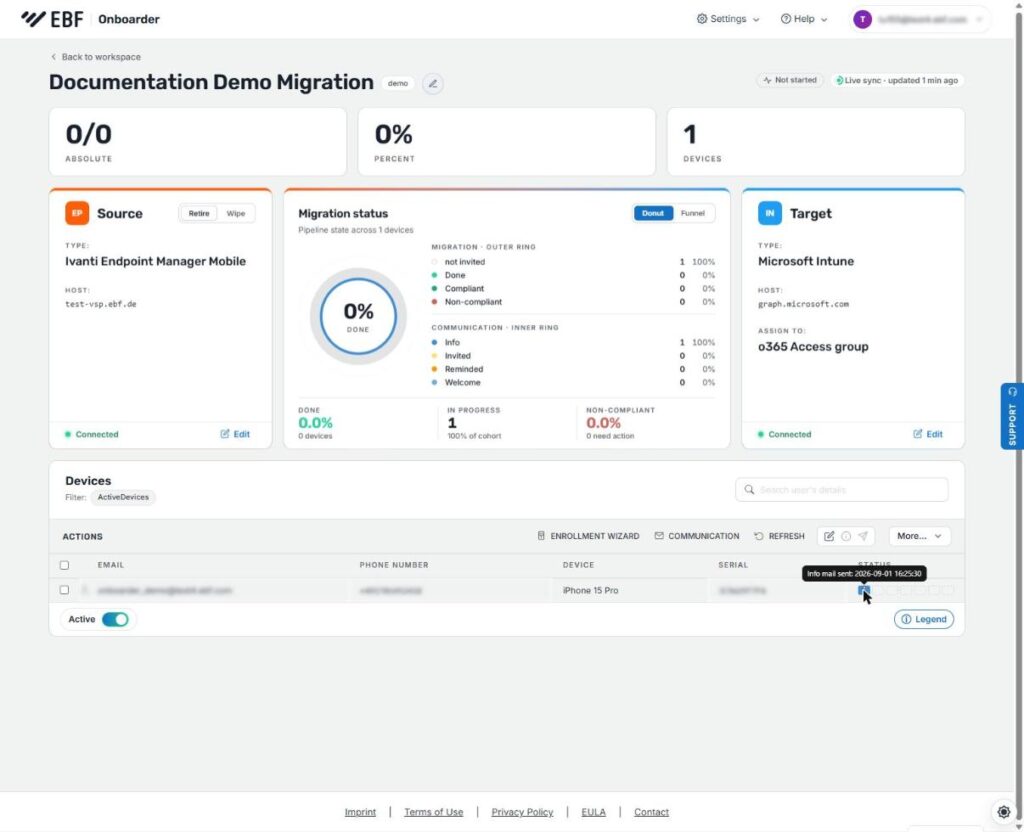
The tooltip confirms the time the information mail was sent.
3. Invitation sent.
Using ‘Send Invitations’ delivers the actual migration link. The communication ring shows Invited at 100%, and a second (yellow) status cell appears:
The tooltip on the yellow cell shows the invitation time and the channels used (Mail, Push):
The invitation was delivered by Mail and Push at the time shown, queued in this example.
4. User opens the link.
When the user opens the migration link on the device, an eye icon appears.
Its tooltip records the time the link was opened together with the IP address it was opened from:
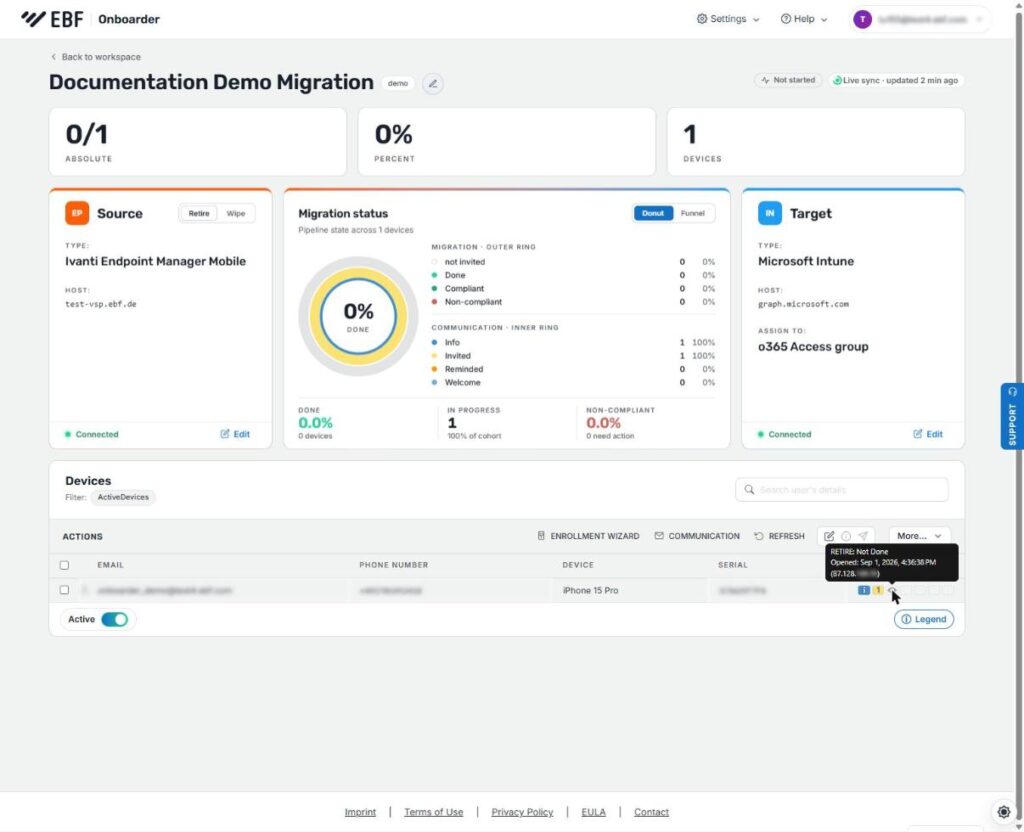
The eye icon shows the user has opened the migration link, with the time and originating IP.
5. Migration completed.
Once the user starts the migration on the device, it unenrolls from the source system and registers in the target.
The migration ring jumps to 100% done and the project is marked ‘Completed’:

The device has been retired from the source and registered in the target: 100% done.
The green status cells document each step of the completion. The ‘retired’ cell confirms the device left the source system:
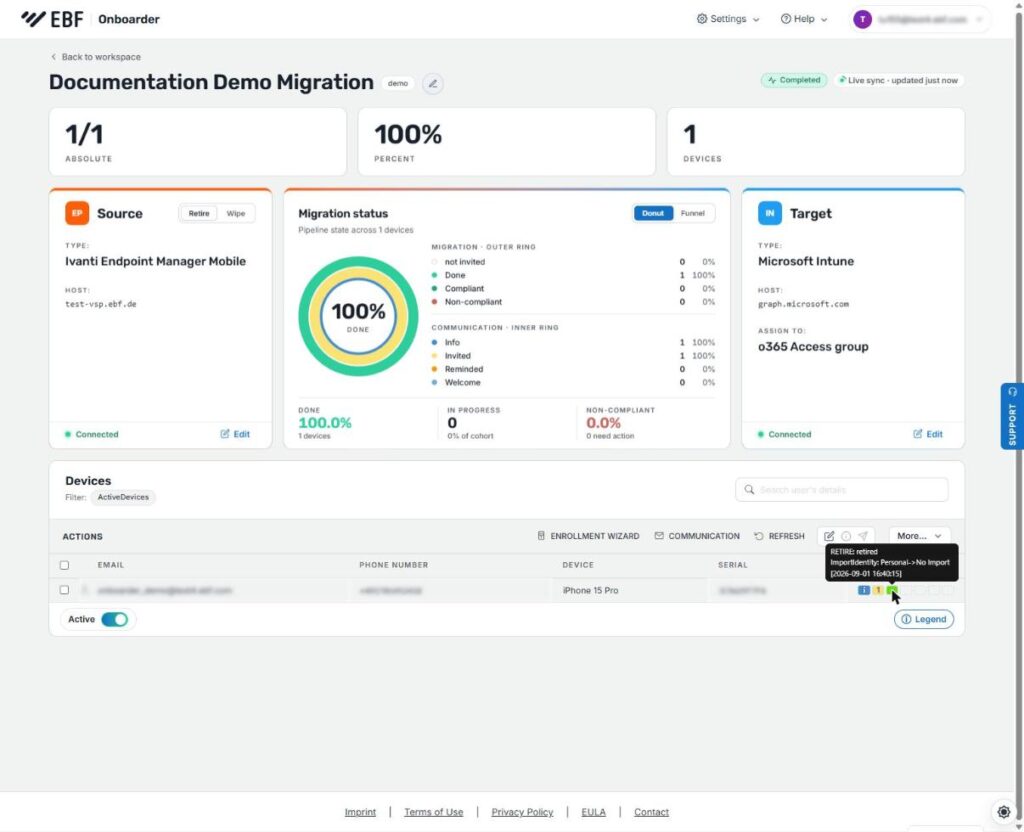
The device was successfully retired (unenrolled) from the source system.
6. User successfully added to the group
The user was successfully added to the group and the continued the migration on the device to register the device in the target:

7. Compliant in the target.
After the device registers and checks in with the target system, the migration ring shows Compliant at 100% and a green checkmark cell appears:

The device has checked in with the target system and is reported as compliant.
8. Welcome message.
Finally, once registration has completed successfully, the Welcome message is sent automatically, filling the last status cell and completing the sequence:

The Welcome message has been sent: every stage of the migration is now complete.