- Distribution of the print profile to the device: Administrator of UEM manually creates and assigns the profile to the device/s. Currently this step is required to be made manually.
The workflow can be read here: Printer creation Workflow - User sends the print job by chosing his assigned printer after clicking ‘AirPrint’.
User/Printer configuration in ‘rules’ of the Proxy file: Print Proxy Configuration - Authorization verification is done by the Print Proxy
The workflow can be read here: Print Proxy - The print job is redirected to internal Print Server
The workflow can be read here: Print Server
 Int
Int
Printer Creation Workflow
For iOS and iPadOS, when the Airprint profile is deployed to a device, a unique device identification is transferred with each print request. Print Proxy uses this identifier in combination with the UEM to identify the device, user, and membership within groups given access to print functionality.
The UEM replaces any device specific fields at the time of profile deployment. The device specific fields may vary based on the UEM system used. EBF Print expects this in the ResourcePath when receiving the print job.
| EMM system | Device fields (variable) |
| MobileIron | $DEVICE_UUID$ |
| MS Intune | {{deviceid}} |
| Workspace ONE | {{DeviceUid}} |
On the device, this AirPrint printer is only visible if the user has permission to print in the corresponding UEM and is double-checked for compliance by the Print Proxy as requests are issued.
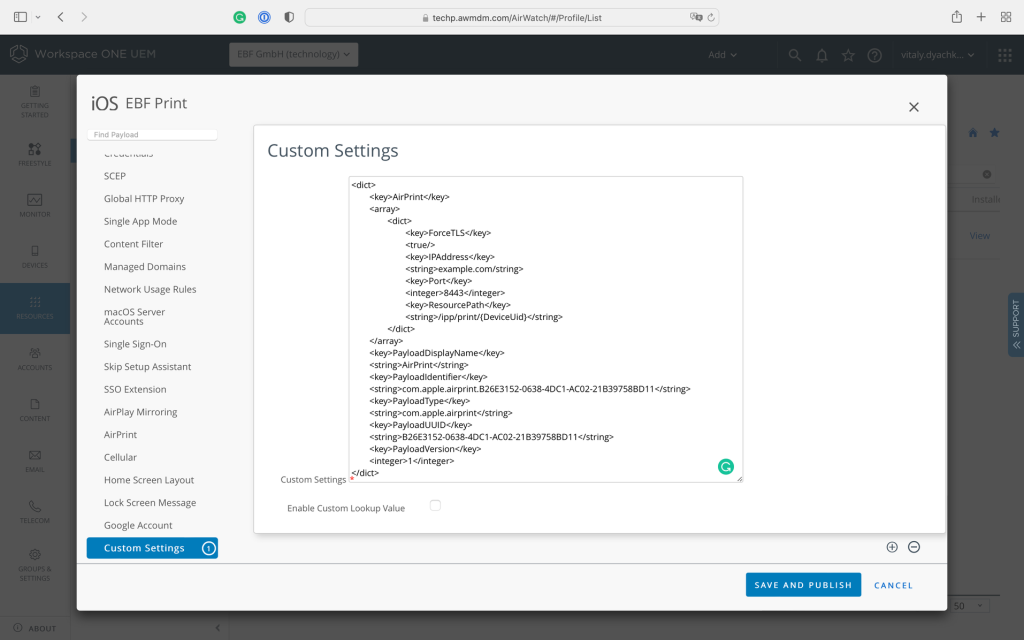
Here is an example of an AirPrint print profile within your UEM:
<?xml version="1.0" encoding="UTF-8"?>
<!DOCTYPE plist PUBLIC "-//Apple//DTD PLIST 1.0//EN" "http://www.apple.com/DTDs/PropertyList-1.0.dtd">
<plist version="1.0">
<dict>
    <key>PayloadContent</key>
    <array>
        <dict>
            <key>AirPrint</key>
            <array>
                <dict>
                    <key>ForceTLS</key>
                    <true/>
                    <key>IPAddress</key>
                    <string>ebf-print.company.com</string>
                    <key>Port</key>
                    <integer>8443</integer>
                    <key>ResourcePath</key>
                    <string>/ipp/print/$DEVICE_UUID$</string>
                </dict>
            </array>
            <key>PayloadDescription</key>
            <string>Configures AirPrint settings</string>
            <key>PayloadDisplayName</key>
            <string>AirPrint</string>
            <key>PayloadIdentifier</key>
            <string>com.apple.airprint.527389BF-56C7-4C95-9E46-032BEFDC9073</string>
            <key>PayloadType</key>
            <string>com.apple.airprint</string>
            <key>PayloadUUID</key>
            <string>527389BF-56C7-4C95-9E46-032BEFDC9073</string>
            <key>PayloadVersion</key>
            <integer>1</integer>
        </dict>
    </array>
    <key>PayloadDisplayName</key>
    <string>AirPrint QA</string>
    <key>PayloadIdentifier</key>
    <string>AirPrint QA</string>
    <key>PayloadRemovalDisallowed</key>
    <false/>
    <key>PayloadType</key>
    <string>Configuration</string>
    <key>PayloadUUID</key>
    <string>F8B38797-2C61-49EB-853A-CDD5C7CA770F</string>
    <key>PayloadVersion</key>
    <integer>1</integer>
</dict>
</plist>
The picture below shows, how a profile needs to be created and look like in Workspace ONE environment.
On macOS a script is published via UEM and executed on the device that will create the connection to EBF Print and establish a new Airprint printer. Afterwards, the new printer will be showing up for the user in any application’s print dialog if the device is compliant.
Please read the following chapters for the specific UEMs.
Deploy printer with Workspace One
This document guides its reader through managing printers with the EBF Print management script. Here, we will show you how to configure Workspace ONE to install/uninstall printers on target devices managed by Workspace ONE.
EBF Print Management Script
ebf-print.sh bash script can be configured directly, editing its content, and alternatively can be configured on execution time via its arguments or environment variables.
To configure the script via editing, open the script with a text editor and find variables defined in the PRINTER_CONFIGURATIONS section, as seen below.
#!/bin/bash

##############################################################################
# PRINTER_CONFIGURATIONS ######################################################
################################################################################

    PRINTER_NAME=${2:-${EBF_PRINTER_NAME:-"EBFPrint"}}
    PROTOCOL=${3:-${EBF_PRINTER_PROTOCOL:-"ipps"}}
    HOSTNAME=${4:-${EBF_PRINTER_HOST:-"ebf-print.example-host.com"}}
    PORT=${5:-${EBF_PRINTER_PORT:-8443}}
    UEM_ID=${6:-${EBF_UEM_ID:-"default"}}

################################################################################
###################################################### PRINTER_CONFIGURATIONS #
##############################################################################

# ... rest of the script omitted for bravity and must kept unchanged!
Arguments of the script
             1st         2nd            3rd        4th        5th    6th
ebf-print.sh <OPERATION> [PRINTER_NAME] [PROTOCOL] [HOSTNAME] [PORT] [UEM_ID]
Explanation of the arguments
# Mandatory Argument:
  <OPERATION> : INSTALL | UNINSTALL
    INSTALL   : Runs the install procedure of the script
    UNINSTALL : Runs the uninstall procedure of the script

# Optional Arguments:
[PRINTER_NAME]: Used to identify the printer during install/uninstall procedure
[PROCOL]      : The protocol of the EBF Print proxy (assets/ipp / ipps)
[HOSTNAME]    : The hostname or IP Address of the EBF Print proxy
[PORT]        : The port of the EBF Print proxy
[UEM_ID]      : The UEM Identifier configured in proxy.yaml
Alternatively, target arguments can be provided with the below environment variables.
- EBF_PRINTER_NAME
- EBF_PRINTER_PROTOCOL
- EBF_PRINTER_HOST
- EBF_PRINTER_PORT
- EBF_UEM_ID
Example script execution with environment variables
EBF_PRINTER_NAME="Printer1" \
EBF_PRINTER_PROTOCOL="ipps" \
EBF_PRINTER_HOST="ebf-print.example-host.com" \
EBF_PRINTER_PORT=8443 \
EBF_UEM_ID="workspace_one" \
ebf-print.sh INSTALL
Configuring Workspace ONE
Workspace ONE configuration for installing and uninstalling EBF Print printers to the target devices can be done on the Workspace ONE dashboard.
On the Files/Actions page under Devices > Provisioning > Components, we will add two Files/Actions for each Installation and Uninstallation to be executed from Products we will create later.
On the Product List View page under Devices > Provisioning, we will add two Products for each Installation and Uninstallation to execute ebf-script.sh through previously added Files/Actions against desired devices respectively.
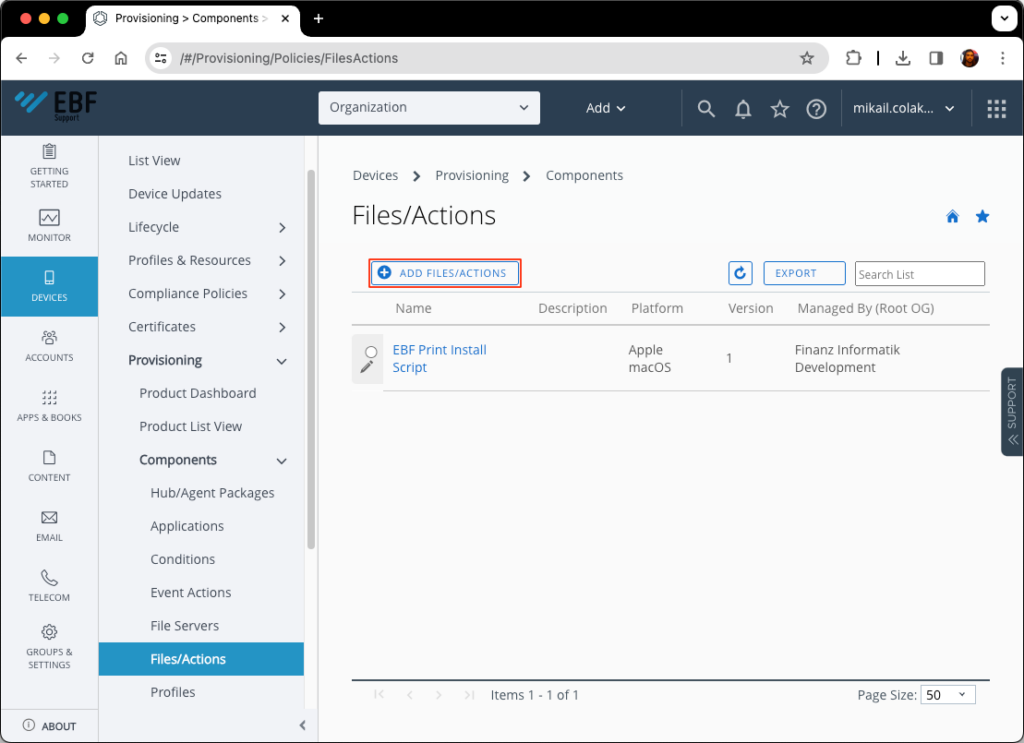
Adding new Files/Actions for installation
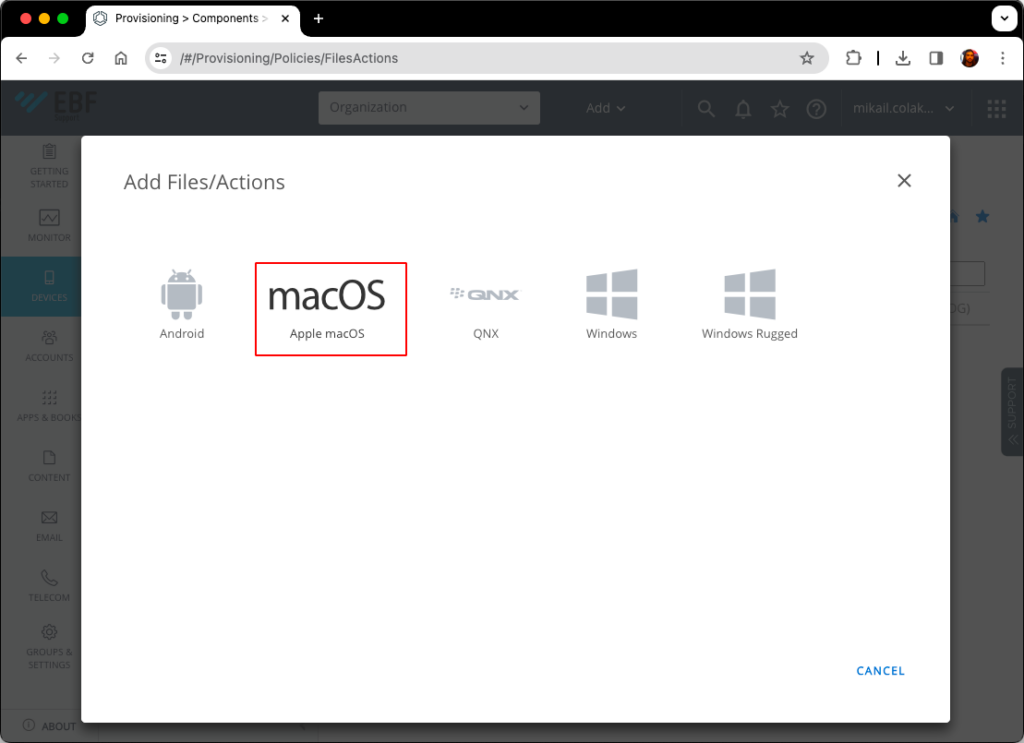
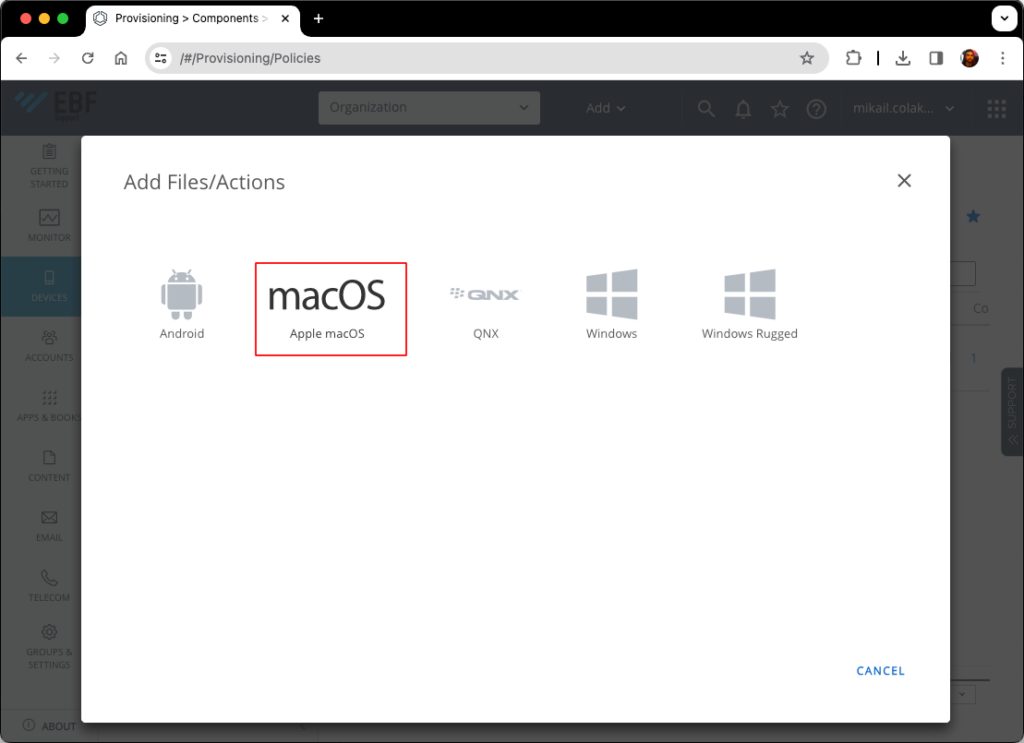
- Open the Files/Actions page and click ADD FILES/ACTIONS button to open the Files/Actions creation form.

- Choose the macOS
- Fill up the form in the General tab.

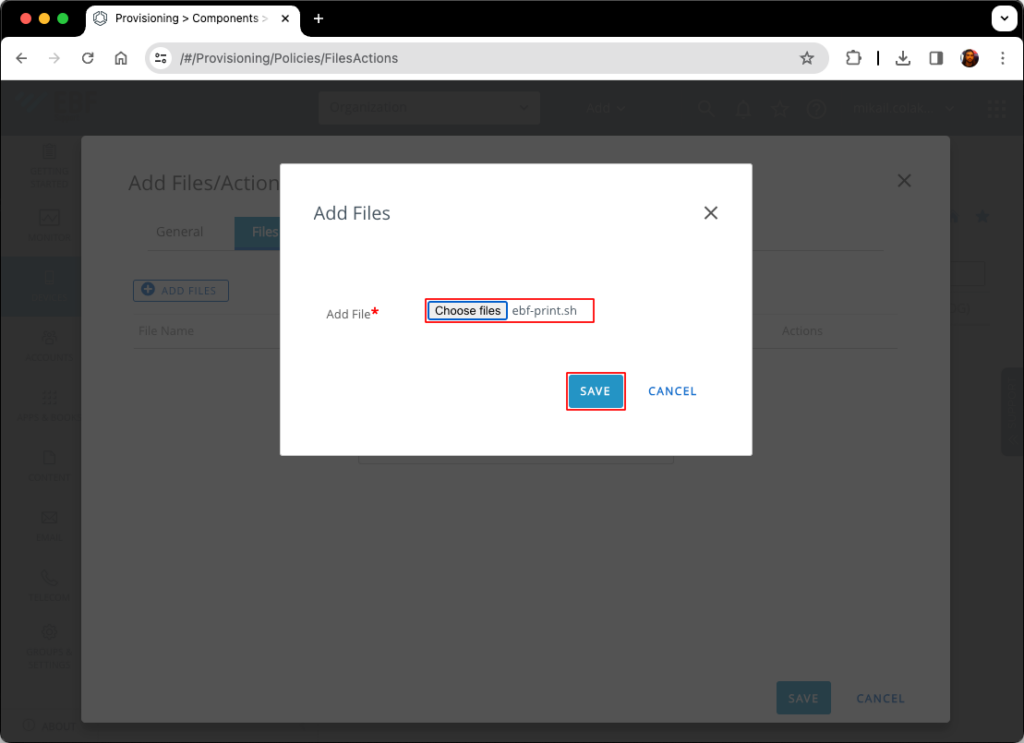
- Click the ADD FILES button in the Files tab.

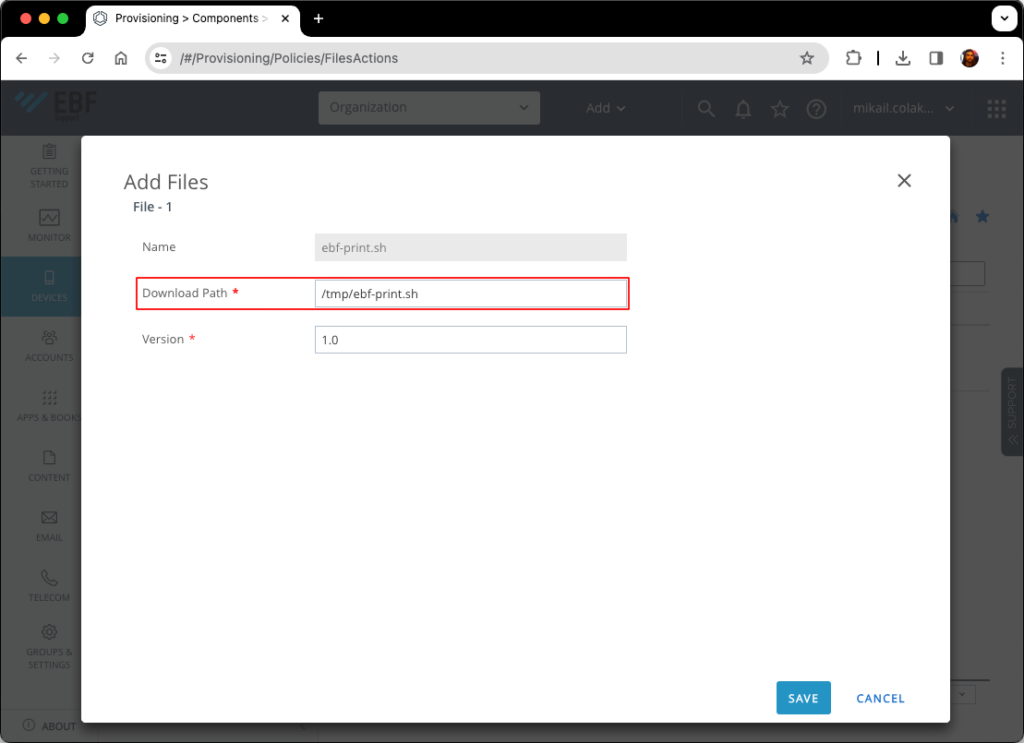
- Locate the ebf-print.sh file and click Save
- Set the Download Path to /tmp/ebf-print.sh and click Save.

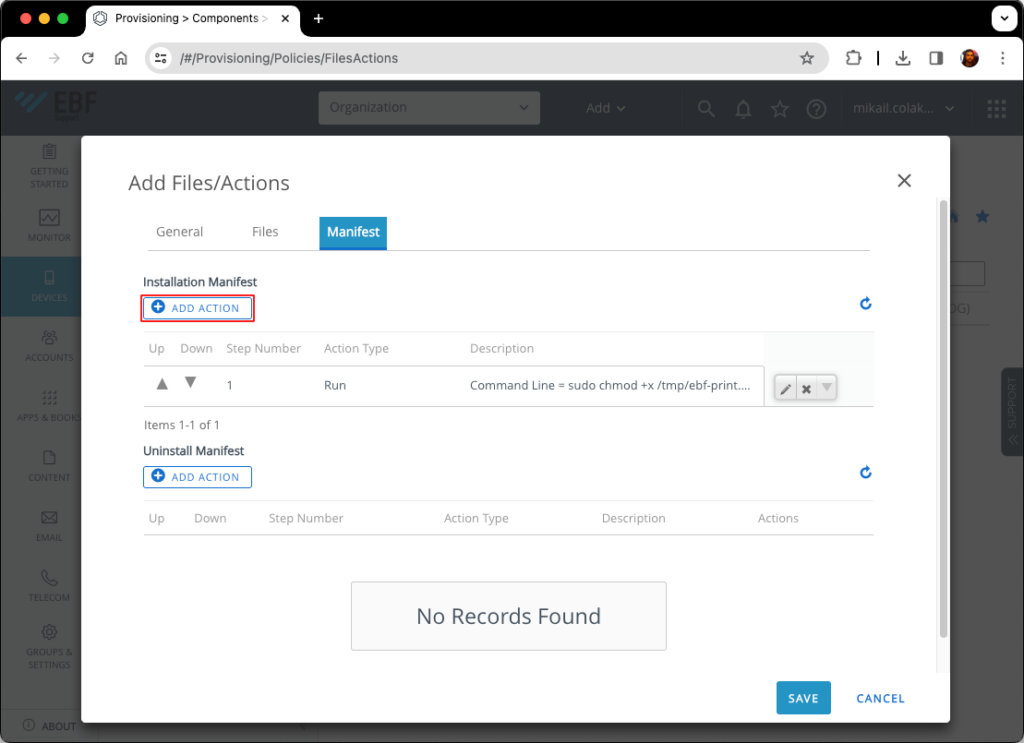
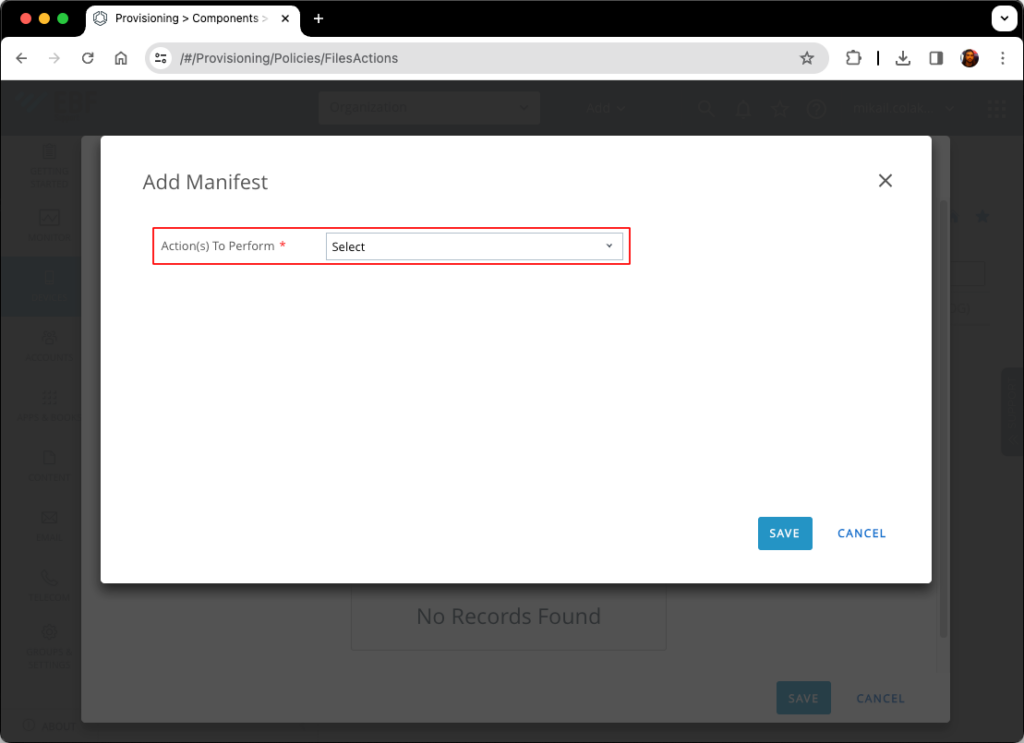
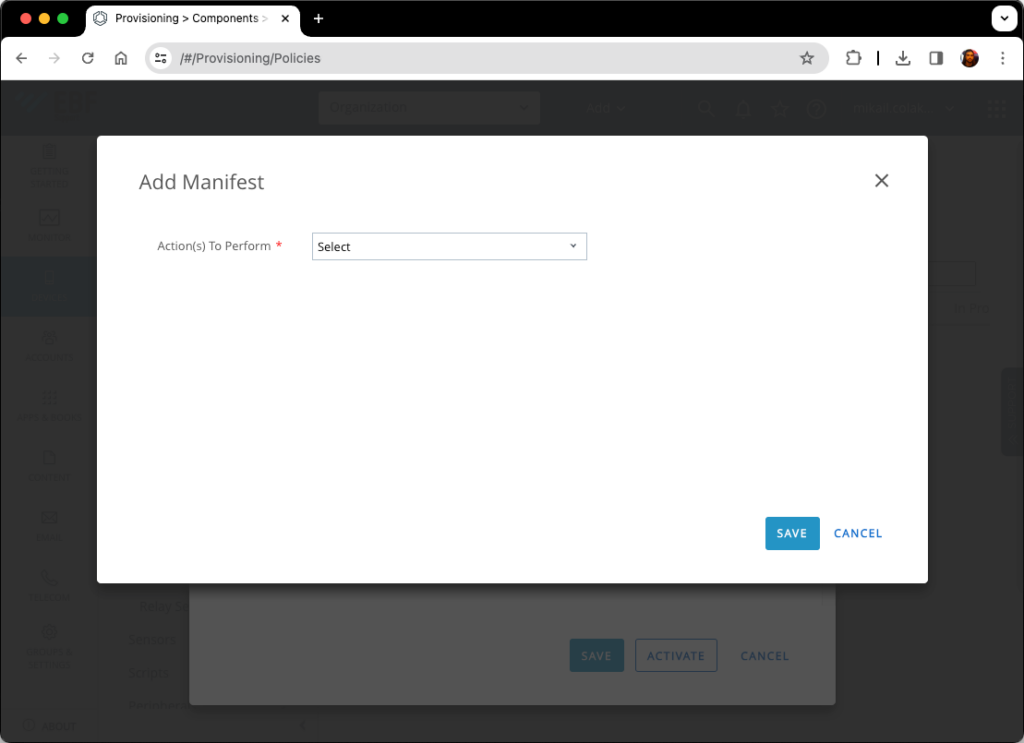
- Open the Manifest tab and click the ADD ACTION button under the Installation Manifest.
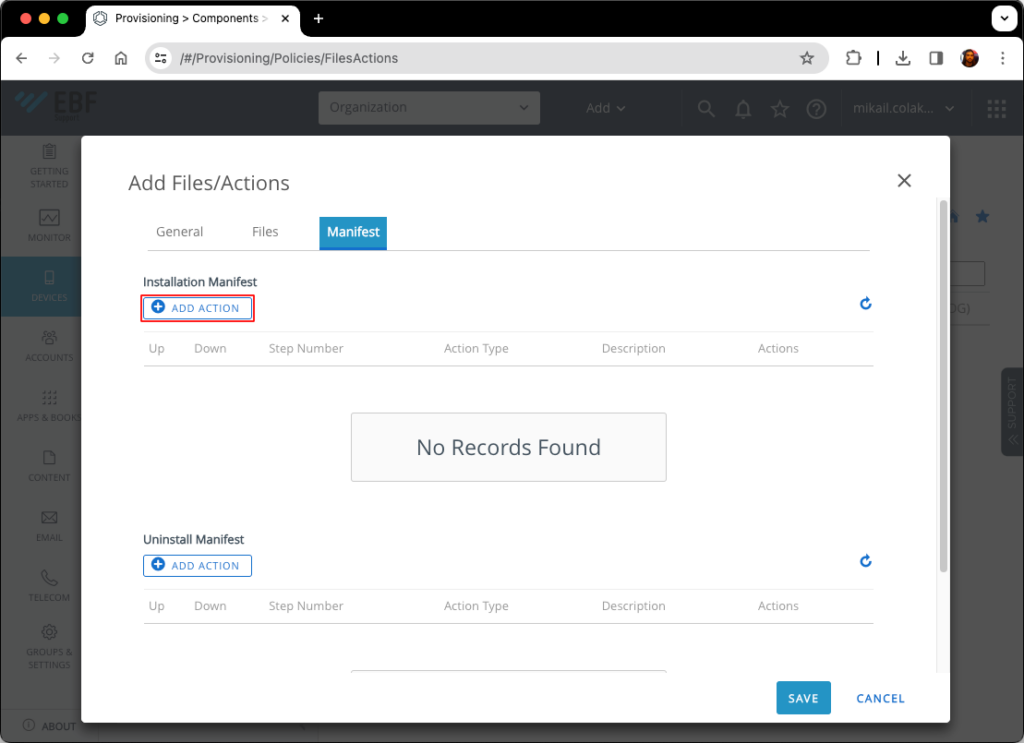
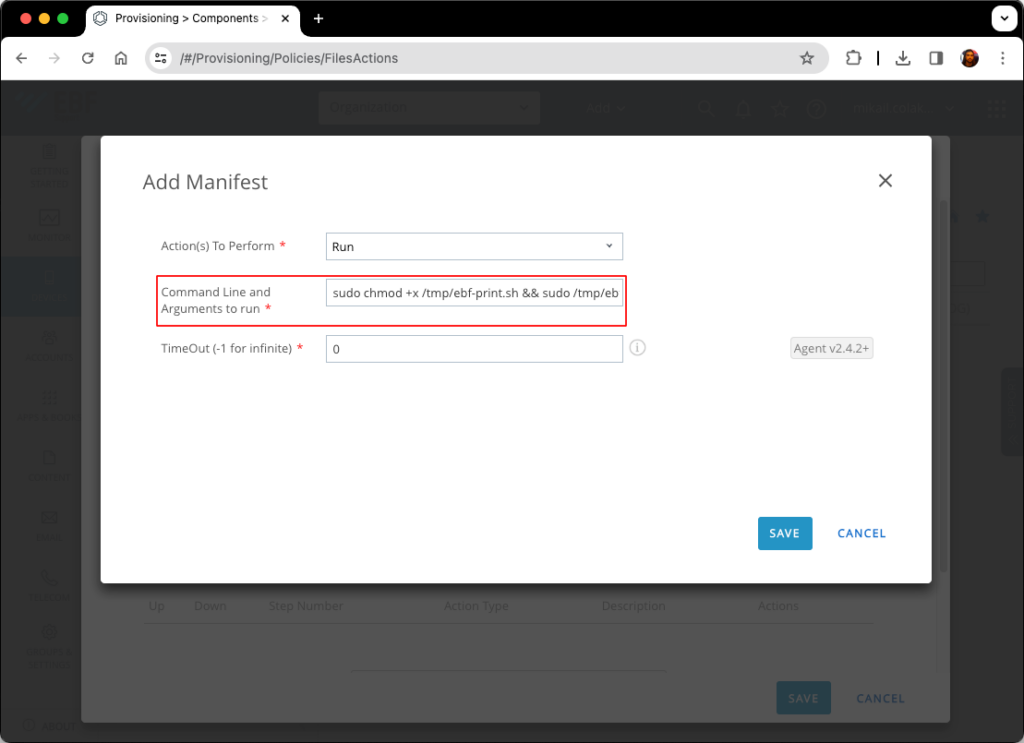
- Select Run as Action(s) To Perform.

- Make the required modification to the command below and fill it in the Command Line and Arguments to run. (For further information about the command, please check the EBF Print Management Script section in this document) and click Save.
sudo chmod +x /tmp/ebf-print.sh && sudo /tmp/ebf-print.sh INSTALL "PRINTER_NAME" "ipps" "printer.example-host.com" 8443
- Click the ADD ACTION button under the Installation Manifest again.
- Select Delete File as Action(s) To Perform.
- Fill in /tmp/ebf-print.sh in Path and File Name to Delete and click Save.

- Click Save to finish adding EBF Print Files/Actions for installation.

Adding new Files/Actions for uninstallation
- Open the Files/Actions page and click ADD FILES/ACTIONS button to open the Files/Actions creation form.
- Choose the macOS.

- Fill up the form in the General tab.

- Click the ADD FILES button in the Files tab.

- Locate the ebf-print.sh file and click Save.

- Set the Download Path to /tmp/ebf-print.sh and click Save.
- Open the Manifest tab and click the ADD ACTION button under the Installation Manifest.

- Select Run as Action(s) To Perform.

- Make the required modification to the command below and fill it in the Command Line and Arguments to run. (For further information about the command, please check the EBF Print Management Script section in this document) and click Save.
sudo chmod +x /tmp/ebf-print.sh && sudo /tmp/ebf-print.sh UNINSTALL "PRINTER_NAME"
- Click the ADD ACTION button under the Installation Manifest again.

- Select Delete File as Action(s) To Perform.

- Fill in /tmp/ebf-print.sh in Path and File Name to Delete and click Save.

- Click Save to finish adding EBF Print Files/Actions for uninstallation.

Adding new Product for installation
- Click the ADD PRODUCT button to open the Product creation form.

- Choose the macOS.

- Fill out the General tab according to your organization’s needsThe below example shows that:This product is managed by the OrganizationThis product targets the devices in All Devices(Organization) named smart group, which also means that Install EBF Print will be installing the printer to the all devices under the All Devices(Organization) smart group.

- Open the Manifest tab and click ADD.

- Select File/Action – Install as Action(s) To Perform.
- Select EBF Print Install Script as Files/Actions and click Save to add the Product.

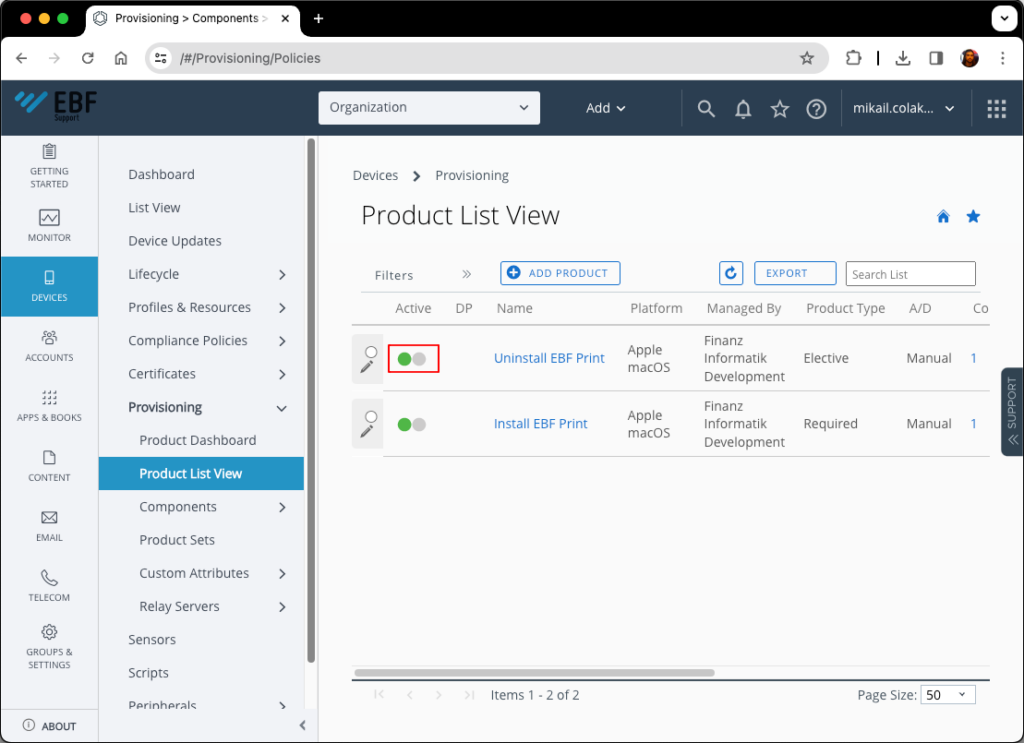
- Click the activate button to activate the Install EBF Print.

- Install EBF Print product is activated and ready.

Adding new Product for uninstallation
- Click the ADD PRODUCT button to open the Product creation form.

- Choose the macOS.
- Fill out the General tab according to your organization’s needs.The below example shows that:This product is managed by the OrganizationThis product targets the devices in All Devices(Organization) named smart group, which also means that Uninstall EBF Print will be uninstalling the printer on all devices under the All Devices(Organization) smart group.

- Open the Manifest tab and click ADD.

- Select File/Action – Install as Action(s) To Perform (* yes please ensure it is File/Action – Install not File/Action – Uninstall!).

- Select EBF Print Uninstall Script as Files/Actions.

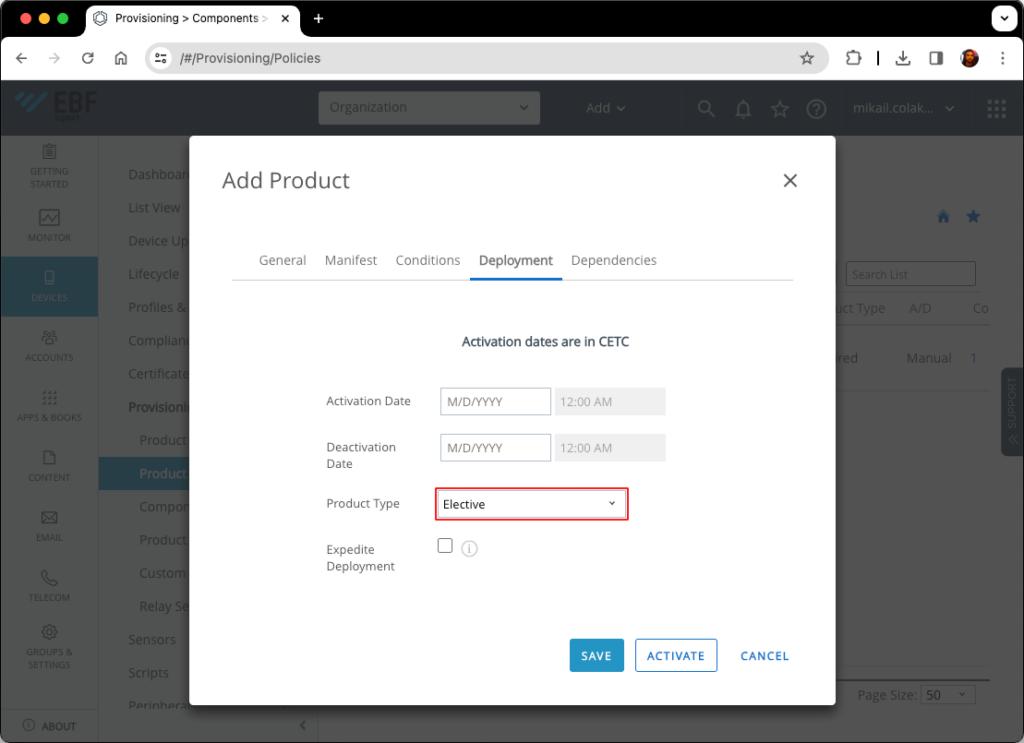
- Open the Deployment tab, select Elective as Product Type, and click Save to add the Product.
- Click the activate button to activate the Uninstall EBF Print.
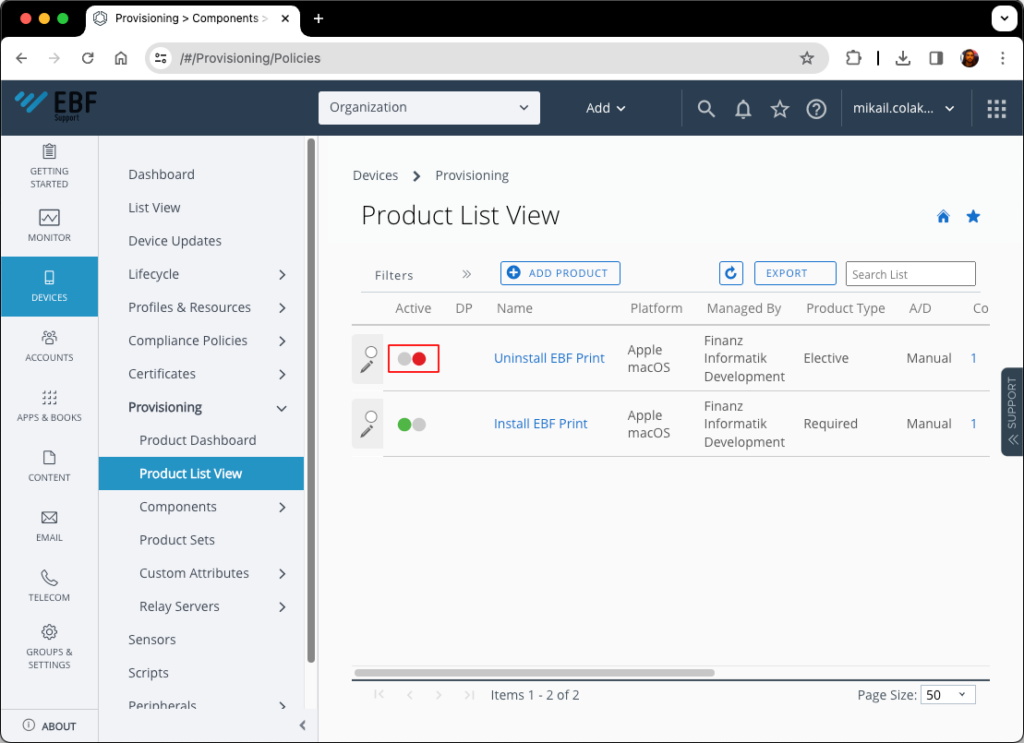
- Uninstall EBF Print product is activated and ready.
Deploy printer with Ivanti EPMM
Due to technical limitations on the Ivanti EPMM we’re forced to re-think the distribution of the script as the native Ivanti scripting engine requires the Mobile@Work client on devices in order to work. As the Mobile@Work client is not supported for Ivanti EPMM and therefor no-one uses it, we have to distribute the script via .pkg file.
This workflow demonstrates how to transform a .sh script to a .pkg and how to distribute that .pkg later on.
To transform a .sh script to a .pkg we are using Script2Pkg, a tool from Mac Admins @ SAP that you can find on GitHub.

As soon as you open the Script2Pkg application once, it asks you to select your “Apple Development Team”. This is required as the package we’re trying to build needs to be signed through a trusted identity. This trusted identity is saved in the “Developer ID Installer” certificate which you can export through our Apple developer account.

Certificate imported into keychain ready to use
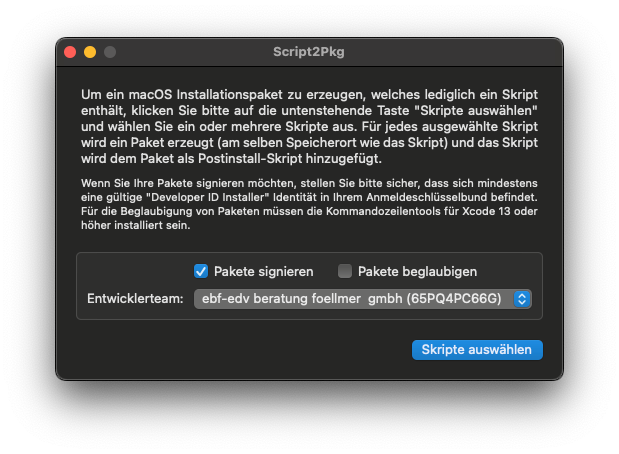
As soon as you activate “Sign Packages”, select the script you want to transform and confirm with “continue”. A Keychain popup will follow if you run it the first time, as it requests the permissions to use the “Developer ID Installer” certificate out of your Keychain. Hit “always allow” to prevent annoying popups in the future.

As soon as you authenticate yourself, the package automatically creates itself within the location of your script.

Now, navigate into the Ivanti EPMM console to upload the freshly created package file.
- Navigate to “Apps”

- Select “Add+”

- Choose “In-House”

- Select the package you created

- Change the “Application Name” to your liking and confirm with “next” on the bottom right

- Adjust the Apps@Work catalog settings, as we want this app to be hidden and installed in the background
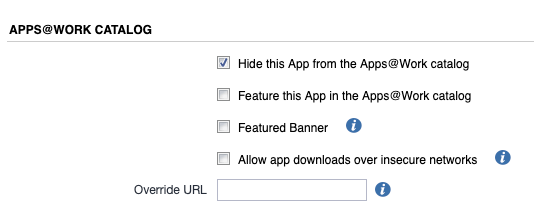
- Enable this option, as we want this script to run as soon as a device gets registered.

- Confirm your settings with “Finish” on the bottom right and you will automatically land in your “App Catalog”. The package is now fully uploaded into Ivanti EPMM. To deploy it to your devices, apply it to a Label.

- You can send a “Installation Request” as soon as your “Application” is assigned to a label
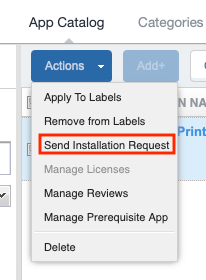
- Change both settings within the window to the settings in the screenshot below, select the Label your devices are in and confirm with “Apply”.

You successfully created a package from a script, uploaded & deployed it to your fleet.
Deploy printer with Intune
- Open up Microsoft Intune admin center and navigate to Devices
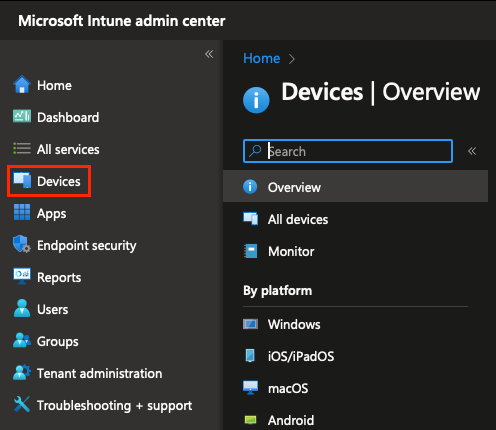
- Select “macOS” from the platform category

- Navigate to “Shell scripts”

- Upload the script via “+Add”

- Choose the name of the script
Choose and upload the following script from your computer.#!/bin/bash ############################################################################## # PRINTER_CONFIGURATIONS ###################################################### ################################################################################ OPERATION="INSTALL" # INSTALL or UNINSTALL (configure scripts runtime) PRINTER_NAME="EBFPrint" PROTOCOL="ipps" HOSTNAME="ebf-print.example.com" PORT=8443 UEM_ID="intune" ################################################################################ ###################################################### PRINTER_CONFIGURATIONS # ############################################################################## # !!!! DONT EDIT ANYTHING BELOW HERE !!!! ############################################################################## # SETUP_LOGGING ############################################################### ################################################################################ LOG_FILE="/tmp/ebf-print.log" OP="$OPERATION" OP=$(echo "${OP::1}" | tr a-z A-Z || echo $OP) # shadows/aliases the original "log" utility if exists but it's ok # Path to our log file function log() { FORMATTED=$(printf "$2\n" "${@:3}"); echo -e "$(date +"%F %T")" "[$OP/$1]" "$FORMATTED" >> $LOG_FILE; echo -e "$(date +"%F %T")" "[$OP/$1]" "$FORMATTED"; } function separator() { printf '=%.0s' {1..80} >> $LOG_FILE; printf "\n" >> $LOG_FILE printf '=%.0s' {1..80}; printf "\n" } function exit_on_failure() { OUTPUT=$($* 2>&1) EXIT_CODE=$? S=$(printf ' %.0s' {1..28}) if [ $EXIT_CODE -ne 0 ]; then log ERR "Failed: $*\n${S}Exit code: %d\n${S}Output: %s" \ $EXIT_CODE "$OUTPUT" exit $EXIT_CODE else log INF "Success: $*\n${S}Exit code: %d\n${S}Output: %s" \ $EXIT_CODE "$OUTPUT" fi } # create flog file if [ ! -e "$LOG_FILE" ]; then # If it doesn't exist, create the file sudo touch "$LOG_FILE" # Adjust permissions as needed [Owner(Read,Write) Group() Public()] sudo chmod 600 "$LOG_FILE" log DBG "$LOG_FILE created" fi ################################################################################ ############################################################### SETUP_LOGGING # ############################################################################## ############################################################################## # UTILITIES ################################################################### ################################################################################ function is_printer_exists() { #if [ "$(sudo grep "<Printer $PRINTER_NAME>" /etc/cups/printers.conf | sed 's/<Printer //; s/>//')" == "$PRINTER_NAME" ]; then #if [ "$(lpstat -p | grep "printer $PRINTER_NAME " | awk '{print $2}')" == "$PRINTER_NAME" ]; then if [ "$(sudo lpoptions -p "$PRINTER_NAME")" ]; then echo "yes"; else echo "no"; fi } ################################################################################ ################################################################### UTILITIES # ############################################################################## ############################################################################## # INSTALL ##################################################################### ################################################################################ function install() { separator log INF "Execution started for installation" # Getting the UUID local UUID=$(security find-identity -v | grep "IntuneMDMAgent-" | sed -E 's/.*IntuneMDMAgent\-(.*)\"/\1/') log INF "Device UUID = '%s'" "$UUID" log INF "Printer Name = '%s'" "$PRINTER_NAME" log INF "Printer URL = '%s://%s:%d'" "$PROTOCOL" "$HOSTNAME" $PORT # Check if $PRINTER_NAME already exists if [ "$(is_printer_exists)" == "yes" ]; then log WRN "Printer '%s' is already installed, re-installing..." \ "$PRINTER_NAME" fi log INF "Adding the '%s' named printer on '%s://%s:%d'..." \ "$PRINTER_NAME" "$PROTOCOL" "$HOSTNAME" $PORT log INF "Generating the driver" local PPD=/tmp/ebf-airprint.ppd /System/Library/Printers/Libraries/ipp2ppd \ "$PROTOCOL://$HOSTNAME:$PORT/ipp/print/$UUID"'!uem_id('"$UEM_ID"')' \ /System/Library/Frameworks/ApplicationServices.framework/Versions/A/Frameworks/PrintCore.framework/Versions/A/Resources/AirPrint.ppd \ > $PPD local TRY=1 local MAX_TRY=5 local AFTER_FAIL_WAIT_FOR=5 # in seconds while true; do # Install the printer exit_on_failure \ "lpadmin" \ "-p $PRINTER_NAME" \ "-v $PROTOCOL://$HOSTNAME:$PORT/ipp/print/$UUID!uem_id($UEM_ID)" \ "-P $PPD" \ "-E" \ "-o printer-is-shared=false" sleep 3 # let's wait a bit to ensure lpoptions can have up-to-date state of the printer if [ "$(is_printer_exists)" == "yes" ]; then log INF "'$PRINTER_NAME' installed on %d. try" $TRY break elif [ ! $TRY -gt $MAX_TRY ] && [ ! $TRY == $MAX_TRY ]; then log INF "On %d. try out of %d couldn't install the '$PRINTER_NAME'. Will retry again after %d second(s)." $TRY $MAX_TRY $AFTER_FAIL_WAIT_FOR; sleep $AFTER_FAIL_WAIT_FOR else log ERR "Installing '$PRINTER_NAME' failed after %d tries." $TRY break fi TRY=$((TRY+1)) done # Set the default printer to $PRINTER_NAME exit_on_failure lpoptions "-d $PRINTER_NAME" # Check and inform about installation result if [ "$(is_printer_exists)" == "yes" ]; then log INF "%s installed successfully." "$PRINTER_NAME" exit 0 else log ERR "%s installation failed." "$PRINTER_NAME" exit 1 fi } ################################################################################ ##################################################################### INSTALL # ############################################################################## ############################################################################## # UNINSTALL ################################################################### ################################################################################ function uninstall() { separator log INF "Execution started for uninstallation" log INF "Printer Name = '%s'" "$PRINTER_NAME" if [ "$(is_printer_exists)" == "yes" ]; then log INF "Printer '%s' was found, removing ...." "$PRINTER_NAME" exit_on_failure lpadmin "-x $PRINTER_NAME" log INF "Printer '%s' removed." "$PRINTER_NAME" exit 0 else log WRN "Printer '%s' is not installed ... no action needed" "$PRINTER_NAME" exit 0 fi } ################################################################################ ################################################################### UNINSTALL # ############################################################################## ############################################################################## # EXECUTION ################################################################### ################################################################################ if [[ "$OP" == "I" ]]; then install fi if [[ "$OP" == "U" ]]; then uninstall fi log ERR "usage: $0 [operation:i(nstall)|u(ninstall)] [printer-name] [protocol:ipp|ipps] [hostname] [port] [uem-id]" ################################################################################ ################################################################### EXECUTION # ##############################################################################
- Select the .sh file from your Mac and change the below settings

- Add your target deployment groups
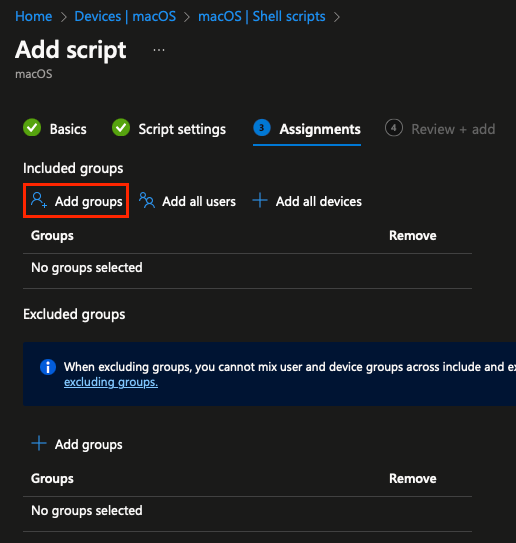
- Review your configuration and confirm the upload with “Add” on the bottom left

- Script successfully uploaded & deployed

Deploy Printer with Jamf
JAMF macOS Printer Management
This document guides its reader about how to manage printers with the EBF Print management script, Here, we will show you how to configure JAMF to install/uninstall printers to target devices managed by JAMF
EBF Print Management Script
ebf-print-jamf.sh bash script can be configured directly by editing its content and alternatively can be configured on execution time via its arguments, which preferably can be provided with an install/uninstall computer management policy that will execute the script.
ebf-print-jamf.sh:
#!/bin/bash

##############################################################################
# PRINTER_CONFIGURATIONS ######################################################
################################################################################

  PRINTER_NAME=${5:-${EBF_PRINTER_NAME:-"EBFPrint"}}
  PROTOCOL=${6:-${EBF_PRINTER_PROTOCOL:-"ipps"}}
  HOSTNAME=${7:-${EBF_PRINTER_HOST:-"ebf-print.example.com"}}
  PORT=${8:-${EBF_PRINTER_PORT:-8443}}
  UEM_ID=${9:-${EBF_UEM_ID:-"jamf"}}

################################################################################
###################################################### PRINTER_CONFIGURATIONS #
##############################################################################


# !!!! DONT EDIT ANYTHING BELOW HERE !!!!

##############################################################################
# SETUP_LOGGING ###############################################################
################################################################################
LOG_FILE="/tmp/ebf-print.log"
OP=${4:-"X"}
OP=$(echo "${OP::1}" | tr a-z A-Z || echo $OP)

# shadows/aliases the original "log" utility if exists but it's ok
# Path to our log file
function log() {
  FORMATTED=$(printf "$2\n" "${@:3}");
  echo -e "$(date +"%F %T")" "[$OP/$1]" "$FORMATTED" >> $LOG_FILE;
  echo -e "$(date +"%F %T")" "[$OP/$1]" "$FORMATTED";
}
function separator() {
  printf '=%.0s' {1..80} >> $LOG_FILE; printf "\n" >> $LOG_FILE
  printf '=%.0s' {1..80};  printf "\n"
}

function exit_on_failure() {
  OUTPUT=$($* 2>&1)
  EXIT_CODE=$?
  S=$(printf ' %.0s' {1..28})
  if [ $EXIT_CODE -ne 0 ]; then
    log ERR "Failed: $*\n${S}Exit code: %d\n${S}Output: %s" \
      $EXIT_CODE "$OUTPUT"
    exit $EXIT_CODE
  else
    log INF "Success: $*\n${S}Exit code: %d\n${S}Output: %s" \
      $EXIT_CODE "$OUTPUT"
  fi
}
# create flog file
if [ ! -e "$LOG_FILE" ]; then
  # If it doesn't exist, create the file
  sudo touch "$LOG_FILE"
  # Adjust permissions as needed [Owner(Read,Write) Group() Public()]
  sudo chmod 600 "$LOG_FILE"
  log DBG "$LOG_FILE created"
fi
################################################################################
############################################################### SETUP_LOGGING #
##############################################################################


##############################################################################
# UTILITIES ###################################################################
################################################################################
function is_printer_exists() {
  #if [ "$(sudo grep "<Printer $PRINTER_NAME>" /etc/cups/printers.conf | sed 's/<Printer //; s/>//')" == "$PRINTER_NAME" ]; then
  #if [ "$(lpstat -p | grep "printer $PRINTER_NAME " | awk '{print $2}')" == "$PRINTER_NAME" ]; then
  if [ "$(sudo lpoptions -p "$PRINTER_NAME")" ]; then
    echo "yes";
  else
    echo "no";
  fi
}
################################################################################
################################################################### UTILITIES #
##############################################################################


##############################################################################
# INSTALL #####################################################################
################################################################################
function install() {
  separator
  log INF "Execution started for installation"
  # Getting the UUID
  local UUID=$(ioreg -d2 -c IOPlatformExpertDevice | awk -F\" '/IOPlatformUUID/{print $(NF-1)}')
  log INF "Device UUID = '%s'" "$UUID"
  log INF "Printer Name = '%s'" "$PRINTER_NAME"
  log INF "Printer URL = '%s://%s:%d'" "$PROTOCOL" "$HOSTNAME" $PORT

  # Check if $PRINTER_NAME already exists
  if [ "$(is_printer_exists)" == "yes" ]; then
    log WRN "Printer '%s' is already installed. Skipping the command." \
      "$PRINTER_NAME"
    exit 0
  fi

  log INF "Adding the '%s' named printer on '%s://%s:%d'..." \
    "$PRINTER_NAME" "$PROTOCOL" "$HOSTNAME" $PORT

  log INF "Generating the driver"
  local PPD=/tmp/ebf-airprint.ppd
  /System/Library/Printers/Libraries/ipp2ppd \
    "$PROTOCOL://$HOSTNAME:$PORT/ipp/print/$UUID"'!uem_id('"$UEM_ID"')' \
    /System/Library/Frameworks/ApplicationServices.framework/Versions/A/Frameworks/PrintCore.framework/Versions/A/Resources/AirPrint.ppd \
    > $PPD

  local TRY=1
  local MAX_TRY=5
  local AFTER_FAIL_WAIT_FOR=5 # in seconds
  while true; do
    # Install the printer
    exit_on_failure \
      "lpadmin" \
      "-p $PRINTER_NAME" \
      "-v $PROTOCOL://$HOSTNAME:$PORT/ipp/print/$UUID!uem_id($UEM_ID)" \
      "-P $PPD" \
      "-E" \
      "-o printer-is-shared=false"

      sleep 3 # let's wait a bit to ensure lpoptions can have up-to-date state of the printer

      if [ "$(is_printer_exists)" == "yes" ]; then
        log INF "'$PRINTER_NAME' installed on %d. try" $TRY
        break
      elif [ ! $TRY -gt $MAX_TRY ] && [ ! $TRY == $MAX_TRY ]; then
          log INF "On %d. try out of %d couldn't install the '$PRINTER_NAME'. Will retry again after %d second(s)." $TRY $MAX_TRY $AFTER_FAIL_WAIT_FOR;
          sleep $AFTER_FAIL_WAIT_FOR
      else
        log ERR "Installing '$PRINTER_NAME' failed after %d tries." $TRY
        break
      fi
      TRY=$((TRY+1))
  done

  # Set the default printer to $PRINTER_NAME
  exit_on_failure lpoptions "-d $PRINTER_NAME"

  # Check and inform about installation result
  if [ "$(is_printer_exists)" == "yes" ]; then
    log INF "%s installed successfully." "$PRINTER_NAME"
    exit 0
  else
    log ERR "%s installation failed." "$PRINTER_NAME"
    exit 1
  fi
}
################################################################################
##################################################################### INSTALL #
##############################################################################


##############################################################################
# UNINSTALL ###################################################################
################################################################################
function uninstall() {
  separator
  log INF "Execution started for uninstallation"
  log INF "Printer Name = '%s'" "$PRINTER_NAME"

  if [ "$(is_printer_exists)" == "yes" ]; then
    log INF "Printer '%s' was found, removing ...." "$PRINTER_NAME"
    exit_on_failure lpadmin "-x $PRINTER_NAME"
    log INF "Printer '%s' removed." "$PRINTER_NAME"
    exit 0
  else
    log WRN "Printer '%s' is not installed ... no action needed" "$PRINTER_NAME"
    exit 0
  fi
}
################################################################################
################################################################### UNINSTALL #
##############################################################################


##############################################################################
# EXECUTION ###################################################################
################################################################################

if [[ "$OP" == "I" ]]; then
  install
fi

if [[ "$OP" == "U" ]]; then
  uninstall
fi

log ERR "usage: $0 [operation:i(nstall)|u(ninstall)] [printer-name] [protocol:ipp|ipps] [hostname] [port] [uem-id]"

################################################################################
################################################################### EXECUTION #
##############################################################################
To configure the script via editing, simply open the script with a text editor and find variables defined in the PRINTER_CONFIGURATIONS section, as can be seen below.
#!/bin/bash

##############################################################################
# PRINTER_CONFIGURATIONS ######################################################
################################################################################

  PRINTER_NAME=${5:-${EBF_PRINTER_NAME:-"EBFPrint"}}
  PROTOCOL=${6:-${EBF_PRINTER_PROTOCOL:-"ipps"}}
  HOSTNAME=${7:-${EBF_PRINTER_HOST:-"ebf-print.example-host.com"}}
  PORT=${8:-${EBF_PRINTER_PORT:-8443}}
  UEM_ID=${9:-${EBF_UEM_ID:-"jamf"}}

################################################################################
###################################################### PRINTER_CONFIGURATIONS #
##############################################################################

# ... rest of the script omitted for bravity and must kept unchanged!
Arguments of the script
             1st         2nd            3rd        4th        5th
ebf-print.sh <OPERATION> [PRINTER_NAME] [PROTOCOL] [HOSTNAME] [PORT]
Explanation of the arguments
# Mandatory Argument:
  <OPERATION> : INSTALL | UNINSTALL
    INSTALL   : Runs the install procedure of the script
    UNINSTALL : Runs the uninstall procedure of the script

# Optional Arguments:
[PRINTER_NAME]: Used to identify the printer during install/uninstall rocedure
[PROCOL]      : The protocol of the EBF Print proxy (assets/ipp / ipps)
[HOSTNAME]    : The hostname or IP Address of the EBF Print proxy
[PORT]        : The port of the EBF Print proxy
[UEM_ID]      : The uem id defined in proxy.yaml configuration file
Configuring JAMF
To be able to install/uninstall EBF Printers on target devices managed by JAMF:
- The script should be uploaded, and its parameter names configured
- Then, the policies for install and uninstall that will use the uploaded and configured script should be created.
Uploading management script (ebf-print-jamf.sh)
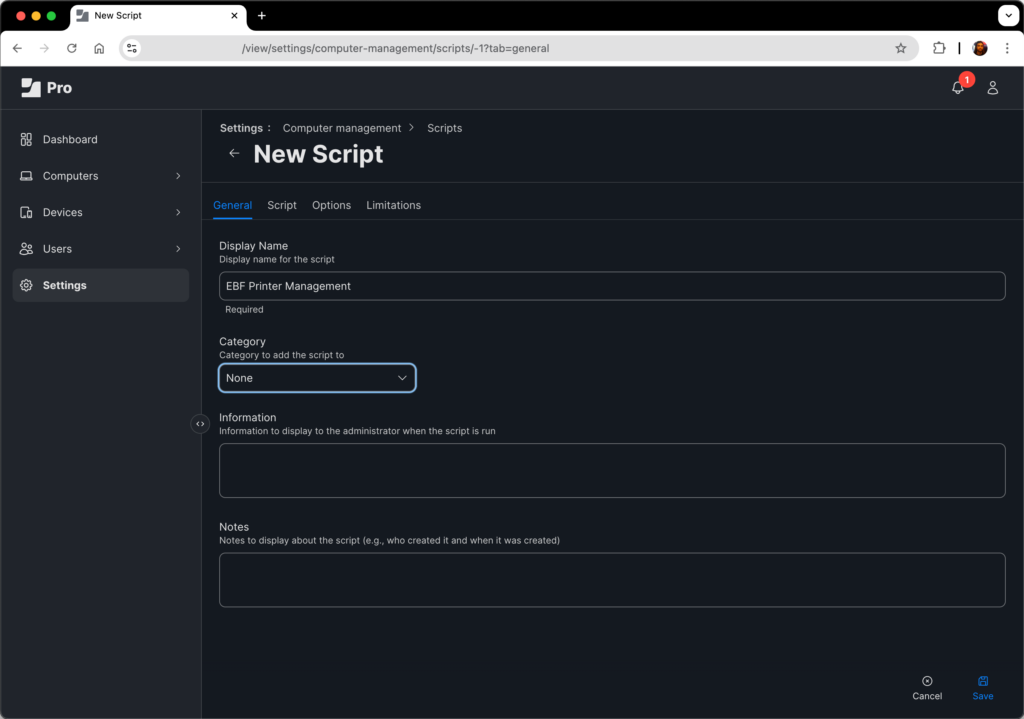
- Open the Scripts page located under Settings / Computer Management page.

- Click the + New button on the top right corner of the page to open the Script creation form

- Fill up the General section of the script
- Open the Script page and paste the copied content of the script from the ebf-print-jamf.sh file into the text editor as shown below.

- Open the Options page and configure the parameter labels:
Parameter 4:
Operation (INSTALL / UNINSTALL)Parameter 5:
Printer name (EBFPrint)Parameter 6:
Protocol (ipp/ipps)Parameter 7:
Host (IP address or hostname)Parameter 8:
Port (8443)Parameter 9:
UEM ID
- Click the Save button located at the bottom right of the page to save the script.
Creating an installation policy
- Open the Policies page located under the Computers page and click the + New button

- Provide a display name to the policy, such as EBF Print Install, configure the policy run triggers with the preferred way, and open the Scripts page

- Click the Configure button

- Locate the script we uploaded and click Add

- Provide script parameters and make additional adjustments for the policy (Scope, Self Service, and User Interaction) as needed, and click the Save button.

Creating an uninstallation policy
Please follow the Creating an installation policy section only with UNINSTALL provided to the Operation parameter.

Print Proxy
The job of the Print Proxy is to receive print requests from devices and verify whether the device and/or user is authorized to print. When permission is granted the requests are forwarded to the appropriate Print Server.
The Print Proxy Admin UI provides an interface where an administrator can create print profiles and transfer them to the connected UEM system. The print profile is assigned to the corresponding users or groups in the UEM system. Authorization is carried out through these devices‘ and users‘ membership within UEM groups, and those groups being potentially being associated with a backing LDAP/Active Directory.
Print Server
The Print Server receives print requests from the Print Proxy and is responsible for forwarding them to the respective enterprise printing systems. Before the requests are forwarded, the print settings and user data are converted: The iOS end device transfers settings via IPP protocol, the Print Server then generates settings in Print Job Language (PJL) format („@PJL JOB NAME“, „@PJL SET USERNAME“, …) and merges them into the data stream.
EBF Print comes with two generic printer drivers which support the printer languages PCL6 (default-pcl.ppd) and PostScript (default.ppd). Meta-data is also included in LPD protocol when the print data is transferred to the Enterprise Print Server. When using LPD protocol, additional authentication is not required.